Tag Archives: short ribs

An easy Bulgogi Beef Skillet recipe from Paleohacks

If you’re craving takeout, try this easy, one skillet beef bulgogi recipe from our friends at Paleohacks for sweet and spicy flavor with zero soy, MSG, or preservatives!

Bulgogi is a popular Korean recipe that translates literally to “fire meat.” Super thin slices of strip steaks, sirloin steak, or ribeye are marinated in spices until tender, then grilled or pan-fried. The result is a sticky, crispy, and slightly spicy recipe that can be turned into a complete meal with a side of cauliflower rice or stir-fried veggie noodles.

The unique marinade includes ripe, grated Asian pear for sweetness, texture, and tang. The acidity in the pear also helps to tenderize the meat. If you can’t find Asian pears, a traditional pear will work just fine. To add a subtle spice to the marinade, use gochugaru, the bright red Korean red pepper. This powder is less spicy than cayenne and creates a balanced heat that lets the other flavors shine through.

bulgogi-beef

Coconut sugar stands in for brown sugar, adding sweetness and helping to crisp the steak for delicious texture. Finally, toasted sesame oil adds nutty aroma while ginger, garlic, and coconut aminos add even more flavor and dimension.

To make the bulgogi, mix all the ingredients for the marinade together, add to the sliced beef, and refrigerate for at least two hours. Then, grease a medium skillet with avocado oil—not olive oil. Avocado oil has a high smoke heat point that can withstand high cooking temperatures without burning. Cook the steak about two minutes per side, in two batches.

bulgogi-beef

To serve, top the hot steak slices with sesame seeds and scallions, and enjoy!

If you’re craving more takeout recipes but don’t feel like cooking, check out one of these 13 totally Paleo meal delivery options!

Paleohacks’ Korean-style BBQ Bulgogi Beef Skillet

bulgogi-beef


Prep time- 10 minutes

Cook time- 10 minutes

Chill time- 4 hours

Total time- 4 hours, 20 minutes

Serves- 4

Tools

Mixing bowl

Skillet

Tongs

Ingredients

bulgogi-beef

For the Marinade

1/3 cup grated Asian pear, peeled

1 T Korean red pepper (or chili powder)

1 T coconut sugar

1 T lime juice

2 T toasted sesame oil

2 T coconut aminos

1 clove garlic, minced

1/2 t ground ginger

1/4 t sea salt

For the Steak:

2 10-oz strip steaks, thinly sliced

1 t avocado oil

1/2 t sesame seeds, for serving

1/4 cup chopped green onion, for serving

Directions

1. Combine ingredients for marinade in a mixing bowl and stir well.

2. Add steak slices and stir to coat. Cover and refrigerate 2 to 4 hours.

3. Grease a skillet with avocado oil and heat over medium-high heat for a few minutes. When hot, use tongs to add half of the marinated steak strips and cook for 2 minutes. Flip and cook an additional 2 minutes.

4. Transfer steak to a bowl and repeat with remaining strips.

5. Serve the beef bulgogi hot garnished with sesame seeds and green onion.

beef cuts chuck short ribs

For grilling season — the best beef cuts from the chuck

Winter is slowly receding here in the Northeast, and it seems as if we’ve — finally — come to the end of a period of strange, colder-than-usual weather across the country. The Masters Tournament has come and gone. The selection of foods at farmers markets is more robust. Scarves, beanies, and mittens will soon be packed away.

And, most importantly, grills will reappear. They will be cleaned, repaired, and lit once more as we undertake that yearly rite of spring — cooking outside.

In our opinion, there is nothing that compares to the experience of throwing a scrumptious hunk of grass-fed beef over some hot charcoals or onto a red-hot grill.

But which beef cuts are best for cooking out? One section of the cow that has long been overlooked is the chuck, especially compared to the filet mignons, ribeyes, strip steaks, t-bone steaks, and tri-tips that come from the middle areas that make up the rib, loin, tenderloin,  and sirloin primal cuts.

As our ButcherBox Head Chef Yankel Polak says, “The chuck is a goldmine of great cuts.”

Some of the best cuts of beef to cook outdoors come from the chuck; also, some of our favorite steaks and roasts, in general, are chuck beef cuts.

You already know chuck beef

The “chuck” primal section produces the vast amount of meat that is used from a cow. Most of the meat from this area — the front section from the shoulder blade and down to the leg muscles — lacks fat and has a ton of connective tissue. Therefore, it can result in tough cuts of meat if cooked incorrectly.

Most parts of the chuck close to the ribs are used for various roasts.

Beef chuck roast, for example, is ideal for braising and slow cooking. Other common roast beef cuts from the chuck include pot roast and bone-in chuck roast, also known as the 7 bone chuck roast. These roast sections are fantastic when quickly seared and then put in a slow cooker for a few hours, especially with some complementary seasonings and spices.

These cuts are large and used for braising mainly because it is easy to cut sizeable hunks of beef out of the chuck section, but also because the connective tissue caused by the overuse of the muscles don’t make them as tender and marbled as sirloin steaks and tenderloin steaks.

However, many of the standard — sometimes vaguely labeled — steaks you can get at the supermarket are likely to be steaks cut from the chuck. Like flank steaks or skirt steaks, chuck is also often used as stew meat, kabobs, and sandwich steaks, and as an alternative to more expensive cuts like sirloin tips, tip roast, and ribeye.

You likely cook chuck meat on your grill quite often without realizing it: Chuck meat is one of the primary sources that butchers use to make ground beef. So if you are cooking cheeseburgers for the family this weekend, there is a good chance you’ve got some ground chuck in the burger mix.

SeeOurPlans2

New beef cuts from the chuck primal

Because chuck beef has primarily been used for braising roast cuts, cheaper cuts of steak, and ground beef in the past, some steak lovers believe that you can’t find quality steaks in this front section of the cow.

However, over the past few decades, the beef industry has innovated and uncovered tasty, tender steaks in the chuck section that were previously unknown, difficult to access, or more prevalently used in unique ways in other cultures.

For instance, as part of the Beef Checkoff Program, meat science researchers at the University of Florida and the University of Nebraska identified new and potentially more affordable tender cuts of meat. The project led to the discovery of little-used or unknown cuts, like the Denver steak.

The Denver steak — which does not officially have anything to do with the Mile High City — comes from the chuck flap, an area of the chuck under blade that is full of tough, connective tissue. This steak is delicious as long as it is cooked correctly and, as we’ve said again and again with these types of cuts, must be cut against the grain once cooked.

The beef industry research project also led to the discovery of the flat iron steak, which is a challenging cut to find from the top section of the chuck shoulder. Flat iron steak is a perfect grilling steak; it is tender and tasty when cooked on an open fire. However, it can easily become tough if overcooked. Similar to many other cuts with lots of connective tissue — like the Denver steak — it should also be sliced against the grain.

The Denver steak and flat iron steak aren’t the only great grilling cuts that come from the chuck. Additionally, the chuck eye steak comes from an area of the chuck that is part of the longissimus dorsi muscle, the same place where the ribeye steak is derived. There is some confusion about whether or not a chuck eye is also a Delmonico steak, but that is a subject for another day.

The most delicious of all the chuck cuts might be a surprise

Although it sounds like it should come entirely from the ribs primal, the best short ribs come from the chuck. The first few ribs of a cow — usually the second through fifth ribs — are where the serratus ventralis muscle is thickest. This area is in the chuck primal section. The meat in this section is often tough, which is why short ribs are best cooked over a long period of time with a good marinade or rub.

Culturally, short ribs have been prominent in East Asian and Middle Eastern cooking traditions. However, they have emerged more recently as a delectable treat in the U.S. and can be cooked in a number of ways.

Chef Yankel describes short ribs as “the kings of the braising cuts.” We love slow cooking them bone-in with a sweet marinade.

“Short ribs are packed with healthy fats and collagen,” Chef Yankel added. “Nothing compares for texture and flavor.”

Many of the chuck cuts mentioned above are featured in our monthly grass-fed beef ButcherBox — if you are a member, you’ve likely experienced some of these steaks and roasts. If you want some more on our favorite cooking methods and recipes for the different cuts of chuck mentioned, check out our recipe page or YouTube channel.

If you aren’t a member and would like to become a ButcherBox member with delicious, thoughtfully-raised grass-fed beef delivered to your door each month, click here.

braised beef braising meat

How to braise beef and why it’s one of the best cooking methods

Whenever I come across braised short ribs on a restaurant menu, I have a hard time passing up the delectable dish. Just thinking about it, I can taste the melt-in-your-mouth, flavorful meat. In all my short rib adventures, I’ve never stopped to wonder how chefs create such divine creations.

The secret, I discovered comes down to braising.

A cooking method mixing high dry heat, low moist heat, and time

Braising is a two-step cooking method that uses both high-heat for a short period and low-heat for a longer period of time. First, it involves browning meat in olive oil, butter, ghee, or some other fat — on high heat — usually by sauteing in a pan. Second, the meat is cooked in a covered dish, in the juices left from the browning and often also with an added liquid such as stock, water, etc.

The second, slow-cooking step is done in a tightly covered pot, like a dutch oven, or, often, in a slow-cooker. This process is also sometimes referred to as “pot roasting.”

Slow-cooking — and, well, the use of a slow-cooker or Crock Pot — helps to add flavor and tenderizes tougher cuts of beef and other meats.

According to The Kitchen Encyclopedia, published in 1911, “Braising is a method much used in France, and is a cross between boiling and baking.” The word itself derives from the French word brasier, which is a form of braise, meaning “live coals.” A brasier or brazier, in French and English, is also another name for a receptacle to burn coal or charcoal. Dutch ovens can also be called brasiers. The origin of the term braising seems to come from a French word for a method using both dry heat and moist heat.

Why braise?

Braising can be done with any meat but is most often done with tough cuts of meat, because tender cuts usually don’t need additional tenderizing or flavor.

Cuts that traditionally have less flavor — say a chuck roast, shoulder steak, chuck pot roast, pork butt, or beef chuck arm — are the best cuts to use and may need richer braising liquids. The best way to add great flavor is with beef broth or chicken stock, as well as spices like rosemary, bay leaves, and other fresh herbs. Moreover, braising done in the style of a pot roast can include aromatic vegetables — carrots, onions, and more — for additional flavor.

How to braise meat

The first step of braising takes about ten minutes, but achieving truly fall-apart-tender meat takes many hours of cooking time. Our in-house ButcherBox Chef Yankel Polak recommends seasoning the meat with salt and black pepper, then searing your meat until you get a nice brown crust. When cooking pork, he likes to use apple cider as a braising liquid that can also help scraping the browned bits of meat left from searing. Chef Yankel also recommends adding tomato paste to your braising liquid for texture and taste. For added flavor and simplicity, he also advises using the same pot to sear and cook, covering the dish after the flavorful liquid and browned meat have simmered.

A long, slow cook is crucial for breaking down the proteins and tenderizing the meat. You’ll need to cook for at least an hour and a half to two hours (depending on the size of your cut of meat) in the oven set to 300 degrees. Cooking on low heat allows the meat to cook slowly as the braising liquid evaporates. It is this process that makes dishes like pulled pork, carnitas, and roasts fork-tender.

Whether cooking pork in the slow cooker or keeping a watchful eye on a roast spending a day in a Dutch oven, meat braising in its juices and spiced-up flavor can turn a simple cut of beef or pork into a truly amazing dish.

You can find some of Chef Yankel’s favorite recipes to braise beef, chicken, or pork here, or watch the video below for more braising techniques.

If you want more from Chef Yankel, check out his recommendations for the best red wine to pair with braised beef and other dishes. 

Our monthly ButcherBox comes often comes with cuts like pork butt and grass-fed beef roasts that are perfect for braising. You can also get these cuts in a custom ButcherBox. If you’re not a member already, you can sign up here. 

different cuts of beef

How to distinguish different cuts of beef often confused

One of the most surprising things we’ve discovered since launching ButcherBox a few years ago is that there is a growing, collective desire to know as much as possible about the food we eat.

This type of knowledge is also central to the ButcherBox mission. For us, it is vital to know as much as possible about the meat we are delivering to our members. This means going further than growing a database of delectable recipes or an understanding of nutritionists perspectives on grass-fed beef. We want to know the specifics about how the animals were raised, the methods used by the farmers we work, and the specifics of the grass or forage  they feed their pastured livestock.

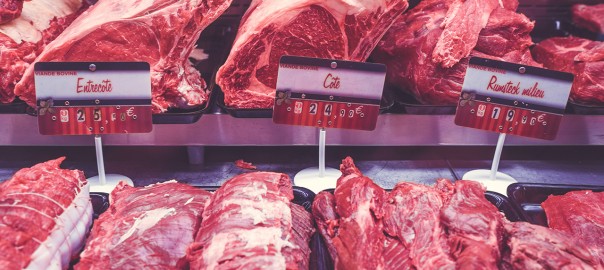
We recently realized that questions abound related to different cuts of beef. But a lot of the information that is out there about various cuts can be tough to swallow.

There is an array of resources available if you want to dive into the finer details of where cuts come from — you’ll have to bone up on terms like “primal cuts” and learn more than you’d care to know about which muscles cattle use most and what that means for the tenderness of certain steaks.

One issue that people seem quite interested in is the differences between cuts of meat that appear similar — like, say, a porterhouse versus a T-bone.

Well, let’s try to clear up as much as we can to avoid some of this common culinary confusion.

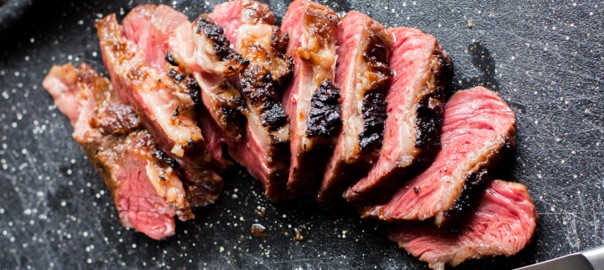
T-Bone vs. Porterhouse

There is only a slight difference in these two cuts, but, for those who love mouth-watering steaks, the contrast is stark. The porterhouse is a staple of steakhouse menus and a popular pick among meat aficionados, while the T-bone is usually the favorite of backyard grillmasters and novice chefs. The T-bone’s name comes from the bone that splits two different types of beef; one side is strip steak and the other is more tender beef.

The T-bone and porterhouse steaks actually come from the same area of a cow. However, the porterhouse is further down what is called the short loin. On one side of the bone — which is the cow’s vertebrae — is the strip loin or top loin, and this is where New York strip steaks are derived. The other half of the porterhouse is tenderloin.

And herein lies the difference. Because T-bone steaks are cut further away from the back of the animal, there is only a minimal amount of tenderloin. T-bones are small porterhouses. This is important because, if you haven’t figured out from its name, tenderloin is extremely tender and quite delicious. In a porterhouse, the tenderloin side is where filet mignon comes from.

So in reality, a porterhouse is a New York strip steak and a filet divided by a bone.

Officially, the rule is that the filet side of the bone has to be at least 1.25 inches thick to be a porterhouse.

Both are delicious steaks. Part of the reason is that the bone-in nature of these tender cuts adds flavor to already tasty steaks. However, be aware: Porterhouse steaks can be challenging to cook correctly. For best results, grill a porterhouse with the smaller, tenderloin section away from a direct heat source.

We could go on about the history of the name porterhouse steak, but that is a story for another day.

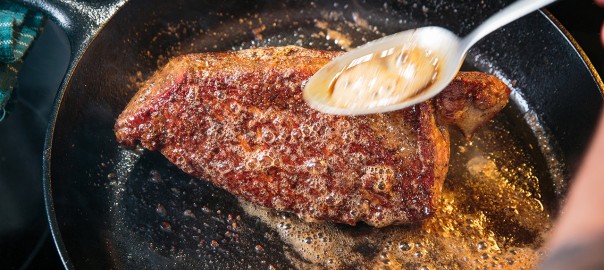
Prime rib vs. Ribeye

Similar to T-bone and porterhouse, the ribeye steak and prime rib come from the same section of the cow; in this instance, as the names hint, both are from the ribs.

However, the difference between these two cuts is in the manner of their preparation.

Ribeye is tender, flavorful beef that is cut away from the ribs and tastes excellent thrown on a grill with just a little salt and pepper for seasoning. Rib roast — also known as prime rib — is the same area, but is cooked with the bone — or bones — in place. Roasting this cut with the bone in place lets it cook in its own juices, giving it the highly-sought-after taste that justifies its often high price and central placement on steakhouse menus.

The best way to understand the difference between the two cuts is that ribeye is a prepared steak without connecting bones, and prime rib is the cooked, bone-in version of the same steak. By its very nature, there is a ribeye in every cut of prime rib.

And if you wonder where roast beef fits into this dynamic, that’s an easy one: generally, it is any cut of beef that is roasted. So, the rib roast or prime rib you get at a restaurant can be also called roast beef. Roast beef can also be top sirloin, tenderloin, tri-tip, chuck roast, or rump roast. Phew.

Flank steak vs. Skirt steak

These two cuts look very similar and each needs to be cut the right way to be appreciated fully. There are, however, a few essential distinguishing qualities between the two.

Unlike the previously-mentioned cuts, these two steaks come from two completely different sections of the cow.

Flank steak comes from the abdominal area of the animal, while skirt steak is from the diaphragm section. They are similar in their long, thin, and fibrous appearance, as well as their uses and taste. These steaks are sometimes confused with hanger steaks and flat iron steaks because of their appearance and various potential uses.

 Both flank steak and skirt steak are great for marinating and are ideal for a variety of dishes, including fajitas, tacos, stir fry, steak sandwiches. They taste great right off the grill, but,  because they are cut from a muscle that gets more usage by the cattle, these cuts can overcook easily and become tough. They are best when cooked to medium or medium-rare doneness.

The key to getting the most out of both of these flat steaks is to make sure you are cutting them properly. As we’ve mentioned before, these steaks must be sliced against the grain to unlock the best flavor.

Ground beef

While it is not a specific cut of meat, ground beef can cause some consumer confusion because there is such a wide variety of options that fall under the label, “ground beef.”

In a store or at a butcher shop, you are going to find that there are vast differences in where ground beef originates, as well as in its nutrition (fat) profile. For example, you are likely to find ground beef labeled as hamburger or ground chuck that is 85 percent lean and 15 percent fat. 

While there is a variety of products out there, there are some important restrictions on ground beef to make sure that whatever you buy adheres to certain basic standards. According to the USDA Food Standards and Labeling Policy Book, ground beef may not contain added fat and must have a maximum total fat content of 30 percent. The meat can come from almost anywhere in the animal — and often does — but must be labeled differently if a large amount of cheek meat is used. Ground beef can also be specifically labeled ground chuck or ground round; in those instances, the meat must come from those specific regions of the cow.

The ground beef that is found in a monthly ButcherBox comes primarily from the chuck and round with some rib and sirloin fat. The ground beef is 85 percent lean and 15 percent fat; burger patties, however, are 80 percent lean and 20 percent fat. The difference in fat content translates to a difference in flavor. Quite simply, grill-cooked burgers taste better with a bit more fat mixed in with the lean meat.

Our in-house chef, Yankel Polak, says that one of the most popular burgers he used to make in his restaurant was made from a combination of ground chuck, ground short rib, and even some dry-aged ribeye scraps. So, it seems that getting the best ground beef mix is more of an art than a science.

Check out all our recipes for some more specific ways to prepare all these various types of beef. All the cuts above come in our monthly boxes, so if you’re not already a member, sign up to compare and contrast these amazing steaks on your own.

Featured image via Lukas Budimaier and Unsplash.

Cooking chili for hundreds or just your family, we have an (almost) award-winning recipe

Recently, ButcherBox took part in the Tenth Annual Harvard Square Chili Cook-off. 

The degree of difficulty was high.

Cooking for large crowds — especially in restaurant settings — is always a challenge. It’s not unlike cooking for friends and family at home; only, you multiply that experience exponentially, and the diners are far less forgiving.

ChiliTent

When cooking for a massive number of people, you have to anticipate a group that might have different likes and dislikes. More than anything, you have to figure out what experience you want them to have. And all that has to be done before you even begin to calculate your ingredients, utilize your equipment and staff efficiently, and figure out a reasonable price to charge your customers, as these situations are typically catering gigs.

How bout this? For the Harvard Square chili cook-off, we had no equipment, no staff, and were giving it away for free…to a crowd that is a thousand people or more. It’s also competitive cooking, outdoors, in New England, in the winter.

Now that’s a challenge I can get behind. 

So, here’s how we pulled it off — earning second place in the process. 

On day one, we had to write a recipe that could be scaled up to feed more than a thousand people. We also had to calculate the cost of the whole endeavor, because let’s face it, someone’s gonna want to know how much you spent. 

Day two was spent renting the commercial kitchen space needed to cook a recipe that yields 50 gallons of chili and requires 24 hours to cook perfectly. 

Once we know we have a space to cook that incredible quantity of chili, we then had to figure out how to transport 50 gallons of chili while keeping it all boiling hot. And to add another degree of difficulty, the temperature outside is about 10 degrees Fahrenheit.

Day four we rented all the necessary equipment for every step of the process. 

On day five we needed to organize the staff for each stage of the process, from the camera crew to video the damn thing, to shopping support, cooking support and set-up, and serving and clean-up crews. 

ChiliBowl3

And day six? Well, there really is no “day six.” Here is the 36-hour sprint to put ButcherBox in a position to win the chili cook-off:

Wake up at 4:00 AM, make coffee and recheck my lists. Call time at restaurant depot is 6:00 AM. There was a wintry mix of weather, and I could only hope it would let up before we had to unload the truck back at our rental kitchen. 

From 6:00 AM to 8:00 AM is a whirlwind; during our shopping trip through a massive restaurant supply warehouse, we collect everything we need. It all gets loaded into a U-haul, and we head to the kitchen. 

Everything is unloaded and set out. We put vegetables on one table, dry goods on another, meat on yet another — hundreds of pounds of each. The ovens are turned on, the smoker is lit, huge skillets are set on burners, and we hunker down and get to chopping.

I chose a recipe that I’ve made variations of in the past. I start with fatty, bone-in short ribs that I smoke with hickory wood and beautiful lean ground chuck sautéed with onions. Then I add three types of dry chilis, gallons of hard cider, pounds and pounds of diced bell peppers, carrots for some extra sweetness to balance the smoke and spice, black beans and pinto beans, and, lastly, garbanzos for some additional texture. That gets rounded out with chipotle puree and tomatoes. (Check out the full recipe below.)

Five hours later, we have four 15-gallon pots brimming with simmering chili. It will cook overnight at a bare simmer, and the slow and low cook will draw the rich beefy flavor out of the short ribs as they become melt-in-your-mouth tender.  

The kitchen gets scrubbed down in anticipation of the next crew renting the space, and we pack up everything except the chili.

Before we leave for the evening, I connect a Wi-Fi thermometer with probes into each pot so that I can monitor the temperature overnight right from my phone.

We head back to the kitchen at 8:00 AM the next morning, and we prepare all the ingredients for the toppings bar: Sour cream, chopped scallions, shredded cheeses, and, lastly, crushed Fritos —  an idea from a Texan co-worker.

The kitchen is ours until 11:00 AM, and it’s a struggle to get everything packed up and cleaned in time. We finish with 30 seconds to spare. I run through last minute taste tests and adjust the seasoning, stirring the pots with a wooden spoon the size of a canoe oar. We pack all the chili into large pans and load the pans onto insulated carriers on the back of the truck. We warm the carriers with Sterno fuel to take the chill off. In Cambridge, MA, the temperature is hovering just above 0 degrees. 

At 11:30 AM, we are right on schedule, but the event doesn’t begin until 1:00 PM, and now its time to pray that everything stays hot.

The setup crew is on-site, and our tent is ready to go. Our spot in the Square looks fantastic. 

A few minutes before 1:00 PM, the crowds begin to line up. A drum group shows up and begins to hammer out a wild latin beat, and we stay warm by dancing. The insulated carriers did their job, and the chili is steaming hot as we begin ladling out portions to the crowd. 

ChiliSquare

People loved it. Our chili seemed to be the fan favorite, but the votes told a different story.

We came in second place, losing to the reigning champs who have held the title for three out the past four years.

But don’t worry, I stopped by their booth to let them know we are coming for them next year, and now I know exactly how to take the Chili Cup for ButcherBox.


Here is our standard recipe for ButcherBox Chili:

Ingredients:

  • 1 pack ButcherBox ground beef
  • 1 pack beef short ribs, seasoned with salt and pepper
  • 2 onions, diced
  • 4 bell peppers, assorted colors, diced
  • 2 carrots, peeled and diced
  • 1 c tomato puree
  • ¼ c tomato paste
  • 1 c black canned black beans
  • 1 c canned garbanzo beans
  • 1 c pinto beans
  • ¼ c ketchup
  • 2 Tbsp chili powder
  • 2 tsp Ancho chili powder
  • 2 tsp Aleppo chili powder
  • 2 Tbsp chipotle puree
  • 1 c hard cider
  • salt and pepper to taste
  • ghee or avocado oil for searing

Directions: 

  1. Preheat a Dutch oven, add oil and sear beef short ribs on both sides for 2 min per side. If you have a smoker, feel free to smoke them for 30 minutes with applewood chips. Remove and place in slow-cooker.
  2. Place onions and ground beef in the Dutch oven and cook until beef is nearly cooked through. Season with all powdered spices, strain excess fat, and transfer to slow-cooker.
  3. Add peppers to Dutch oven and sauté for 1 min. Add tomato paste and chipotle puree and stir, simmering for 1 min. Add hard cider to deglaze and transfer to slow-cooker.
  4. Add all remaining ingredients and cook on low setting for 18-24 hrs.

 ChiliBowl1

And the recipe for 50 gallons of chili? Follow the directions above, but use this recipe list:

  • 50 pounds ground beef
  • 70 pounds short ribs
  • 20 pounds beef bones
  • 20 pounds white onions
  • 15 pounds carrots
  • 2 qts garlic
  • 6 pounds red peppers
  • 6 pounds green peppers
  • 6 pounds yellow peppers
  • 6 pounds orange peppers
  • 4 gallons black beans
  • 4 gallons pinto beans
  • 4 gallons stewed tomatoes
  • 8 gallons tomato puree
  • 2 gallons tomato paste
  • 1 gallon chipotle puree
  • 3 gallons ketchup
  • 1 qt ancho chili powder
  • 1 qt Aleppo chili powder
  • 2 cups chili powder
  • 1 qt cumin
  • 1 qt black pepper
  • kosher salt to taste
  • 3 gallons hard apple cider