Tag Archives: Recipe

An easy Bulgogi Beef Skillet recipe from Paleohacks

If you’re craving takeout, try this easy, one skillet beef bulgogi recipe from our friends at Paleohacks for sweet and spicy flavor with zero soy, MSG, or preservatives!

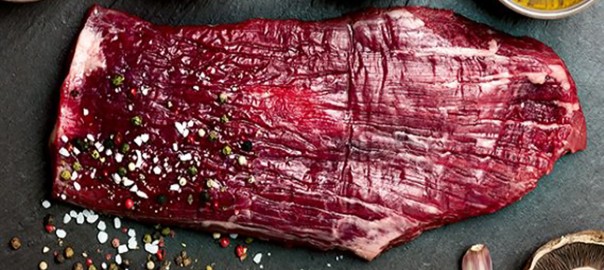
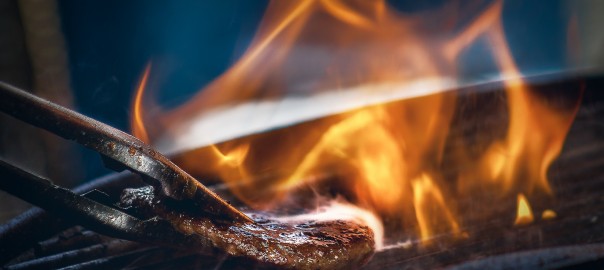
Bulgogi is a popular Korean recipe that translates literally to “fire meat.” Super thin slices of strip steaks, sirloin steak, or ribeye are marinated in spices until tender, then grilled or pan-fried. The result is a sticky, crispy, and slightly spicy recipe that can be turned into a complete meal with a side of cauliflower rice or stir-fried veggie noodles.

The unique marinade includes ripe, grated Asian pear for sweetness, texture, and tang. The acidity in the pear also helps to tenderize the meat. If you can’t find Asian pears, a traditional pear will work just fine. To add a subtle spice to the marinade, use gochugaru, the bright red Korean red pepper. This powder is less spicy than cayenne and creates a balanced heat that lets the other flavors shine through.

bulgogi-beef

Coconut sugar stands in for brown sugar, adding sweetness and helping to crisp the steak for delicious texture. Finally, toasted sesame oil adds nutty aroma while ginger, garlic, and coconut aminos add even more flavor and dimension.

To make the bulgogi, mix all the ingredients for the marinade together, add to the sliced beef, and refrigerate for at least two hours. Then, grease a medium skillet with avocado oil—not olive oil. Avocado oil has a high smoke heat point that can withstand high cooking temperatures without burning. Cook the steak about two minutes per side, in two batches.

bulgogi-beef

To serve, top the hot steak slices with sesame seeds and scallions, and enjoy!

If you’re craving more takeout recipes but don’t feel like cooking, check out one of these 13 totally Paleo meal delivery options!

Paleohacks’ Korean-style BBQ Bulgogi Beef Skillet

bulgogi-beef


Prep time- 10 minutes

Cook time- 10 minutes

Chill time- 4 hours

Total time- 4 hours, 20 minutes

Serves- 4

Tools

Mixing bowl

Skillet

Tongs

Ingredients

bulgogi-beef

For the Marinade

1/3 cup grated Asian pear, peeled

1 T Korean red pepper (or chili powder)

1 T coconut sugar

1 T lime juice

2 T toasted sesame oil

2 T coconut aminos

1 clove garlic, minced

1/2 t ground ginger

1/4 t sea salt

For the Steak:

2 10-oz strip steaks, thinly sliced

1 t avocado oil

1/2 t sesame seeds, for serving

1/4 cup chopped green onion, for serving

Directions

1. Combine ingredients for marinade in a mixing bowl and stir well.

2. Add steak slices and stir to coat. Cover and refrigerate 2 to 4 hours.

3. Grease a skillet with avocado oil and heat over medium-high heat for a few minutes. When hot, use tongs to add half of the marinated steak strips and cook for 2 minutes. Flip and cook an additional 2 minutes.

4. Transfer steak to a bowl and repeat with remaining strips.

5. Serve the beef bulgogi hot garnished with sesame seeds and green onion.

A taco-stuffed sweet potato? Another great recipe from Paleohacks

The great recipe team at Paleohacks has shared another tasty dish with Roam. This Mexican-inspired recipe features sweet potatoes stuffed with taco meat and topped with homemade guacamole for a single serving meal everyone will love!

Ditch the tortilla and stuff your favorite taco fixings inside tender roasted sweet potatoes for a filling and guilt-free meal.

Tacos are a dinner staple that everyone can agree on. However, when following a Paleo lifestyle, tortillas can be difficult to replace. Traditional tortillas and other grain-filled foods can cause bloating, which is why sweet potatoes are such a great alternative. Plus, they’re big enough to stuff with drool-worthy toppings for a fun twist on taco night.

Grass-fed ground beef carries the smoky taco spices, like cumin, onion powder, and chili powder. A little tomato paste adds to the tangy zip. And as we all know, no taco is complete without a scoop of creamy guacamole. This one is kept simple with chopped onion, cilantro, and jalapeños so you can mash it together while the meat sizzles on the stove.

stuffed sweet potatoes

Get started by greasing the sweet potatoes with avocado oil, which helps to lightly crisp up the skins. Bake for one hour, then let the sweet potatoes cool at room temperature while preparing the other ingredients.

Meanwhile, heat ground beef in a skillet until browned, then stir in dry seasonings, tomato paste, and a little water. Cook about five minutes more.

While the taco meat cooks, make the guacamole by mashing an avocado until just slightly chunky. Add red onion, cilantro, sea salt, and jalapeños.

When everything’s ready, slice the sweet potatoes lengthwise and fill it up with taco meat. Top with a scoop of guacamole and finish with freshly diced tomatoes. Enjoy it while it’s hot!

stuffed sweet potatoes

Other great toppings to include:

  • Pickled jalapeño
  • Diced mango
  • Sliced radishes
  • Chopped bell pepper 

Tip: Try baking up a few additional sweet potatoes so you can have these decadent sweet potato brownies for dessert!

Taco-Stuffed Sweet Potato 

Prep time- 10 minutes

Cook time- 1 hour, 15 minutes

Total time- 1 hour, 25 minutes

Serves- 4 

Tools

Parchment paper

Baking sheet

Skillet

Spatula

Small bowl 

Ingredients

stuffed sweet potatoes

4 sweet potatoes

1 T avocado oil

1 lb ground beef

1 T ground cumin

2 t chili powder

1/2 t garlic powder

1/4 t onion powder

1/4 t cayenne pepper

2 T tomato paste

1/4 cup water

1 medium ripe avocado

2 T red onion, chopped

1 T cilantro

1 T minced jalapeños

1/4 t sea salt

1/2 cup tomatoes, diced

Directions

1. Preheat oven to 350ºF and line a baking sheet with parchment paper.

2. Grease the outsides of the sweet potatoes with avocado oil and set on the prepared baking sheet. Bake for 1 hour, then let cool.

3. Meanwhile, heat ground beef in a skillet over medium heat, using a spatula to break up the meat. Cook 10 minutes, stirring occasionally.

4. Stir in dry seasonings, tomato paste, and water until thoroughly combined. Continue to cook for 5 minutes.

5. While the taco meat cooks, prepare the topping: Mash an avocado in a small bowl. Add the chopped red onion, cilantro, jalapeños, and sea salt. Stir well.

6. When the sweet potatoes are cool enough to handle, slice them down the center lengthwise. Stuff with the taco meat, then add a scoop of the guacamole and diced tomatoes and serve.

If you liked this recipe, then you’ll love this sweet potato cheeseburger casserole recipe that you can make with just one pan.


Photo by James Harris on Unsplash

The ultimate brunch food with a unique history – Quiche

Check out one of our favorite breakfast recipes, our bacon and Swiss quiche from Head ButcherBox Chef Yankel Polak, below.

Quiche is the ideal brunch food. Yes, better than French toast, cinnamon rolls, and even any combination of fried eggs and cheeseburgers. 

It is a delicious, easy to make brunch dish that is a veritable opera of European appropriation. I mean, the word ‘quiche’ carries with it the assumption that it is a culinary dish derived from some famous French culinary experiment.

Quiche has a pretty extensive history, with recorded dishes going back to the 12th century. Although back then, it went under a different name.

A Continental brunch dish

Quiche, you see, is actually believed to have originated in Germany. According to foodreference.com, the savory breakfast food was first concocted in the medieval German kingdom of Lotharingia, which stretched across France, Germany, Luxembourg, Belgium, and the Netherlands. The area where the dish is believed to have derived was called Lothringen in German — it was a German kingdom at the time— but was later annexed by France and renamed Lorraine. The word ‘quiche’ itself comes from the German word for cake, ‘Kuchen.’

According to history, the original ‘quiche Lorraine’ — as it is called — was “an open pie with a filling consisting of an egg and cream custard with smoked bacon.” Over time, cheese was added to the dish that we now call quiche Lorraine.

According to Chef Yankel, it was “traditionally made in a more delicate version, similar to a tart.”

As a brunch food, the quiche, or breakfast pie, gained popularity in France over a long period of time; however, it really grew in esteem in the US during the 80’s and 90’s, as a way to prepare breakfast ahead of time. As an easy-to-make “breakfast casserole,” it became a suburban cuisine staple; sometimes.  Quiche even appeared at holidays — think back to whether or not you recall a quiche featured prominently at a past Easter brunch — as well as, strangely, cocktail parties and other gatherings.

Breakfast pies are popular in various forms

But we are most familiar with it as a brunch food in pie form. 

And, while both pie-like, a quiche is also not a frittata, just to set the record straight. A frittata is an Italian egg dish — this is also quite popular as a brunch dish — similar to an omelet. It is actually, more of a crustless quiche which combines scrambled eggs, a meat — like ham or bacon — and some vegetables. 

On the opposite side of the breakfast food equation is the dutch baby, which is a popover or bread pudding that can be filled with fruits or maple syrup. Bascially, like a frittata is a quiche with out a crust, a dutch baby is like a quiche without the egg filling.

A love it or hate, quiche is the perfect brunch food

Knowledge of the dish’s rich history is not where the story ends for ButcherBox’s Chef Yankel.

“Personally, I have a love/hate relationship with eggs,”Chef Yankel says.

“I was an egg cook for some time at Eastern Standard, working brunch two days a week. During each shift, I would cook at least 150 omelets to order — and we could not serve an omelet if it had even a tiny bit of brown on it. We also had to do 200 to 300 orders of scrambled and fried eggs as well,” he explains. “I’d end each shift covered in eggs.”

And for Yankel and his team, quiche became the balm. “Quiche became one of those pre-made items we could serve to take some of the heat off my station.”

“So while I’m really freaking good at cooking a ton of fried eggs at the same time, and I totally enjoy eating them with a nice cut or ham or some maple sausage, the combination of eggs and brunch is one of those nightmarish experiences anyone who’s put some time into the service industry is familiar with.”

But rest assured, our delicious quiche recipe, with our amazing heritage-breed pork bacon, pays the proper homage to the historical origins of the dish. 

Plus, it’s easy to make.

“Quiche is a set-it-and-forget-it kind of dish, really simple to put together, and easy to cook well,” said Chef Yankel. “It has a great shelf life in the fridge and is totally customizable in terms of what you want to flavor it with, it is really one of the best brunch ideas.” So you can put it together really quick in a casserole dish or pie pan and spend more time on the bloody mary mix, hash browns, and coffee cake.

So skip the homemade buttermilk pancakes, eggs benedict, or any other complicated and challenging to make breakfast foods. Give Quiche Lorraine or our own gluten-free recipe below. You won’t be disappointed by the amazing brunch dish, and you’ll likely have 

Chef Yankel’s quick “Bacon and Swiss Quiche” recipe:

The crust and the filling can be made the night before a brunch or cooked the night before and reheated. This is one of Chef Yankel’s favorite brunch recipes and serves six and takes 20 minutes to prepare and 60 minutes to cook. This version is healthy and gluten-free, with almond flour making a fabulously nutty crust.

  • Quiche Dough:
  • 2 c almond flour
  • ¼ tsp sea salt
  • 2 Tbsp coconut oil
  • 1 egg
  • Quiche Filling:
  • 6 slices ButcherBox bacon diced into ½ pieces
  • 3 Eggs1 ½ c heavy cream
  • 1 tsp chopped sage
  • ¼ tsp fresh ground black pepper
  • ¼ tsp nutmeg
  • ⅛ tsp salt
  • ¼ c grated swiss cheese

Directions:

  1. Preheat oven to 375°F.
  2. In a food processor, pulse to combine salt and flour. Add coconut oil and egg and pulse to form a ball.
  3. Press dough into 9.5” pie dish and bake 8 to 12 min or until lightly browned, set aside.
  4. Sauté bacon until crispy, drain, pat dry and sprinkle on bottom of quiche crust. Sprinkle Swiss cheese on top of the bacon.
  5. Whisk together remaining ingredients and pour into quiche crust.
  6. Bake on middle rack of oven for 35 to 40 min or until golden brown and set.
  7. Let rest at room temperature for 20 more minutes before slicing and serving. Happy eating!

ClickHereForMore1

flankSteak1

Don’t ruin your steak by cutting it wrong

Obviously, we love a great steak as much as anyone.

And there is nothing we dislike more than when a simple mistake ruins a fantastic, tender steak.

So as a bit of public service, we want to make sure that you are aware of one of the most common errors that can transform a melt-in-your-mouth steak into something akin to chewing a rubber boot.

So once you cook your steak to your preferred level of doneness — although we don’t know why anyone would eat a steak cooked anything but medium-rare  — you should first let the steak rest for it to maintain a perfect tenderness and its juices.

And now comes the part that is easy to screw up: Cutting the steak.

Don’t ruin your steak with a simple mistake

You should always cut a steak against the grain, which means against the direction that the muscle fibers run.

This is true of all cuts of meats, but it is most vital in some of the unique cuts that we include in our ButcherBox shipments like flank steak and Tri-Tip. These and cuts like skirt steak and hangar steak have more pronounced muscle fibers (the grain of the meat) because they come from parts of the cattle where the muscles work harder.

Our in-house ButcherBox chef Yankel Polak said that to dig into the reasons for this more, it’s important to consider what beef is.  “It is muscle, and muscle consists of fiber and connective tissue,” said Yankel. “Depending on where the cut is harvested, the muscle may be tougher with more connective tissue or tender with very little. Cuts from the loin and rib — such as New York strip, filet mignon, or ribeye steaks — are quite tender because those are less used muscle groups. Cuts from the chuck, round, and flank tend to be tougher with more tissue due to their high usage.”

The more the muscle is used according to Yankel, the more apparent the grain. “On a tender steak, like the filet or strip, it really doesn’t matter how you cut it, it will pretty much be tender no matter what,” he said. “However, a steak with a distinct grain will be inedible unless cut against the direction the grain runs.”

If you do cut with the grain of the steak, you will often find the meat more gamey and tougher to chew. The reason? It is because the longer muscle fibers remain intact and haven’t been cut. Cutting against the grain breaks up the muscle fibers making the steak much more tender.

Cutting grass-fed steak

This is even more true with grass-fed beef. “Grass-fed will be significantly less forgiving to an improper cut,” said Yankel. “It’s leaner, to begin with, and the cows have lived more active lives meaning their muscles will be more developed than grain fed cows who spend a significant portion of their lives cooped up in a feedlot,” he added.

That’s why it is essential for you to cut against the grain and why most restaurants cut their flanks, hangars, and skirts before delivering them to your table.

Not only is cutting against the grain crucial, but the thickness of the slice is important as well.  “Considering the muscles fibers run parallel to each other,” said chef Yankel, “cutting thick slices against the grain still leaves a significant amount of tough muscle to chew through.”

“Keep the slices thin,” he added, “as thin as possible.”

Lastly, consider the knife you use.

While most steak knives are serrated, the best knife for a steak is actually a flat blade, a chefs knife, or slicer. “At least double the length of the width of the meat,” is chef Yankel’s rule.

“This will allow you a smooth motion while slicing,” he said. “Don’t press down hard or struggle with the meat. Using a sharp knife, draw the blade smoothly across the surface.  Allow the knife to do the work, not your strength.”

“A clean-cut retains all the moisture that reabsorbed during the resting period,” Yankel said.

So, to sum up, always rest your steak for ten minutes or more, use a wicked sharp knife, and cut THIN against the grain.

Think this is nonsense? Well, Cook’s Illustrated did an interesting test that discovered that even steaks that many people consider to be “tougher” cuts were actually as tender as the traditionally better known and more widely considered “tender” cuts, if cut the correct way. You can watch a video of the experiment and its results here.

Our taste buds and science concur: Cut your steak against the grain and you will have a mouth-watering, tender steak every time.

Our taste buds and science concur: Cut your steak against the grain and you will have a mouth-watering, tender steak every time.

Oh, and whatever you do, don’t cook it medium-well. But we’ll get into that another time.


roam

An invitation to Roam with ButcherBox

When I began the journey that is ButcherBox, I was trying to solve a very real problem for my family… sourcing amazing grass-fed beef that is shipped to my door at an affordable cost.  While this is the second company I’ve founded, I didn’t want to have any preconceived ideas on what I would discover and experience along the way. All I knew was that I had a big problem ahead of me, and we would get there, one way or another.

After starting as a novice in the meat industry, I’ve been lucky to both learn about the intricacies and proclivities of the worlds of cattle, poultry, and pork, and to meet some of the most outstanding folks who are working on the farms and ranges the world over.

And so we here at ButcherBox want to share the adventures, the tales of those working in the industry, the sometimes unusual — yet fascinating — minutiae of buying and selling meat, the tradeoffs in raising livestock, the delicious recipes passed down through generations, the wisdom shared by experts on how to best prepare grass-fed meats, the unique and passionate individuals we’ve met along the way, and so much more.

Which is why we are launching Roam, an online magazine of sorts aimed at bringing you the amazing stories and fascinating facets of our industry that we’ve only begun to uncover.

In a way, Roam is directionless — which isn’t quite necessarily a bad thing. What I mean is that we see Roam as an ongoing adventure that can go many different ways. And that’s what we aim to bring you: The authentic stories of those on the frontlines of the grass-fed meat industry.

Thanks for coming along. Explore, imbibe, and eat up all that you can.

MikeS_SignaturesSmall


roam

james-sutton-198306 copy

How to cook an amazing grass-fed burger this summer

Yesterday, the 4th of July, is officially the most popular barbecue day in America. More hot dogs, burgers, sausages, and other slabs of meat were cooked on grills across the nation than on any other day.

The staple of any good cookout, whether it’s part of a celebration of America’s birthday or otherwise, is the cheeseburger.

Cooking a burger is one of the most simple things you can do; that is, unless you decide to make it more challenging than it needs to be and screw it up. Using grass-fed beef can add a bit more difficulty to the task if you don’t know what you’re doing.

Our ButcherBox grass-fed ground beef has a meat-to-fat ratio of 80 percent meat to 20 percent fat, which is just the perfect amount of fat to ensure that the meat stays rich and juicy, and maintains a robust flavor.

Our in-house chef Yankel Polak says that, first and foremost, grass-fed burgers are better because of their flavor. “Grass-fed has a significantly more developed flavor, almost as though its been dry aged,” Yankel says.

As we’ve mentioned previously, the health benefits of grass-fed meat are numerous. Not only are you getting meat that hasn’t been fattened with grains on a feedlot but has actually eaten grass its entire life — which is more humane as well — but it is considered more nutritious according to many people far more knowledgeable about eating healthy than us.

As our friend Liz Wolfe of Real Food Liz explained the benefits of our grass-fed beef, “Their meat is healthier for us…more conjugated linoleic acid (a super interesting and health-promoting substance) and a better ratio of Omega 3 to Omega 6 fats.”

Enough about how great the meat is, here’s how to take grass-fed ground beef and turn it into something magical.

First, make sure to preheat the grill. If you are using an open flame, let the heat source burn down which will minimize flare-ups, something more common with grass-fed beef.

Yankel says that you should always start with an extremely hot surface. “I like to set up two zones when grilling so I can sear on the hottest part and move it to the lower temp to finish,” Yankel suggests. “That initial blast of heat is crucial to get the flavorful caramelized crust without overcooking the inside.”

In terms of add-ins. Most chefs agree that the more simple you keep it the better the burger ends up. The best thing to add to a grass-fed burger is salt and pepper. “Once you start mixing vegetables and bbq sauce into your ground beef you’re going to experience changes in cooking time and texture and you’ll lose that amazing beefy flavor,” Yankel explained.

Grass fed beef in general cooks about 30 percent faster than grain fed. Chef Yankel says, “Obviously there’s a lot of room for variety and error here but the general rule of thumb should be ‘don’t walk away while its cooking’.”

A good rule of thumb for a 6 oz. burger is to cook it for about 4 minutes for medium-rare. Although you’d be tempted to do so, the less you flip them the more they retain their juiciness and flavor. “Grass finished tends to be a bit dryer and chewier after 130 degrees, or medium. So you definitely want to cook your burgers to medium rare. (The one time to break this rule would be our upcoming “Bacon Celebration” recipe where we mix a whole bunch of chopped bacon into the ground beef for burgers. Then you can cook away, and they stay moist and juicy due to the additional incorporated fat content.)

For the best possible flavor and texture always allow ButcherBox grass-fed beef to rest in a warm place 8 to 10 minutes after cooking before cutting or serving.

Lastly, the best burgers are given some time to rest after cooking. “The longer it rests, the better it will taste, the juicier it will be, the more vibrant the color inside,” says Yankel.

The biggest mistake people make when cooking grass-fed burgers is that they overcook the meat. “Meat continues to cook after removing it from the heat,” as Chef Yankel says.

And you thought all you had to do was grab some ground beef and throw it on the grill. Cooking great grass-fed burgers takes a lot more attention to detail than you might have imagined.

The great thing is that the end result is an amazing, healthy burger.

Enjoy!