Tag Archives: olive oil

pantry essentials

10 Pantry Essentials Every Cook Should Have

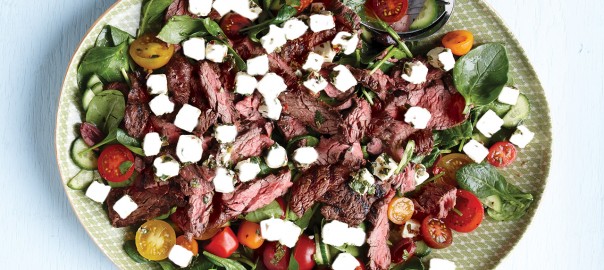
You may have taken the first key step towards a month of great eating and ordered a ButcherBox, complete with high-quality grass-fed beef, heritage pork, and free-range, organic chicken.

But do you know what else completes a kitchen? Pantry staples, like high-quality oils, a few kinds of vinegar, dried herbs, and more.

This guide details the pantry essentials that make all the difference when preparing the delicious meals at home. The essentials that all cooks have a hands-length from their stoves include condiments like assorted vinegars, Dijon mustard, and soy sauce or their gluten-free variants. With a few of these, you can make everything from vinaigrettes and dressings to sauces, rubs, and much more.

Other necessary kitchen staples include canned tomatoes, which add richness to stews and soups, and dried herbs like oregano, rosemary, and thyme.

The best part? None of these staples are prohibitively expensive, and your individual purchase will probably last you quite a while.

1. High-Quality Oils

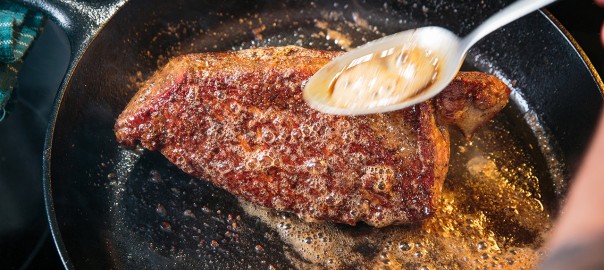
You can’t cook many meals without a cooking fat, and while grass-fed butter, ghee, or tallow might be an option, you should always keep a solid selection of healthy, high-quality cooking oils at hand.

These oils might include high heat friendly options filled with healthy fats, like avocado oil or coconut oil. For lower heat preparations, a solid bottle of olive oil should always be handy. You can even use good olive oil as a finishing touch, like a drizzle over salad or hummus.

Neutral oils like avocado oil or olive oil are also excellent bases for homemade salad dressings, and, if you’re really looking to up your pantry game, keep finishing oils like sesame oil or walnut oil on hand.

2. An Assortment of Vinegar

A good vinegar will take a good dish to great, and thankfully there are many options to choose from.

If you need to add acidic sweetness, reach for balsamic vinegar. In fact, dousing some caramelized red onions with balsamic vinegar and sugar is a sure-fire way to make a quick and delicious topping for burgers and steaks, while aged balsamic vinegar makes the perfect coating for grilled veggies.

Don’t stop at balsamic vinegar. Champagne vinegar adds a sweet note to homemade vinaigrettes, while apple cider vinegar boasts so many purported health benefits it’s hard to keep count. You can even throw it into homemade barbeque sauce for a unique bite.

Even plain old white vinegar has its place in a pantry. It’s as useful for making crispy pickles as making homemade kitchen cleanser.

3. Dijon Mustard

Yellow mustard has its place, but nothing heightens a dish more than a dollop of Dijon mustard. The traditional French mustard is made with brown mustard seeds, white wine, and a verjus made from unripe grapes. This verjus is what gives Dijon mustard its distinct, tart flavor.

Use Dijon mustard in a homemade vinaigrette for a crisp salad, or as part of a rub for various cuts of meat. These rosemary brined pork chops are a perfect example.

The best part about Dijon mustard? While it sounds fancy, it’s a pretty affordable condiment, with the store brand bottles rarely costing more than $3 and the fancy stuff only clocking in at $5 or less.

4. Soy Sauce/Tamari/Coconut Aminos

What’s the best way to build umami into your dishes? Soy sauce, a sauce made from fermented soybeans, roasted wheat, and cultures, is the ultimate, inexpensive umami condiment.

Of course, many people question the nutritional impact of soy sauce. If you’re gluten-free, a specific type of soy sauce, tamari, can be made without gluten.

If you avoid soy and grains entirely, coconut aminos, a sauce made from coconut tree sap and salt, is a great alternative. While a bit less pungent and a tad sweeter than traditional soy sauce, it still packs umami flavor into dishes.

Use soy sauce or any of its alternatives in Asian-inspired fare, like this ginger pork noodle soup.

5. A Solid Hot Sauce

While the hot sauce category is vast, your favorite hot sauce is a kitchen essential. Why? Because it can be doused on most anything and elevates the flavor of whatever you’re noshing on.

Do you prefer Asian flavor profiles? Reach for the less hot, slightly sweet Sriracha, or pack in the chili garlic flavor with sambal.

Mexican and Latin America hot sauces are another great category: The options are many, but most sauces feature some kind of vinegary heat and potentially a kick of citrus like lime.

Channel pure Americana with Tabasco or Louisiana hot sauce. There are, literally, thousands of hot sauces to choose from.

Use your favorite hot sauce to jazz up a simple breakfast of eggs and bacon, or incorporate it into vinaigrettes and sauces for a little kick.

6. Dried Herbs

Like hot sauce, the selection for dried herbs is vast. And while it’s great to build out your spice cabinet and experiment with various herbs, there are a few essentials we’d recommend always having on hand.

Dried oregano, basil, rosemary, and thyme — commonly sold together as an Italian seasoning blend — lend bright flavors to any dish you whip up and are much more convenient in a pinch than fresh herbs.

Other dried herbs we’d consider staples include dill, which is perfect in anything from pickles to salads, and dried bay leaves, which lend depth to soups and stews.

If you’d really like to pad out your spice cabinet, add dried marjoram, ground coriander, dried mint, dried sage, and dried tarragon.

7. Coconut Milk

Canned coconut milk is a treasure, and not just because it’s suitable for most diets. The silky, fatty substance lends richness to any dish it touches, and won’t spoil as quickly as refrigerated alternatives like heavy cream or milk.

Despite it including coconut meat, coconut milk is a fairly neutral, non-dairy way to add creaminess and heft. Use coconut milk to add creaminess to soup, braise meats, or add silky texture and flavor to rice.

Pro tip: Stock up on cans of coconut milk. Whichever ones you don’t use for savory dishes, use them to make dairy-free sweets like no-churn ice cream.

8. Nut and Seed Butters

What’s your favorite? Peanut butter, almond butter, cashew butter, tahini? Whichever nut or seed butter you prefer, it’s bound to serve many uses in your kitchen.

You can, of course, use nut butters to spread on toast, add protein to smoothies, and bake up some delicious cookies. But nut butters have serious culinary uses, too.

Peanut butter or almond butter both make excellent Asian-inspired sauces, like in this Thai almond soba noodle salad. Tahini tastes delicious in Mediterranean fare. Try it drizzled over these Mediterranean meatballs.

9. Canned Tomatoes

Whether you’re whipping up a sauce for pasta, throwing some chili in the crockpot, or cooking up beef stew or pot roast low and slow, canned tomatoes are so useful.

You can find canned tomatoes in many forms, from canned tomato paste to whole, peeled tomatoes in a can. It’s good to have a variety of these options on hand for whatever you may need. They’re inexpensive and can add flavor to nearly any dish, like this fennel and tomato Italian pork shoulder.

10. Good Salt and Black Pepper

It’s a bit of a given that you should have salt and pepper on hand. It’s rare to not add it to a dish in the kitchen. But not just any salt or pepper will do.

Iodized table salt is the most common option, but it’s not exactly the healthiest one. It’s bleached, devoid of trace elements, and often contains additives. Also, it just doesn’t taste as good as sea salt crystals.

Sea salt comes from the ocean, and is evaporated to separate the salt crystals from the water.

(Another option: ButcherBox Chef Yankel always recommends having Kosher salt on hand for seasoning steaks.)

For pepper, whole peppercorns that can be cracked in a pepper mill lend the best flavor.

A taco-stuffed sweet potato? Another great recipe from Paleohacks

The great recipe team at Paleohacks has shared another tasty dish with Roam. This Mexican-inspired recipe features sweet potatoes stuffed with taco meat and topped with homemade guacamole for a single serving meal everyone will love!

Ditch the tortilla and stuff your favorite taco fixings inside tender roasted sweet potatoes for a filling and guilt-free meal.

Tacos are a dinner staple that everyone can agree on. However, when following a Paleo lifestyle, tortillas can be difficult to replace. Traditional tortillas and other grain-filled foods can cause bloating, which is why sweet potatoes are such a great alternative. Plus, they’re big enough to stuff with drool-worthy toppings for a fun twist on taco night.

Grass-fed ground beef carries the smoky taco spices, like cumin, onion powder, and chili powder. A little tomato paste adds to the tangy zip. And as we all know, no taco is complete without a scoop of creamy guacamole. This one is kept simple with chopped onion, cilantro, and jalapeños so you can mash it together while the meat sizzles on the stove.

stuffed sweet potatoes

Get started by greasing the sweet potatoes with avocado oil, which helps to lightly crisp up the skins. Bake for one hour, then let the sweet potatoes cool at room temperature while preparing the other ingredients.

Meanwhile, heat ground beef in a skillet until browned, then stir in dry seasonings, tomato paste, and a little water. Cook about five minutes more.

While the taco meat cooks, make the guacamole by mashing an avocado until just slightly chunky. Add red onion, cilantro, sea salt, and jalapeños.

When everything’s ready, slice the sweet potatoes lengthwise and fill it up with taco meat. Top with a scoop of guacamole and finish with freshly diced tomatoes. Enjoy it while it’s hot!

stuffed sweet potatoes

Other great toppings to include:

  • Pickled jalapeño
  • Diced mango
  • Sliced radishes
  • Chopped bell pepper 

Tip: Try baking up a few additional sweet potatoes so you can have these decadent sweet potato brownies for dessert!

Taco-Stuffed Sweet Potato 

Prep time- 10 minutes

Cook time- 1 hour, 15 minutes

Total time- 1 hour, 25 minutes

Serves- 4 

Tools

Parchment paper

Baking sheet

Skillet

Spatula

Small bowl 

Ingredients

stuffed sweet potatoes

4 sweet potatoes

1 T avocado oil

1 lb ground beef

1 T ground cumin

2 t chili powder

1/2 t garlic powder

1/4 t onion powder

1/4 t cayenne pepper

2 T tomato paste

1/4 cup water

1 medium ripe avocado

2 T red onion, chopped

1 T cilantro

1 T minced jalapeños

1/4 t sea salt

1/2 cup tomatoes, diced

Directions

1. Preheat oven to 350ºF and line a baking sheet with parchment paper.

2. Grease the outsides of the sweet potatoes with avocado oil and set on the prepared baking sheet. Bake for 1 hour, then let cool.

3. Meanwhile, heat ground beef in a skillet over medium heat, using a spatula to break up the meat. Cook 10 minutes, stirring occasionally.

4. Stir in dry seasonings, tomato paste, and water until thoroughly combined. Continue to cook for 5 minutes.

5. While the taco meat cooks, prepare the topping: Mash an avocado in a small bowl. Add the chopped red onion, cilantro, jalapeños, and sea salt. Stir well.

6. When the sweet potatoes are cool enough to handle, slice them down the center lengthwise. Stuff with the taco meat, then add a scoop of the guacamole and diced tomatoes and serve.

If you liked this recipe, then you’ll love this sweet potato cheeseburger casserole recipe that you can make with just one pan.


meaty-salads

Substantial salads: Meaty salads to keep you nourished

When you think of meaty, hearty, satisfying meals, salads may not be the first thing that comes to mind. But salads, with their plentiful varieties, are a brilliant way to get in a balanced, nourishing meal.

Whether it’s a meat-packed salad complemented by fruits and veggies — like this tarragon and 3 apple chicken salad—or it’s a mound of grilled steak served atop a bed of lettuce and other veggies, salads pack in nutrients without compromising flavor.

You’re not limited to lettuce, either. Try cold noodle salads or veggie varietal salads. Whatever kind of meaty salads you’re craving, this list of salad recipes delivers substantial, vibrant, and healthy meals.

Tarragon and 3 Apple Chicken Salad

Need an easy, delicious, and nutritious salad that will fuel you till dinner? Try this tarragon and 3 apple chicken salad, rife with zingy flavors from tarragon, white wine (preferably one with stone fruit notes), garlic, Dijon mustard, and more. 

The salad itself boasts a crisp variety of apples, including Granny Smith, Gala, and Honeycrisp. Celery and pistachios add even more crunch. At the center of it all is ultra-tender, ultra-juicy grilled chicken breast cubes.

Spring Pea Chicken Salad

This spring pea chicken salad is the epitome of spring, thanks to the abundance of seasonal produce and deliciously refreshing poached chicken breast. Enjoy fresh peas, sugar snap peas, pea shoots, dried apricots, and almonds for a delicious textural meld. 

The chicken is poached in a white wine, thyme, and butter mixture, making for fork-tender, refreshing meat. The salad dressing is impressive in and of itself, with white balsamic vinegar, shallots, thyme, avocado oil, dried apricots, salt, and pepper. For even more flavor, make the dressing one day in advance and dress the chicken in the vinaigrette before serving.

Grilled Greek Marinated Chicken Breast with Peach and Endive Salad

Here’s a hearty salad that you can throw together in 30 minutes. While simple, this grilled Greek marinated chicken breast with peach and endive salad does not compromise on flavor. Marinated in a zingy Greek vinaigrette (we like the one created by Primal Kitchen), the chicken is grilled for a few minutes for the perfect char then finished off in the oven. An abundance of produce joins this grilled chicken salad, including peaches, avocado, endive, red onion, scallions, and corn. Throw in some feta cheese for even more zest, and you’re in for a nourishing, complete, and healthy meal.

Lemon Turmeric Marinated Flank Steak with Lentil and Beet Salad

This lemon turmeric marinated flank steak with lentil and beet salad couldn’t be easier to throw together. Perfectly cooked flank steak, which cooks up in minutes, and a salad of pre-cooked lentils, pre-cooked beets, and curry-seasoned and roasted cauliflower, are all dressed in lemon turmeric vinaigrette. This salad is a bevy of textures and flavors and makes for an ideal, speedy weeknight dinner or a make-ahead meal.

Seared Flat Iron Steak with Roasted Veggie Salad

If you’re craving all the trappings of a salad but prefer something warm, this seared flat iron steak with roasted veggie salad delivers. Flat iron steaks are seared and basted in butter then transferred to the oven to finish up for a few minutes. Then, turn up your oven and toss in a mélange of cauliflower, butternut squash, and Portobello mushrooms. Once those are thoroughly roasted, serve everything on a bed of greens with some crisp bacon and pomegranate arils. Toss in a salad dressing of orange juice, balsamic vinegar, whole grain mustard, shallots, orange zest, garlic, and olive oil. You’re good to go.

Thai Almond Soba Noodle Salad

Asian noodle salads make for a cool, creamy and refreshing meal any time of the day, and this Thai almond soba noodle salad is no exception. While it requires a bit of prep time, it cooks up incredibly fast. 

Hearty flank steak gets the umami treatment with a marinade of fresh ginger, Tamari, mirin, garlic, fish sauce, and sambal chili paste. Seared quickly in a cast iron skillet then finished in the oven in minutes, it’s ultra-tender and flavorful. Cooked soba noodles are tossed with broccoli, red pepper, sugar snap peas, carrots, and toasted almond slices. An insanely flavor-packed Thai almond sauce finishes the dish off, complete with sesame oil, garlic, ginger, green curry paste, lime juice, tamari, honey, sambal chili paste, fish sauce, almond butter, coconut milk, salt, and cilantro.

Greek Salad with Primal Kitchen Greek Vinaigrette Chicken Skewers

This simple Greek salad with Primal Kitchen Greek Vinaigrette chicken skewers takes minutes to throw together. Simply marinate chicken beforehand in Greek vinaigrette, then grill it on skewers for 10 to 14 minutes. Toss together romaine lettuce, artichoke hearts, cherry tomatoes, English cucumber, Kalamata olives, and red onion. Throw in some more of the Greek salad dressing, and you’ve got a light but filling grilled chicken salad full of tangy and satisfying flavors.

Pork, Tomato, and Mango Salad

Sick of just having chicken or steak on your salad? Pork tenderloins, ever-admired for their versatility, make a great stand-in here. For this pork, tomato, and mango salad, grill pork tenderloin and corn on the cob for perfect charred flavor, then toss the pair on top of a salad of romaine lettuce, mango, tomato, cucumber, and red onion. Dress the whole thing in a simple balsamic vinaigrette, and you’re in for a tangy, sweet and savory meal.

Southwestern Steak Salad with Jalapeno Ranch Dressing

Need a steak salad with Southwestern flair? Try this Southwestern steak salad with jalapeno ranch salad dressing, chock full of big, bold flavors. With taco-seasoned, grilled top sirloin steak and a diverse veggie and bean selection, this romaine salad is hearty and satisfying. Enjoy the combination of Roma tomatoes, corn, avocado, red onion, black beans, and of course, romaine lettuce. Throw in a homemade spicy jalapeno ranch dressing, and you’re in for a treat.

ny-strip-steak

NY strip steak – An iconic steak in New York and beyond for good reason

You can find it featured on the menu of most reputable steakhouses, and although it goes by various names, when one thinks of a perfectly sized, tender, and flavorful cut of beef, likely, they are imagining a New York strip steak.

The strip steak comes from the topmost section of the sirloin, a little-used area of muscle, the longissimus, that is commonly referred to as the strip loin or top loin. The strip steak is sometimes prepared with a bone attached; quite often, you can find the strip is part of a T-bone steak or Porterhouse steak when part of a larger bone-in cut that also includes tenderloin steak — by itself, filet mignon. 

Delmonico steak, Kansas City strip steak, or NY strip steak?

As a standalone steak, it is most commonly referred to as the New York strip steak, but it can also be called the New York sirloin steak, the Kansas City steak (with bone-in) or Kansas City strip steak, contré filet, strip loin steak, hotel steak, ambassador steak, club sirloin steak, or in some parts of the world, simply sirloin steak. Also, the New York strip can be — or has been known — as the Delmonico steak.

The connection to Delmonico’s, the famous New York steakhouse and restaurant first opened in Lower Manhatten in the 1820’s, is likely how the cut earned its most famous moniker, the New York strip steak. However, it is unclear if a Delmonico steak, or the original Delmonico steak, is, or ever was a strip steak from the top loin or a ribeye steak. The reason for the confusion is likely due to steakhouses across the country seeking to mimic Delmonico’s famous steaks, but using an array of different — yet similarly tender and thick — cuts. Those who have investigated the Delmonico and New York strip steak connection, refer to the cut also being called a club steak, a reference to the restaurant’s early days as one of the first American dining clubs. 

However convoluted the naming history of the cut may be, one thing isn’t up for debate: New York strip steaks take relatively little preparation and can be cooked to a melt-in-your-mouth level of deliciously quite easily.

ny-strip-steak

The perfect NY strip steak

Whether pan seared — or reverse seared — grilling on a charcoal or gas grill, or cooking by some other method, all a New York strip steak really needs is a coating of crushed black pepper and kosher salt or sea salt and some compound butter. Just a few ingredients, a few minutes of cooking time, and you can get the perfect steak for any steak lover. The easy prep is one of the reasons it pops up on restaurant menus so often.

According to ButcherBox Head Chef Yankel Polak, the lack of too much visible fat also makes New York strip steak a steakhouse favorite.

“There is a breed of steak lover out there who likes things a bit leaner,” Chef Yankel explains. “I used to see them in restaurants all the time; they would order a big ol’ ribeye and leave all that amazing fat sitting on the plate. It inspired me to offer a NY strip steak as the lean alternative.”

“When butchered properly, it has only a thin strip of fat running down one side — and besides its natural marbling — the strip steak presents itself as the less fatty menu option,” continues Chef Yankel.

And, there is a business reason as well: According to Chef Yankel, a NY strip steak is a high-value item for a restaurant because there is nearly no waste. “It dry ages well, cooks quickly, and requires almost no skill to do it perfectly and deliciously.”

“Personally I like slow smoking them at 225°F until they are rare, resting them for a bit, and then finishing them over a raging fire for the ultimate crust,” he added.

The cut does also benefit from a bit of marinating if you want to marry a grass-fed, grass-finished New York strip steak to other flavors you may be preparing. Below are two of Chef Yankel’s favorite methods for marinating and cooking the perfect New York strip steak.

NY Strip Steak with Chef Yankel’s Zesty Marinade Recipe

Ingredients:

  • 2 ButcherBox NY Strip Steaks
  • 3 limes, zest and juice
  • 1 bunch fresh cilantro chopped
  • 1 head of garlic, peeled and minced
  • 1 Tbsp crushed black pepper
  • ¼ c olive oil

Directions:

1. Combine all ingredients for marinade in small bowl. Mix well and coat steaks thoroughly.

2. Allow steaks to marinate refrigerated at least one hour, then bring steaks to room temp before cooking.

3. Grill steaks over charcoal or open flame for 4 to 6 min per side, or until internal temperature reads 120°F. Rest steak 8 min before serving.

Chef Yankel’s  5-minute NY Strip Steak Marinade Recipe


Ingredients:

  • 2 ButcherBox NY Strip Steaks

Marinade/Dressing:

  • ¼ c balsamic vinegar (the higher-quality, the better!)
  • ½ c extra virgin olive oil
  • 2 Tbsp Italian seasoning
  • ½ tsp chili flakes
  • 1 Tbsp garlic, minced
  • 1 tsp lemon zest
  • 1 tsp kosher salt
  • 1 tsp black pepper

Directions

1. Preheat oven to 400°F.

2. Bring steaks to room temperature and season with salt and pepper.

3. Mix all marinade ingredients. Pour ¼ c over steaks and let them sit at room temp for 5 min.

4. Preheat cast-iron skillet. Once skillet is hot, sear steaks on both sides for 2-3 min per side or until a nice crust forms.

5. Place pan in oven for 5 more min, or until thermometer inserted in thickest part of steak reads 120°F.

6. Let steaks rest for at least 8 min before slicing. Serve alongside salad and enjoy!

ribeye-steak

The ribeye steak – There is no better grilling steak

Ribeye steak is one of the most delicious of all the cuts of beef that we — as steak lovers — want to grill and eat every time we spark up the grill.

The reason for our ribeye obsession is that it is so tender and tasty; and, it is mouthwatering-good when grilled with just kosher salt or sea salt and fresh ground black pepper for seasoning. The reason ribeye steak is a true beef flavor bomb is that it has more marbling — the fatty connective tissue within the muscle — than most other cuts.

Even grass-fed and grass-finished ribeye steaks — which are usually less fatty than corn-fed and grain-fed factory farm beef — has just enough of that good fat marbling to make the steaks savory and full of that great grass-fed beef flavor we love.

And while ribeyes are perfect steaks to cook with an oven — they are great when lightly seasoned and seared on a hot skillet with a bit of olive oil or unsalted butter — we prefer the simple pleasure of a perfectly cooked ribeye from the grill.

“ribeye-steak”

Head ButcherBox Chef Yankel Polak is a huge fan of the ribeye steak. Chef Yankel says, “Cast iron or open fire. Finish it with butter and tons of salt. Even the best ribeye will taste underwhelming if not seasoned properly.”

What gives ribeye steaks such great marbling? They come from the rib primal of a cow, specifically, the longissimus dorsi, which gets very little use, hence the excess fat dispersed throughout the muscle. But in a grass-fed ribeye steak, that fat is a bit healthier than in a grain-fed or corn-fed ribeye.

The fattiness burns up when being cooked adding a juicy moisture to the meat, making it incredibly tender. Once you eat a grilled ribeye, you will definitely notice its smooth, rich texture and delicious beefy flavor. When cooked on an open flame, charred lightly and medium-rare in the middle 

According to Chef Yankel, “Ribeyes have a ton of fat so super high heat is the best way to get the most flavor.” When cooking on an open flame, char a ribeye lightly on each side — a few minutes on each side — and then let it sit for eight to ten minutes before cutting into.  Follow these instructions and you will get a perfect medium-rare steak every time. 

Here, for a little more detail, is Chef Yankel’s recipe for Garlic Crusted Ribeye Steak:

Garlic-Crusted Ribeye Steak

  1. Dry ribeye steaks and bring to room temperature.  

  2. Season steaks generously on both sides with salt and pepper.

  3. Preheat grill. If using an open flame, wait for flames to die down. Right before grilling, make sure grill surface is extremely hot, then rub it down with an oil-soaked rag – we advise using tongs to hold the rolled-up rag.

  4. Rub heads of garlic with olive oil, 1 tsp kosher salt, and 1 tsp fresh black pepper and wrap in aluminum foil.

  5. Bake garlic for about 30 minutes on the cooler side of grill – indirect heat.

  6. Once baked, peel the skin off garlic and place in food processor with ghee. Pulse to make a paste.

  7. For medium-rare, place ribeye steaks at 45° angle across hottest part of grill grates, then grill for 2 – 3 min per side, while rotating 90° every 1 ½ min.

  8. Place steaks on a baking sheet and smear 1 large Tbsp of garlic paste on top of each steak.

  9. Move steak to the cooler part of the grill, then grill for 4 min per side. Keep your meat moving to ensure that it cooks evenly. Remove from grill when a meat thermometer inserted into thickest part reads 120°F.

  10. Let the steaks rest for 8 min before slicing.

“hog-farmer”

grilled-chicken-breast

Grilled chicken breast and chicken thighs: The essential summer recipes

Grilled chicken breast and chicken thigh: The essential summer recipes

Grilled chicken is the ultimate summer dish. Why heat up the oven or slave over a pot indoors when you can soak up some sunshine while grilling up your dinner?

The key to juicy, tender grilled chicken is the technique. Harnessing the power of indirect heat on the grill is the way to go. Whether it’s a gas or charcoal grill, spend some time building heat in your grill, then grill your chicken over indirect heat. You can use the direct flames and high heat for crisping, browning, and those characteristic grill marks.

The flavor profile possibilities are endless, too. Try Greek-marinated grilled chicken or spicy Italian grilled chicken. Citrus is grilled chicken’s best friend, from smoky citrus grilled chicken to grilled chicken with lemon and thyme.

Whatever marinade or spice-blend you opt for, these chicken recipes will keep you grilling all summer long.

1.      Juicy Grilled Chicken Breast

This juicy grilled chicken breast is all about the technique. Keep it pure and simple (to start, at least) with just a few bone-in, skin-on chicken breast halves, some salt, some oil, and a grill. The trick is to harness the power of indirect heat, whether you’re using a gas or charcoal grill. If using a gas grill, turn on all the burners and close the lid. Once the temperature inside the grill reaches 400°F, turn off one of the burners. You’ll be grilling your chicken in the indirect heat left by the now-off burner. For a charcoal grill, light 50 or 60 briquettes for 20 to 30 minutes, until they’re covered with ash. Clear them to one side, and place chicken breast halves over the indirect heat. Your chicken will take a quick trip to the direct heat for crisping and browning. Once you’ve mastered this technique, you can get more creative with a marinade or rub. 

2.      Grilled Greek Marinated Chicken Breast with Peach and Endive Salad 

If you’re trying to capture the essence of summer in a meal, this grilled Greek marinated boneless chicken breast with peach and endive salad will do it. Freshness abounds with summer fruits and veggies like peaches, avocado, endive lettuce, and corn. Meanwhile, boneless skinless chicken breasts get marinated in a deliciously zesty Greek vinaigrette and grilled quickly for color, then finished off in the oven. While you’re grilling chicken, you can also grill corn to add a delicious smoky char flavor to the accompanying salad. Toss the salad in Primal Kitchen’s Green Goddess dressing and add some tangy feta, and you’re in heaven. 

3.      Spicy Grilled Italian Chicken 

Heat things up with this Italian flavored, red pepper flake, and chili powder-spiced grilled chicken breast. Barbeque sauce, white wine vinegar, and lemon juice add tang while Italian seasonings like dried basil, dried oregano, and dried parsley add an herbaceous touch. Marinating the chicken in the sauce ensures tender, juicy breasts while basting it while grilling maximizes the spicy Italian flavor. Bonus: It only takes an hour to marinate and 20 minutes to grill up, making for one effortless summer meal.

4.      Aromatic Grilled Chicken Thighs

The ultimate spice blend prevails in this aromatic grilled chicken thighs recipe. With seasonings like garlic powder, onion powder, dried oregano, turmeric, chili powder, paprika, and of course salt and black pepper, these skin-on, bone-in, grilled chicken thighs are packed with flavor. The unique custom spice blend is better than anything you can find in a bottle, plus your kitchen will smell as heavenly as a spice shop as you prepare it. The trick to perfectly grilled and crispy, aromatic chicken is to cook it over indirect heat, bone side down for the majority of the time. Only flip it to the spiced-skin side at the end to avoid burning the spices.

“grilled-chicken-breast”

5.      Smoky Citrus Grilled Chicken Thighs

These smoky citrus grilled chicken thighs are extra special because they require a charcoal grill and hickory wood chips to perfect that smoke flavor. This recipe works with any cut of chicken, but boneless skinless chicken thighs ensure ultra-juicy and flavorful dark meat. Herbs like rosemary and thyme and plenty of citrus—including lemon, orange, and lime—really pack in the flavor to complement the smokiness from the hickory wood chips. Once again, indirect heat helps create masterfully charred yet juicy grilled chicken.

6.      Grilled Citrus Chicken Breast with Summer Watermelon Salad

Summer strikes again with these grilled citrus chicken breasts with summer watermelon salad. Boneless skinless chicken breasts get marinated in a mélange of aromatics, including fresh crushed garlic cloves, shallots, fresh thyme, and rosemary, whole lemon and orange and a bit of olive oil, salt, and pepper. All of the aromatics get pulsed in the food processor to form the perfect marinade. Meanwhile, a refreshing summer salad of grilled corn, red and yellow watermelon, cilantro, feta, and onion accompany the chicken, making for an ideal summer meal.

7.      Grilled Chicken Breasts with Lemon and Thyme

Simple yet bold, these grilled chicken breasts with lemon and thyme are a delicious quick meal, clocking in at 20 minutes total on the grill. Lemon juice and thyme meld with red pepper flakes, garlic, olive oil, salt and pepper for an uncomplicated marinade. Bone-in chicken breasts stand up to the heat to ensure succulent flavor and tenderness. If you don’t have dried thyme on hand, don’t worry, any similar dried spice will work. Think marjoram, oregano, rosemary, or sage.

Extra Tips

ButcherBox Head Chef Yankel Polak suggests the best way to grill a juicy chicken breast comes down to two key steps. The first is to pound your boneless chicken breast thin before you grill chicken. You can use a meat mallet or just your rolling pin, but either way, a thinner chicken breast allows for more evenly cooked meat. Second, once you’ve achieved the ideal internal temperature, set aside at room temperature and let the juices distribute throughout the now flavorful grilled chicken breast. 

Do both and you will get the ultimate summer dish, perfectly grilled chicken, every time you use the outdoor grill.

“grilling-for-a-party”

bacon-jam

Bacon is our jam – The history of the most delicious breakfast meat with a special bacon jam recipe

Check out an amazing bacon jam recipe at the bottom of this post from our Head ButcherBox Chef.

Bacon has been around for a long time. In fact, the earliest recorded examples of the cut date back to 1,500 B.C. The fatty back or belly of pork was popular with the Greeks and Roman, the latter who cooked it with figs and flavored with pepper. 

Breakfast meat history

What we know as bacon today is not precisely what has been traditionally known as bacon or bacoun. In much of Europe, the word bacon was used as a synonym for all pork. The word bacon and its earlier form bacoun were derived from French, German, and Teutonic versions for “back.”

The form of salt-cured and sliced bacon we know in America today is much different from its earlier forms and is known as “streaky” bacon in the United Kingdom. 

Bacon became a common dish in England starting in the 17th century. According to the Oxford Companion of Food, bacon, especially smoked bacon and extra-fatty bacon was a staple for almost everyone except the very poor across the British Isles. In fact, many families would keep their bacon in a prominent place in the home as a point of pride. For centuries, Bacon grease was a common cooking fat, which remained true until the mid-twentieth century when bacon fat was replaced by olive oil, vegetable oil, and other fats not derived from meat.

bacon-jam

Modern bacon

Today, Wiltshire in England remains one of the world’s bacon-producing centers; Wiltshire has been the center of the bacon universe since John Harris set up the first large-scale bacon curing business there in the 1770s.  

The modern, American version of bacon was an innovation of butcher and manufacturing. At the turn twentieth century, the meat industry moved away from salt-curing and smoking bacon, and found it more affordable to sugar-brine pork belly at a large scale. Before 1915, bacon was still sold as a solid hunk of meat — usually four pounds — and people cut bacon into smaller pieces in the home. 

Until the 1960s, bacon maintained its reputation as being a “country” cut of pork, a holdover from its English peasant popularity. As wet-cured, pre-sliced bacon became easier to package, it appeared more readily in stores and — due to its sweet and salty flavor — found its ways to the breakfast plates of many Americans as the perfect companion to fried eggs. 

You can even make homemade bacon jam these days

These days, you can find bacon beyond the morning breakfast table as the cut of pork has spiked in popularity over the past two decades. 

There is dark brown sugar candied bacon, maple bacon, applewood smoked bacon, turkey bacon, and even, shockingly, meatless veggie bacon. 

These days, you can find bacon cheeseburgers almost anywhere someone is making burgers, and it is especially useful — to add some fatty flavor — to lead cuts of beef like filet mignon. Bacon appears everywhere from donuts to ice cream to cocktails — in the form of sweet bacon candy — and can even be made into a form of bacon jam. 

Our Head ButcherBox Chef, Yankel Polak, has devised an ingenious bacon jam recipe that he thinks is best used when added to a cheeseburger. It could also be added to grilled cheese or mixed in with roasted and mashed potatoes, pasta, or scrambled eggs. 

Is your mouth watering yet?

Without further ado, here is Chef Yankel’s famous burger recipe featuring his own unique homemade bacon jam recipe featuring maple syrup, brown sugar, coffee, and Guinness.

Chef Yankel’s “Epic Burger With 15 Ingredient Homemade Bacon Jam”

Total time: 1 hour and 15 minutes 

Prep time: 60 minutes

Cook time: 15 minutes

Ingredients:

  • 4 ButcherBox Burgers or ButcherBox Ground Beef molded into 6oz burger patties

Bacon Jam

  • 1 pack (10 oz) ButcherBox Bacon, roughly chopped
  • ½ onion, diced
  • 3 Tbsp brown sugar
  • 3 garlic cloves, minced
  • ¼ tsp cayenne
  • 1 tsp cinnamon
  • ½ tsp nutmeg
  • ¼ c bourbon
  • 3 Tbsp cold brew coffee
  • 3 Tbsp Guinness
  • 3 Tbsp sherry vinegar
  • 3 Tbsp balsamic vinegar
  • ¼ c maple syrup
  • ¼ c ketchup 

Onion Rings

  • 1 red onion, sliced and separated
  • 1 c buttermilk
  • 1 Tbsp smoked paprika
  • 1 Tbsp garlic powder
  • 1 Tbsp chipotle powder
  • 1 tsp kosher salt
  • 1 c cornstarch
  • 2 c peanut oil 

Truffle Mayo

  • ½ c mayonnaise
  • 2 Tbsp truffle puree (or truffle oil)
  • salt and black pepper to taste

Fixins

  • salt and black pepper to taste
  • 2 Tbsp ghee
  • 4 thick slices sharp yellow cheddar
  • 4 leaves butter lettuce
  • 4 large tomato slices
  • 4 sesame hamburger buns


Directions:

1. Place bacon in a cold Dutch oven on medium heat (starting cold renders the fat better). Cook bacon until crispy, then drain half the bacon fat. Keep the other half in the pan.

2. Add onions to bacon and sauté. Once onions are translucent, add nutmeg, cinnamon, cayenne, garlic cloves, and brown sugar. Stir until sugar has melted.

3. Add bourbon, coffee, Guinness, sherry vinegar, balsamic vinegar, and maple syrup. Simmer on medium heat until liquid is reduced by half.

4. Remove from heat and let cool at room temperature for 5 min. Place mixture in food processor, add ketchup and pulse to a chunky jammy texture. Refrigerate for up to 30 days or freeze up to 6 months.

5. Soak red onion slices in buttermilk for 30 min.

6. Preheat peanut oil to 350°F.

7. Mix cornstarch, kosher salt, smoked paprika, chipotle powder and garlic powder.

8. Coat onion slices evenly with the spice mix and fry gently for 2 min or until golden brown. Let rest on a paper towel-lined plate to drain excess oil.

9. Mix mayo, truffle puree and salt and black pepper. Refrigerate until needed.

10. Bring burgers to room temperature and season both sides with salt and pepper.

11. Preheat a large skillet (preferably cast-iron skillet) and add 2 Tbsp ghee. Once the ghee is hot, sear burgers for 3 min on one side. Flip burgers, place cheddar on the burger and sear the other side for three more min or until desired doneness.

12. Spread truffle mayo liberally on both sides of the bun. Place lettuce leaf down first (to protect the bun from burger juices), followed by tomato.

13. Place burger on top of tomato followed by a healthy dollop of bacon jam. Top with onion rings and close that baby up! Be sure to let us know how it went! 

“how-to-cook-burgers”

steak marinade

Make a great chicken, pork, or grass-fed steak marinade for a mouthwatering meal

Quality chicken, pork, and beef can often be thrown directly on the grill without any seasoning — or with just a pinch of kosher salt and freshly-ground black pepper — and taste amazing. But, an excellent homemade steak marinade — for instance — can take your meat to the next level.

Many steaks can be immensely improved with a little kitchen creativity and some minced garlic or soy sauce. This is especially true of skirt steak, flank steak, and similar tougher cuts with lots of connective tissues.

But if you really want to pack flavor into a grass-fed, grass-finished steak or some pasture-raised, heritage-breed pork or free-range chicken, a little knowledge of how marinades work and which flavor combinations are best can make a standard weeknight meal into a savory, memorable culinary experience.

Is it necessary to marinate steak, pork, or chicken?

Why marinate, you ask? Marinating before grilling is an excellent way to add additional flavors and to get more tender meat.

Marinades work well because of the natural attributes of beef, chicken, and pork, according to Head ButcherBox Chef Yankel Polak. “The longer you leave a protein in a marinade the more flavor it should absorb,” he explains, “and, what’s more, marinating will tenderize a tougher cut of meat.”

The problem is that, in reality, most marinades only penetrate about 2 millimeters deep. “And, get this,” Chef Yankel says, “it all happens in the first few seconds.”

So, while many people think that marinating meat for extended periods of time, or even overnight, is the key to having meat with fantastic flavor, that’s not actually the case. “While there is nothing wrong with preparing your ingredients the day before, remember that a good marinade only needs minimal contact with your protein to do everything it’s supposed to do,” according to Chef Yankel.

A good marinade enhances flavors

While there are many options for chicken or steak marinades, you can pull right off the shelf of your grocery store to have a pretty good meal, making your own marinades is healthier and leads to more flavorful pork chops or a nice juicy steak.

If you can, try to keep the marinades as natural as possible. It would be foolish to take a nice cut of grass-fed steak or heritage-breed pork and then douse it with some combination of corn syrup and lab-made additives.

Keep in mind that different cuts and types of meat have different flavor profiles. Some flavors will work best with, say, a flank steak more so than a ribeye, and vice versa.

“Think about the item you are cooking, whether that’s chicken, beef, or pork, and use ingredients in your marinade that will complement the flavor,” Chef Yankel says.

Flavor profiles for each type of meat

According to our chef, the best complementary flavor profiles are citrus for chicken, sweet flavors for pork, and marinades that are rich and savory for beef, especially grilled steaks.

This is why lime and lemon juices go great with other spices in chicken marinades; pineapple, brown sugar, and maple are great to have in pork marinades; and balsamic vinegar, minced garlic, and mushroom flavors work well as steak marinades.

“While they don’t alter the internal structure of the meat,” Chef Yankel adds, “acidic elements in marinades will certainly give you that extra punch of flavor — the ‘wow’ factor that accompanies that first bite.”

Some flavors that can’t be made from scratch — unless you have time to ferment malt vinegar, molasses, anchovies, and tamarind extract for 18 months. So it is okay to mix some natural ingredients like rosemary or fresh lemon juice with a good soy sauce or Worcestershire sauce.

Using a homemade marinade on your grass-fed steak can change a mundane meal into something otherworldly. Experiment and you might discover unexpected flavor combinations that work wonders for your palate.

And, to save you some precious time, now you also know that you don’t even have to marinate for too long to get those flavorful benefits.

Watch Chef Yankel break down his favorite marinades for chicken, pork, and beef here. In the video below check out an easy steak marinade — that has very little prep time —featuring garlic, cilantro, lime zest and olive oil. According to Yankel, that’s all you need for a delicious steak every time.

Also, here is Chef Yankel’s favorite one-hour steak marinade recipe for grilling New York strip steaks:

  • 3 limes, both zest and juice
  • 1 bunch fresh cilantro, chopped
  • 1 head of minced garlic
  • 1 tablespoon black pepper
  • 1/4 cup olive oil
  • 1/4 cup parsley, chopped
  • 1/4 cup chives, chopped
  • 4 tablespoons tarragon, chopped
  • 4 tablespoons dill, chopped
  • 2 tablespoons whole grain mustard
  • 1 tablespoon dijon mustard
  • 1/4 cup white wine vinegar
  • 1/4 cup olive oil
  • 1 tablespoon coarse kosher salt
  • 1 tablespoon fresh ground black pepper
  1. Combine all marinade ingredients in small bowl. Mix well and coat steaks thoroughly.
  2. Allow steaks to marinate in a refrigerator at least one hour, then bring steaks to room temperature before cooking.
  3. Grill the strip steaks over charcoal or an open flame for 4 to 6 minutes per side, or until internal temperature reads 120°F. Rest steak 8 minutes before serving.

You can find more recipes here. Happy eating!


ribeye roast

Ribeye roast – For special occasions, Sunday dinner, or anytime

Don’t miss a special Ribeye Roast recipe from ButcherBox Head Chef Yankel Polak at the bottom of this post.

Here at ButcherBox, we believe the best way to bring friends together is over a delicious cut of grass-fed, grass-finished beef.

Our favorite cut to share with others is the ribeye roast. Perfectly-cooked, the ribeye roast goes well with an array of side dishes, red wine, and good friends.

What exactly is a ribeye roast?

Ribeye roasts — and ribeye steaks — come from the rib section of the cow, as the name implies. Specifically, ribeye roasts come from between the sixth and twelfth rib. It is a well-marbled section of muscle that is comprised of the longissimus dorsi, complexus, and spinalis muscles of a cattle. Ribeyes come in a number of different cuts and go by a few different names.

Most ribeye roasts are large, boneless cuts that have generous marbling and are best cooked over a few hours time. Traditionally the cut was used only on special occasions; a beef ribeye roast would be coated with salt and ground black pepper, spend an entire day in a roasting pan, and then be sliced up and presented as Sunday dinner or the centerpiece of a holiday meal.

Some roasts come with the bones included, and in this form is called standing rib roast and sometimes prime rib. It can also, confusingly, be called prime rib without the bone, and to add a level of complexity can be referred to as a roast beef mainly because it is beef roasted in an oven. (Check out our piece on often confused cuts for some clarification on the difference between prime rib roast and ribeye steak.)

The ribeye can be cut into steaks and cooked on a grill — with or without the bone — and has enough fatty, flavorful marbling that it needs little more than a pinch of sea salt and black pepper to make it a tender, mouthwatering treat.

A section of the ribeye can also be further cut down into a hard to find cut of steak known as the ribeye cap. The cut comes from the most tender part of this large muscle known as the spinalis dorsi that is highly-sought-out by discerning steak aficionados. The cut also goes by other names across the globe, including “Scottish fillet” in its boneless steak roast form.

Enough about the details of the ribeye, let’s get to the important stuff: How to prepare a delicious ribeye roast.

BBClickHere

How to cook a ribeye roast

You can order ribeye steaks from a butcher, or cut up a ribeye into steaks if you don’t want to put effort into roasting the cut. However, putting a little time and effort into the roast will pay off in the form of smooth, rich, well-marbled beef that you can easily slice up and serve to a number of dinner guests.

According to our Head Chef Yankel Polak, our ButcherBox boneless ribeye roast is a “breathtakingly marbled and tender hunk of meat.”

It can be prepared in numerous ways. For example, you can cook a ribeye roast in a slow cooker with some spices like fresh rosemary, minced garlic, and some vegetables. However, ribeye roast can be a bit too expensive to cook in this manner. “Pot roast,” beef usually tenderized by a day spent in a slow cooker is best with tough, less inherently flavorful cuts like chuck roast and shoulder steaks.

Below is ButcherBox Chef Yankel’s “Super Easy Ribeye Roast With Roasted Mushrooms and Eggplant.” This recipe serves eight, takes 20 minutes to prepare, and after two and half hours of cooking time, you’ll have a tender roast. It is quite simple and the perfect way to show off your cooking skills and delicious ButcherBox grass-fed beef.

The key is Chef Yankel’s use of a reverse-searing method, which allows you to sear the ribeye roast and let sit until it needs its final 15 minutes of cooking.

According to Chef Yankel, this will give you a medium-rare roast with a delicious brown crust. Also, he says, “This recipe won’t keep you stuck in the kitchen all night if you have guests.”

Super Easy Ribeye Roast With Roasted Mushrooms and Eggplant

Ingredients:

Beef Rub:

  • 1 ButcherBox Ribeye Roast
  • 3 Tbsp kosher salt  
  • 2 Tbsp garlic powder
  • 2 Tbsp onion powder
  • 2 Tbsp paprika
  • 2 Tbsp olive oil

Roasted Mushrooms and Eggplant

  • 2 lbs mushrooms, assorted variety, cut into similar size pieces
  • 4 Japanese eggplants, halved lengthwise
  • 6 garlic cloves, minced
  • 2 shallots, minced
  • 3 Tbsp fresh thyme, chopped
  • 3 Tbsp fresh parsley, chopped
  • 4 Tbsp extra virgin olive oil
  • 2 Tbsp sherry vinegar (or red wine vinegar)
  • salt and pepper to taste

Directions:

  1. Mix all ribeye rub ingredients and rub all over ribeye roast. Refrigerate on lowest shelf uncovered overnight. Remove from fridge 1 hr before roasting.
  2. Preheat oven to 250°F. Roast ribeye in a roasting pan until meat thermometer inserted into thickest part reads 115°F. Remove from oven and let rest for at least 20 min. The ribeye can sit out up to 2 hrs or be refrigerated until Step 7. If refrigerating, make sure to bring the ribeye back to room temperature before reheating.
  3. Preheat oven to 425°F.
  4. Mix all ingredients for the roasted vegetables except for the vinegar, then spread the vegetables evenly on sheet pans in a single layer.
  5. Roast vegetables in oven until lightly browned. Eggplant should be tender and mushrooms should shrink to half their original size.
  6. Remove vegetables from oven, sprinkle with vinegar and set aside.
  7. Place roast back in the oven and cook for an additional 15 min, until internal temperature is 125°F and the top is browned and crisp.
  8. Let ribeye roast rest for at least 20 min before carving. Happy Eating!

You can also check out Chef Yankel going through the steps of cooking a “Pan Seared Ribeye with Potatoes and Mushrooms”:


braised beef braising meat

How to braise beef and why it’s one of the best cooking methods

Whenever I come across braised short ribs on a restaurant menu, I have a hard time passing up the delectable dish. Just thinking about it, I can taste the melt-in-your-mouth, flavorful meat. In all my short rib adventures, I’ve never stopped to wonder how chefs create such divine creations.

The secret, I discovered comes down to braising.

A cooking method mixing high dry heat, low moist heat, and time

Braising is a two-step cooking method that uses both high-heat for a short period and low-heat for a longer period of time. First, it involves browning meat in olive oil, butter, ghee, or some other fat — on high heat — usually by sauteing in a pan. Second, the meat is cooked in a covered dish, in the juices left from the browning and often also with an added liquid such as stock, water, etc.

The second, slow-cooking step is done in a tightly covered pot, like a dutch oven, or, often, in a slow-cooker. This process is also sometimes referred to as “pot roasting.”

Slow-cooking — and, well, the use of a slow-cooker or Crock Pot — helps to add flavor and tenderizes tougher cuts of beef and other meats.

According to The Kitchen Encyclopedia, published in 1911, “Braising is a method much used in France, and is a cross between boiling and baking.” The word itself derives from the French word brasier, which is a form of braise, meaning “live coals.” A brasier or brazier, in French and English, is also another name for a receptacle to burn coal or charcoal. Dutch ovens can also be called brasiers. The origin of the term braising seems to come from a French word for a method using both dry heat and moist heat.

Why braise?

Braising can be done with any meat but is most often done with tough cuts of meat, because tender cuts usually don’t need additional tenderizing or flavor.

Cuts that traditionally have less flavor — say a chuck roast, shoulder steak, chuck pot roast, pork butt, or beef chuck arm — are the best cuts to use and may need richer braising liquids. The best way to add great flavor is with beef broth or chicken stock, as well as spices like rosemary, bay leaves, and other fresh herbs. Moreover, braising done in the style of a pot roast can include aromatic vegetables — carrots, onions, and more — for additional flavor.

How to braise meat

The first step of braising takes about ten minutes, but achieving truly fall-apart-tender meat takes many hours of cooking time. Our in-house ButcherBox Chef Yankel Polak recommends seasoning the meat with salt and black pepper, then searing your meat until you get a nice brown crust. When cooking pork, he likes to use apple cider as a braising liquid that can also help scraping the browned bits of meat left from searing. Chef Yankel also recommends adding tomato paste to your braising liquid for texture and taste. For added flavor and simplicity, he also advises using the same pot to sear and cook, covering the dish after the flavorful liquid and browned meat have simmered.

A long, slow cook is crucial for breaking down the proteins and tenderizing the meat. You’ll need to cook for at least an hour and a half to two hours (depending on the size of your cut of meat) in the oven set to 300 degrees. Cooking on low heat allows the meat to cook slowly as the braising liquid evaporates. It is this process that makes dishes like pulled pork, carnitas, and roasts fork-tender.

Whether cooking pork in the slow cooker or keeping a watchful eye on a roast spending a day in a Dutch oven, meat braising in its juices and spiced-up flavor can turn a simple cut of beef or pork into a truly amazing dish.

You can find some of Chef Yankel’s favorite recipes to braise beef, chicken, or pork here, or watch the video below for more braising techniques.

If you want more from Chef Yankel, check out his recommendations for the best red wine to pair with braised beef and other dishes. 

Our monthly ButcherBox comes often comes with cuts like pork butt and grass-fed beef roasts that are perfect for braising. You can also get these cuts in a custom ButcherBox. If you’re not a member already, you can sign up here.