Tag Archives: grilling

Cooking for groups? Tips for grilling for a party, family, or big crowd

Last fall, ButcherBox hosted a large, family-style meal at a small farm outside of Boston. In attendance were some of our most loyal members. For the event, ButcherBox Head Chef Yankel Polak cooked up an array of different ButcherBox cuts of beef, chicken, and pork.

The dinner at Matlock Farm required more than 150 ingredients to cook dishes like grass-fed New York strip steak and free-range organic boneless chicken thighs for about 30 people. In a blog post from last fall, Chef Yankel explains all the intricate planning and work that went into pulling off an amazing evening in a relatively remote locale. 

Last week, Chef Yankel repeated the feat, cooking a massive meal for the entire ButcherBox team as the company officially opened its new test kitchen and content studio in an old warehouse on the North Shore of Massachusetts.

This time, however, he took less of the catering approach and used some strategies, planning, and skills that anyone can mimic if they are trying to cook for a large crowd this summer. 

“grilling-for-a-party”

Here are the key takeaways from Chef Yankel’s guide to cooking for a crowd:

Plan ahead – Food and tools

Chef Yankel has a ton of experience on what does and what doesn’t work when cooking for a large number of people. The lessons learned have led to an important insight: Detailed planning is integral to pulling off a large meal.

The first key is making sure you have enough food. With cooking for a large group, it is better to have leftovers than to leave people wanting more. With side dishes, it is a little easier to gauge how many dishes to make based on the crowd you have coming. It is much easier to make an extra tray of vegetables or potatoes and let people take the excess home. 

When it comes to meat, especially burgers, it is a little trickier. 

Most people will eat a fist-sized piece of steak — between 4 to six ounces — or one small grilled chicken breast at a cookout. You can get filet mignon that size or get a larger steak, like ribeye steak, that is shared among a couple of guests. With flank steaks, skirt steaks, and similar slicing steaks, consider cuts that can be split between three to four eaters. That way, if you have 12 guests, you can get four skirt steaks to grill up. 

With burgers, the ideal size is between a quarter of a pound and a bit more than a third of a pound, depending on your guests’ appetites. If you are making smaller burgers, you can get four out of one pound of ground grass-fed beef. If you are making some heftier cheeseburgers, you can get four six-ounce burgers out of one-and-a-half pounds of ground beef. 

Beyond the food, make sure you have all the tools and backups you need. If using a gas grill, make sure to have a spare propane tank on hand; with charcoal, make sure you fire up enough when starting the grill, so you don’t lose heat. It’s easy to forget key tools like spatulas, tongs, knives, and cutting boards, but they are likely not far from where you are cooking your food. If you don’t have dishes or tins to store the food you cook and some tin foil to keep it warm until all the other food is ready to eat, you are going to have some cold food and unhappy guests.

Also, never forget your meat thermometer. Undercooked or over-cooked food is the cardinal sin of hosting a large, grilled meal. 

“cooking-music”

Keep it simple – Salt, pepper, oil, and then add a few fresh ingredients

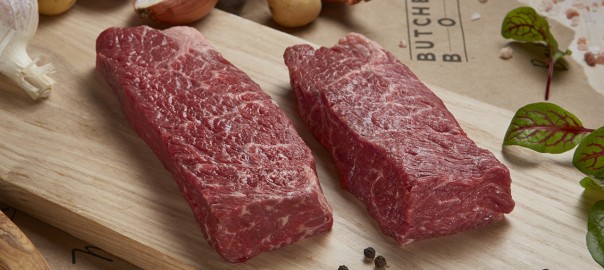
When you have a delicious grass-fed steak, like a New York strip steak, all you need to do to make it taste amazing is coat it with some kosher salt and fresh ground pepper. When it comes to marinades, rubs, or seasoning for sides, the fewer, the fresher, the better. 

Olive oil is one of the keys to almost everything you’ll cook. It can be used as a base for marinades. Olive oil is good to toss veggies in after they’ve cooked — balsamic vinaigrette is also perfect to add to grilled vegetables like asparagus, summer squash, peppers, and onion…after they cook.

However, olive oil is essential for cooking almost everything on the grill for one reason. Instead of putting too much olive oil in a marinade or directly on the vegetables you might be grilling, use it to coat the grill. Grab a clean rag, dip it in the olive oil, and then rub it over the grates lightly. This is one of Chef Yankel’s top grilling tricks, and it keeps food burning and drying flare-ups to a minimum.

Time it out

You are going to need to remember a few things about timing.

Cook your sides first. They don’t lose any flavor or freshness if kept warm and then quickly reheated before serving. In the video below, Chef Yankel uses two grills but makes sure to cook the item that takes longest for his meal — the potatoes — first. That way, you can cook the meat closer to serving time. 

We’ve shared the importance of letting your meat rest many times. But it’s still important to reiterate: Let chicken, pork, and steak rest sit at room temperature for eight to ten minutes before cutting or serving. This allows the natural juices to disperse. 

Cooking large amounts of meat

When cooking steak, chicken, or pork, Chef Yankel uses two methods that get equal results. Both require setting up two different temperature zones on the grill. With a gas grill, that can be done by raising or lowering the heat of the burners. On a charcoal grill, once you’ve fired up your charcoal, move it to one side of the grill. 

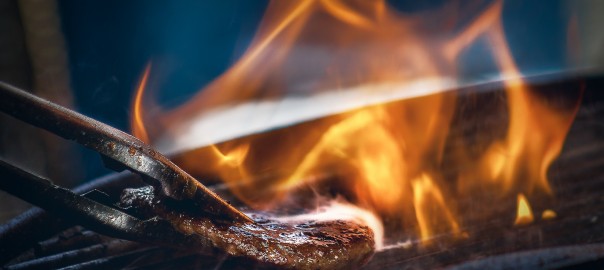
The more common practice — and one that is easier when cooking larger quantities of meat — is to put the steak, pork, or chicken on the hot side first and to turn for a few minutes each side. This creates a char or sear that generates a ton of flavor and texture, which is why we sear. in once you move it to the lower temperature side to finish cooking. The other method — one Chef Yankel uses for New York strip steaks and filet mignon, more tender cuts — is the reverse sear. Basically, it is the opposite of the first grilling technique. Cook on the warm side first and then finish by searing on the hot section of the grill.

While you could cook a few filets or ribeye steaks at once, it makes more sense to use a cut of beef like flank steak or skirt steak for larger groups. You can put three to four decent size skirt steaks — marinated with any number of delicious, savory flavors — on the grill at the same time and they cook evenly.

For burgers, you can cook on even heat. No need to sear. But make sure to give burgers the same post-grilling rest period as other meats.

A vital step in this process, especially when cooking a bunch of steaks, is to get the correct level of doneness. To do that, you need a meat cooking chart and a meat thermometer — we love the Thermapen instant-read thermometer — to get the perfect internal temperature.

With a steak, get the temperature five to 10 degrees cooler than the temperature you are trying to achieve as it will continue to cook when resting. 

As always, make sure to cut your steak against the grain. If you watched the video above, you’ll notice Chef Yankel likes to cut a flank steak in half, with the grain, before cutting against the grain in smaller pieces. 

More than anything, have fun! There’s no point in hosting a cookout or grilling for a party if you are going to stress while prepping and cooking the meal. Get others involved and crank some cooking music and enjoy!

Denver steak

The Denver steak: An American innovation

While discoveries in centuries-old industries are exceedingly rare, they do still occur from time to time.

Witness the Denver steak, a uniquely American, and rather “new” cut of meat that, if you are lucky, you can find on the menu at some of the best purveyors of meat across the country. (The Denver steak is also a part of this month’s ButcherBox for some subscribers.)

While the profession of “butcher” has been around likely as long as cattle have been domesticated — and the oldest butcher guild in England was founded in the tenth century — the Denver cut is less than a decade old.

So first, what exactly is a Denver steak?

The cut comes from the chuck roll, which is mostly muscular meat from the area that starts under the shoulder blade and continues to the ribs and backbone. Some common steaks that derive from this area include the ribeye and Delmonico steaks. More specifically, the Denver steak comes from the serratis ventralis section of the chuck underblade. Most of the meat in this area is tough and tends to be used for ground beef and stew meat. If it is cooked for other purposes, it often needs to be braised or roasted over long periods of time.

But the Denver steak is an exception to the tough beef from this part of a cow.

Getting at a Denver steak out of the chuck roll is a bit of an onerous process. It usually comes from a section that accounts for only eight total pounds of an average 25-pound chuck roll. The cut is a part of the muscle that is more flavorful, due to marbling, and more tender than the surrounding meat. This section of the shoulder underblade gets a lot of use, but the particular area that derives the Denver steak is one often used less and therefore has more fat, i.e., marbling. The challenge of making this often tear-shaped cut comes from separating the tough connective muscle tissue surrounding it.

It is a very rare — as in challenging to find — cut. In fact, before 2009, you couldn’t find a Denver steak at all. It didn’t exist.

(Note: The history on this steak is a bit confusing, as similar steaks appear in other cultures across the world. Their origin, too, is not always clear. For instance, the zabuton is an extremely rare cut of Wagyu steak found in Japan. The name, which in Japanese means “flat cushion,” refers to the shape it is often presented in. This cut is often sliced extremely thin and cooked for a very short period of time — like eight seconds. Similar cuts from the same region of a cow can be found throughout the world, yet, as far as I’ve found, few are promoted as a steak meant to be thrown on the grill and cooked. The key modifier in the previous sentence being “promoted,” as you will see below.)

The Denver steak as we know it comes out of a project funded by the Cattleman’s Beef Board, the Beef Checkoff Program, a project whose goal is to identify and promote new and potentially more affordable cuts of meat. The Denver steak is the result of a research project from the 1990’s by meat-science professors at the University of Florida and the University of Nebraska.

The moniker “Denver steak” has no historical significance; it is not as if the cut is more popular in the Rocky Mountain foothills. It is actually the marketing brainchild of Beef Checkoff Program and was “unveiled” with the cut in 2009.

So, in more ways than one, the Denver steak, both an innovation and a bit of a marketing ploy, is a most American creation.

One last thing to know about the Denver steak: Among the thousands of cuts identified during the research project that led to the discovery of the cut, the Denver steak is the fourth most tender muscle section of a heifer, steer, or cow.

You will undoubtedly discover this once you take your first bite.

According to most  — but not all — chefs, the best way to cook a Denver steak is to do so rather quickly on a very hot grill. The key to a great Denver steak experience, however, is how you slice this particular cut.

As we’ve pointed out before, how you cut your steak can have a tremendous impact on taste and tenderness; cutting the wrong way and you will make a potentially delectable steak tough and less flavorful. This is especially true for a Denver steak which could be considered a cousin to other, better-known steaks to come out of the Beef Checkoff program such as the flat iron steak.

Like many other muscular cuts, the Denver steak should be cut against the grain for maximum taste and tenderness. Also, be careful not to overcook, something that is especially true with grass-fed steaks.

Now you know more about the cut, get out there an throw one on the grill and enjoy so good old-fashioned American ingenuity.

james-sutton-198306 copy

How to cook an amazing grass-fed burger this summer

Yesterday, the 4th of July, is officially the most popular barbecue day in America. More hot dogs, burgers, sausages, and other slabs of meat were cooked on grills across the nation than on any other day.

The staple of any good cookout, whether it’s part of a celebration of America’s birthday or otherwise, is the cheeseburger.

Cooking a burger is one of the most simple things you can do; that is, unless you decide to make it more challenging than it needs to be and screw it up. Using grass-fed beef can add a bit more difficulty to the task if you don’t know what you’re doing.

Our ButcherBox grass-fed ground beef has a meat-to-fat ratio of 80 percent meat to 20 percent fat, which is just the perfect amount of fat to ensure that the meat stays rich and juicy, and maintains a robust flavor.

Our in-house chef Yankel Polak says that, first and foremost, grass-fed burgers are better because of their flavor. “Grass-fed has a significantly more developed flavor, almost as though its been dry aged,” Yankel says.

As we’ve mentioned previously, the health benefits of grass-fed meat are numerous. Not only are you getting meat that hasn’t been fattened with grains on a feedlot but has actually eaten grass its entire life — which is more humane as well — but it is considered more nutritious according to many people far more knowledgeable about eating healthy than us.

As our friend Liz Wolfe of Real Food Liz explained the benefits of our grass-fed beef, “Their meat is healthier for us…more conjugated linoleic acid (a super interesting and health-promoting substance) and a better ratio of Omega 3 to Omega 6 fats.”

Enough about how great the meat is, here’s how to take grass-fed ground beef and turn it into something magical.

First, make sure to preheat the grill. If you are using an open flame, let the heat source burn down which will minimize flare-ups, something more common with grass-fed beef.

Yankel says that you should always start with an extremely hot surface. “I like to set up two zones when grilling so I can sear on the hottest part and move it to the lower temp to finish,” Yankel suggests. “That initial blast of heat is crucial to get the flavorful caramelized crust without overcooking the inside.”

In terms of add-ins. Most chefs agree that the more simple you keep it the better the burger ends up. The best thing to add to a grass-fed burger is salt and pepper. “Once you start mixing vegetables and bbq sauce into your ground beef you’re going to experience changes in cooking time and texture and you’ll lose that amazing beefy flavor,” Yankel explained.

Grass fed beef in general cooks about 30 percent faster than grain fed. Chef Yankel says, “Obviously there’s a lot of room for variety and error here but the general rule of thumb should be ‘don’t walk away while its cooking’.”

A good rule of thumb for a 6 oz. burger is to cook it for about 4 minutes for medium-rare. Although you’d be tempted to do so, the less you flip them the more they retain their juiciness and flavor. “Grass finished tends to be a bit dryer and chewier after 130 degrees, or medium. So you definitely want to cook your burgers to medium rare. (The one time to break this rule would be our upcoming “Bacon Celebration” recipe where we mix a whole bunch of chopped bacon into the ground beef for burgers. Then you can cook away, and they stay moist and juicy due to the additional incorporated fat content.)

For the best possible flavor and texture always allow ButcherBox grass-fed beef to rest in a warm place 8 to 10 minutes after cooking before cutting or serving.

Lastly, the best burgers are given some time to rest after cooking. “The longer it rests, the better it will taste, the juicier it will be, the more vibrant the color inside,” says Yankel.

The biggest mistake people make when cooking grass-fed burgers is that they overcook the meat. “Meat continues to cook after removing it from the heat,” as Chef Yankel says.

And you thought all you had to do was grab some ground beef and throw it on the grill. Cooking great grass-fed burgers takes a lot more attention to detail than you might have imagined.

The great thing is that the end result is an amazing, healthy burger.

Enjoy!