Tag Archives: gas grill

smoking-meat

The ultimate guide to smoking meat at home

Smoking meat is a prehistoric culinary art. In the past, the technique was used to preserve protein-rich foods. Smoking dehydrates meat and imparts antibacterial properties that keep it from spoiling quickly. While our ancestors used the method to preserve red meat and fish, today smoking is used for all kinds of meat — not just as a preservation method — and the enhanced flavor makes it quite the delicacy.

We’re most familiar with smoked meats in the form of barbecue: When meat is treated to the low and slow treatment in a smoker, connective tissues and collagen within the meat break down,  resulting in ultra-flavorful, ultra-tender food. Top that off with the bevy of barbecue sauces we’ve invented — vinegar-based, sweet, thick and tangy, you name it — and you’re in heaven.

This guide delves into the ins and outs of smoking meat at home — from equipment to wood chips to the best cuts of meat to smoke.

Equipment

There are several fancy smoker options, from pellet smokers to vertical electric smokers to offset smokers for the true meat smoking aficionado. These smokers are specially designed for applying indirect heat at steady low temperatures, and most cost several hundreds of dollars.  While cooking with a Traeger wood pellet grill can be amazing, if you’re a novice who’s not ready to invest too heavily into smoking equipment, have no fear.

Everyday gas grills and charcoal grills can be manipulated to smoke meat with just a little effort.

Gas grills can be tricky to use as smokers, as they’re designed to cook meat over direct heat at high temperatures — the opposite of smoking, which is low, indirect heat over a long period of time.

With a little patience, however, a gas grill will smoke your meat. You’ll need to build an indirect heat zone and a direct heat zone within your grill, making sure to keep your meat in the indirect zone. Experiment with your burners until you’re able to bring the internal temperature to around 250°F which you can check with a meat thermometer (for most cuts of meat, anyway).

You’ll need a smoke box to hold your — soaked and drained — wood chips. Newer gas grills sometimes come with a built-in metal smoker box, but you can also purchase a heavy duty metal smoker box or make an inexpensive one at home by placing the wood chips in a foil pan, covering it with heavy-duty aluminum foil, and adding slits with a knife. 

It’s a good idea to set up a drip pan to collect the drippings of your meat. Also, be sure to add a small amount of liquid to the drip pan — like water, apple juice, or beer — to add moisture and keep the drippings from drying out. Don’t set the pan directly on top of the burners, but rather on a grate, with another grate above for the meat. 

As for a kettle or charcoal grill, like a traditional Weber, things are a little simpler. Remove the cooking grate from your grill and place the drip pan on one side. Remember to fill it with some liquid. Next, pile up your coals or lump charcoal on the opposite side of the grill. 

Once the coals are white hot, you can add your wood and then smoke your meat over the drip pan. While you’ll occasionally need to open the grill to add more coal or wood, try not to disturb the smoking process.

Cuts of Meat

In truth, you can smoke pretty much any kind of meat or seafood. Poultry, red meat, pork, fish are all fair game — game meat, like venison, is also great when smoked.

But, if you’re looking for meats that respond really well to the smoker, you’ll actually want to aim low, rather than high. Low-cost, tougher cuts of meat tenderize when smoked low and slow.

For example, try Boston butt — or simply pork butt as it’s also simply called — for sumptuous pulled pork. Be sure to rub your pork butt amply with your desired spices — we like this smoky coffee rub recipe. Other pork options include ribs, like this brown sugar rub and mustard barbeque sauce-laced recipe. You can also smoke sausages for a complex, savory flavor.

While you can smoke leaner cuts like pork loin, it’s not ideal, as it responds better to grilling or roasting than smoking. 

Beef brisket is the king of smoked meat, and the perfect cut when it comes to smoked beef. Give this smoked brisket with citrus marinade a whirl. But one thing to remember is not to smoke steaks—seriously, a simple grill or hot skillet is a better bet.

Poultry like whole chickens and turkeys turn out great in the smoker. You can also smoke chicken leg quarters if you’re not feeling up to the whole chicken yet. Here are some pecan smoked chicken wings for a super simple smoked recipe.

Wood Chips and Chunks

Not all wood is created equal when it comes to smoking meat. For one, you should never use any old wood you chopped down in your backyard — it’s potentially toxic. Never fear, though, there are plenty of other woods to experiment with as you smoke meat

While wood chips are sold more readily in most grocery stores and hardware stores, they tend to ignite quickly and burn out quite fast. This is not ideal for smoking low and slow. Wood chunks, on the other hand, burn for hours in a smoker. They do take a bit longer to ignite, but if you’re smoking meat, you’ve probably already committed the time.

If you use wood chips, be sure to soak them for at least 30 minutes before using. This will ensure they burn long enough to impart some flavor to the food.

What about the many varieties of wood? Getting the smoky flavor you want requires choosing the right wood.

Consider them on a scale of mild to intense. Fruity woods, like apple, peach, cherry, and pear, are light and sweet. They pair well with poultry, fish, and pork. Hickory, maple, pecan, and oak are stronger, but not overwhelming. Beef, game, and pork all go well with these woods. Mesquite is the most intense wood—it’s best used in moderation and with red meat.

Once you’ve mastered smoking with one wood, feel free to experiment with mixing woods for different flavors. 

Now, you’re equipped with everything you need to know to get started on smoking meat. Get cooking!
grilled-chicken-breast

Grilled chicken breast and chicken thighs: The essential summer recipes

Grilled chicken breast and chicken thigh: The essential summer recipes

Grilled chicken is the ultimate summer dish. Why heat up the oven or slave over a pot indoors when you can soak up some sunshine while grilling up your dinner?

The key to juicy, tender grilled chicken is the technique. Harnessing the power of indirect heat on the grill is the way to go. Whether it’s a gas or charcoal grill, spend some time building heat in your grill, then grill your chicken over indirect heat. You can use the direct flames and high heat for crisping, browning, and those characteristic grill marks.

The flavor profile possibilities are endless, too. Try Greek-marinated grilled chicken or spicy Italian grilled chicken. Citrus is grilled chicken’s best friend, from smoky citrus grilled chicken to grilled chicken with lemon and thyme.

Whatever marinade or spice-blend you opt for, these chicken recipes will keep you grilling all summer long.

1.      Juicy Grilled Chicken Breast

This juicy grilled chicken breast is all about the technique. Keep it pure and simple (to start, at least) with just a few bone-in, skin-on chicken breast halves, some salt, some oil, and a grill. The trick is to harness the power of indirect heat, whether you’re using a gas or charcoal grill. If using a gas grill, turn on all the burners and close the lid. Once the temperature inside the grill reaches 400°F, turn off one of the burners. You’ll be grilling your chicken in the indirect heat left by the now-off burner. For a charcoal grill, light 50 or 60 briquettes for 20 to 30 minutes, until they’re covered with ash. Clear them to one side, and place chicken breast halves over the indirect heat. Your chicken will take a quick trip to the direct heat for crisping and browning. Once you’ve mastered this technique, you can get more creative with a marinade or rub. 

2.      Grilled Greek Marinated Chicken Breast with Peach and Endive Salad 

If you’re trying to capture the essence of summer in a meal, this grilled Greek marinated boneless chicken breast with peach and endive salad will do it. Freshness abounds with summer fruits and veggies like peaches, avocado, endive lettuce, and corn. Meanwhile, boneless skinless chicken breasts get marinated in a deliciously zesty Greek vinaigrette and grilled quickly for color, then finished off in the oven. While you’re grilling chicken, you can also grill corn to add a delicious smoky char flavor to the accompanying salad. Toss the salad in Primal Kitchen’s Green Goddess dressing and add some tangy feta, and you’re in heaven. 

3.      Spicy Grilled Italian Chicken 

Heat things up with this Italian flavored, red pepper flake, and chili powder-spiced grilled chicken breast. Barbeque sauce, white wine vinegar, and lemon juice add tang while Italian seasonings like dried basil, dried oregano, and dried parsley add an herbaceous touch. Marinating the chicken in the sauce ensures tender, juicy breasts while basting it while grilling maximizes the spicy Italian flavor. Bonus: It only takes an hour to marinate and 20 minutes to grill up, making for one effortless summer meal.

4.      Aromatic Grilled Chicken Thighs

The ultimate spice blend prevails in this aromatic grilled chicken thighs recipe. With seasonings like garlic powder, onion powder, dried oregano, turmeric, chili powder, paprika, and of course salt and black pepper, these skin-on, bone-in, grilled chicken thighs are packed with flavor. The unique custom spice blend is better than anything you can find in a bottle, plus your kitchen will smell as heavenly as a spice shop as you prepare it. The trick to perfectly grilled and crispy, aromatic chicken is to cook it over indirect heat, bone side down for the majority of the time. Only flip it to the spiced-skin side at the end to avoid burning the spices.

“grilled-chicken-breast”

5.      Smoky Citrus Grilled Chicken Thighs

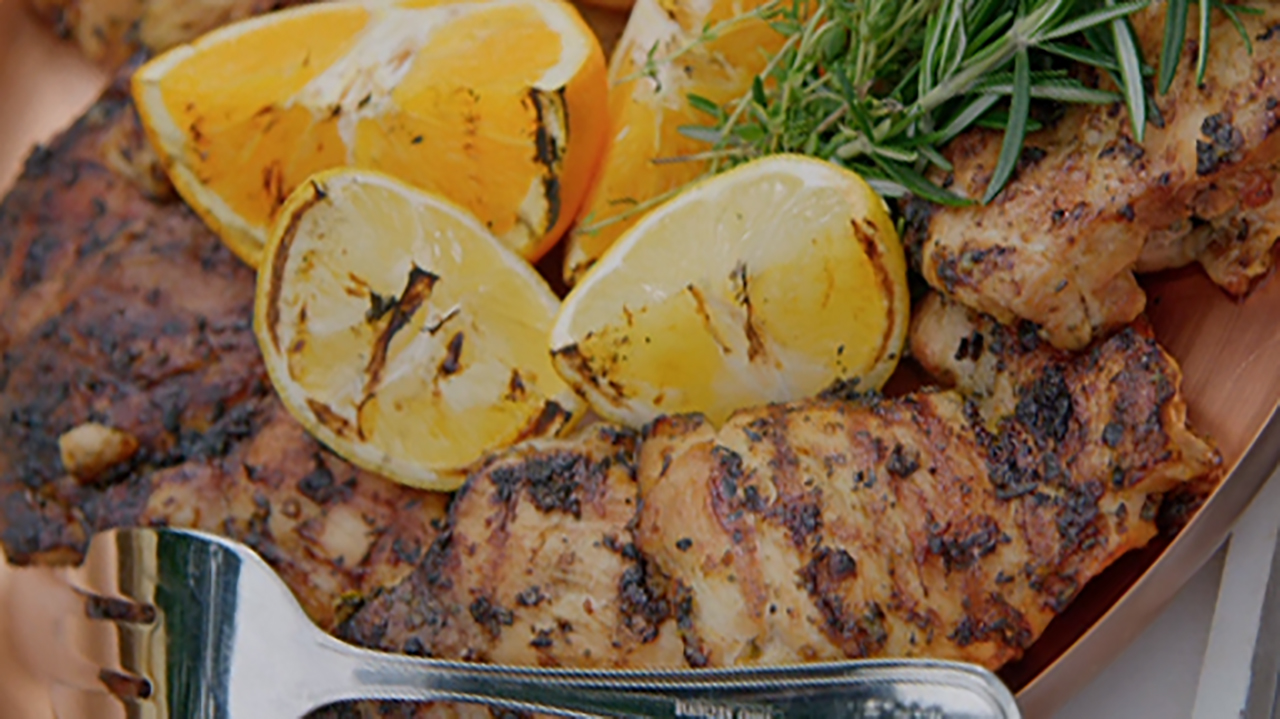
These smoky citrus grilled chicken thighs are extra special because they require a charcoal grill and hickory wood chips to perfect that smoke flavor. This recipe works with any cut of chicken, but boneless skinless chicken thighs ensure ultra-juicy and flavorful dark meat. Herbs like rosemary and thyme and plenty of citrus—including lemon, orange, and lime—really pack in the flavor to complement the smokiness from the hickory wood chips. Once again, indirect heat helps create masterfully charred yet juicy grilled chicken.

6.      Grilled Citrus Chicken Breast with Summer Watermelon Salad

Summer strikes again with these grilled citrus chicken breasts with summer watermelon salad. Boneless skinless chicken breasts get marinated in a mélange of aromatics, including fresh crushed garlic cloves, shallots, fresh thyme, and rosemary, whole lemon and orange and a bit of olive oil, salt, and pepper. All of the aromatics get pulsed in the food processor to form the perfect marinade. Meanwhile, a refreshing summer salad of grilled corn, red and yellow watermelon, cilantro, feta, and onion accompany the chicken, making for an ideal summer meal.

7.      Grilled Chicken Breasts with Lemon and Thyme

Simple yet bold, these grilled chicken breasts with lemon and thyme are a delicious quick meal, clocking in at 20 minutes total on the grill. Lemon juice and thyme meld with red pepper flakes, garlic, olive oil, salt and pepper for an uncomplicated marinade. Bone-in chicken breasts stand up to the heat to ensure succulent flavor and tenderness. If you don’t have dried thyme on hand, don’t worry, any similar dried spice will work. Think marjoram, oregano, rosemary, or sage.

Extra Tips

ButcherBox Head Chef Yankel Polak suggests the best way to grill a juicy chicken breast comes down to two key steps. The first is to pound your boneless chicken breast thin before you grill chicken. You can use a meat mallet or just your rolling pin, but either way, a thinner chicken breast allows for more evenly cooked meat. Second, once you’ve achieved the ideal internal temperature, set aside at room temperature and let the juices distribute throughout the now flavorful grilled chicken breast. 

Do both and you will get the ultimate summer dish, perfectly grilled chicken, every time you use the outdoor grill.

“grilling-for-a-party”

Cooking for groups? Tips for grilling for a party, family, or big crowd

Last fall, ButcherBox hosted a large, family-style meal at a small farm outside of Boston. In attendance were some of our most loyal members. For the event, ButcherBox Head Chef Yankel Polak cooked up an array of different ButcherBox cuts of beef, chicken, and pork.

The dinner at Matlock Farm required more than 150 ingredients to cook dishes like grass-fed New York strip steak and free-range organic boneless chicken thighs for about 30 people. In a blog post from last fall, Chef Yankel explains all the intricate planning and work that went into pulling off an amazing evening in a relatively remote locale. 

Last week, Chef Yankel repeated the feat, cooking a massive meal for the entire ButcherBox team as the company officially opened its new test kitchen and content studio in an old warehouse on the North Shore of Massachusetts.

This time, however, he took less of the catering approach and used some strategies, planning, and skills that anyone can mimic if they are trying to cook for a large crowd this summer. 

“grilling-for-a-party”

Here are the key takeaways from Chef Yankel’s guide to cooking for a crowd:

Plan ahead – Food and tools

Chef Yankel has a ton of experience on what does and what doesn’t work when cooking for a large number of people. The lessons learned have led to an important insight: Detailed planning is integral to pulling off a large meal.

The first key is making sure you have enough food. With cooking for a large group, it is better to have leftovers than to leave people wanting more. With side dishes, it is a little easier to gauge how many dishes to make based on the crowd you have coming. It is much easier to make an extra tray of vegetables or potatoes and let people take the excess home. 

When it comes to meat, especially burgers, it is a little trickier. 

Most people will eat a fist-sized piece of steak — between 4 to six ounces — or one small grilled chicken breast at a cookout. You can get filet mignon that size or get a larger steak, like ribeye steak, that is shared among a couple of guests. With flank steaks, skirt steaks, and similar slicing steaks, consider cuts that can be split between three to four eaters. That way, if you have 12 guests, you can get four skirt steaks to grill up. 

With burgers, the ideal size is between a quarter of a pound and a bit more than a third of a pound, depending on your guests’ appetites. If you are making smaller burgers, you can get four out of one pound of ground grass-fed beef. If you are making some heftier cheeseburgers, you can get four six-ounce burgers out of one-and-a-half pounds of ground beef. 

Beyond the food, make sure you have all the tools and backups you need. If using a gas grill, make sure to have a spare propane tank on hand; with charcoal, make sure you fire up enough when starting the grill, so you don’t lose heat. It’s easy to forget key tools like spatulas, tongs, knives, and cutting boards, but they are likely not far from where you are cooking your food. If you don’t have dishes or tins to store the food you cook and some tin foil to keep it warm until all the other food is ready to eat, you are going to have some cold food and unhappy guests.

Also, never forget your meat thermometer. Undercooked or over-cooked food is the cardinal sin of hosting a large, grilled meal. 

“cooking-music”

Keep it simple – Salt, pepper, oil, and then add a few fresh ingredients

When you have a delicious grass-fed steak, like a New York strip steak, all you need to do to make it taste amazing is coat it with some kosher salt and fresh ground pepper. When it comes to marinades, rubs, or seasoning for sides, the fewer, the fresher, the better. 

Olive oil is one of the keys to almost everything you’ll cook. It can be used as a base for marinades. Olive oil is good to toss veggies in after they’ve cooked — balsamic vinaigrette is also perfect to add to grilled vegetables like asparagus, summer squash, peppers, and onion…after they cook.

However, olive oil is essential for cooking almost everything on the grill for one reason. Instead of putting too much olive oil in a marinade or directly on the vegetables you might be grilling, use it to coat the grill. Grab a clean rag, dip it in the olive oil, and then rub it over the grates lightly. This is one of Chef Yankel’s top grilling tricks, and it keeps food burning and drying flare-ups to a minimum.

Time it out

You are going to need to remember a few things about timing.

Cook your sides first. They don’t lose any flavor or freshness if kept warm and then quickly reheated before serving. In the video below, Chef Yankel uses two grills but makes sure to cook the item that takes longest for his meal — the potatoes — first. That way, you can cook the meat closer to serving time. 

We’ve shared the importance of letting your meat rest many times. But it’s still important to reiterate: Let chicken, pork, and steak rest sit at room temperature for eight to ten minutes before cutting or serving. This allows the natural juices to disperse. 

Cooking large amounts of meat

When cooking steak, chicken, or pork, Chef Yankel uses two methods that get equal results. Both require setting up two different temperature zones on the grill. With a gas grill, that can be done by raising or lowering the heat of the burners. On a charcoal grill, once you’ve fired up your charcoal, move it to one side of the grill. 

The more common practice — and one that is easier when cooking larger quantities of meat — is to put the steak, pork, or chicken on the hot side first and to turn for a few minutes each side. This creates a char or sear that generates a ton of flavor and texture, which is why we sear. in once you move it to the lower temperature side to finish cooking. The other method — one Chef Yankel uses for New York strip steaks and filet mignon, more tender cuts — is the reverse sear. Basically, it is the opposite of the first grilling technique. Cook on the warm side first and then finish by searing on the hot section of the grill.

While you could cook a few filets or ribeye steaks at once, it makes more sense to use a cut of beef like flank steak or skirt steak for larger groups. You can put three to four decent size skirt steaks — marinated with any number of delicious, savory flavors — on the grill at the same time and they cook evenly.

For burgers, you can cook on even heat. No need to sear. But make sure to give burgers the same post-grilling rest period as other meats.

A vital step in this process, especially when cooking a bunch of steaks, is to get the correct level of doneness. To do that, you need a meat cooking chart and a meat thermometer — we love the Thermapen instant-read thermometer — to get the perfect internal temperature.

With a steak, get the temperature five to 10 degrees cooler than the temperature you are trying to achieve as it will continue to cook when resting. 

As always, make sure to cut your steak against the grain. If you watched the video above, you’ll notice Chef Yankel likes to cut a flank steak in half, with the grain, before cutting against the grain in smaller pieces. 

More than anything, have fun! There’s no point in hosting a cookout or grilling for a party if you are going to stress while prepping and cooking the meal. Get others involved and crank some cooking music and enjoy!