Tag Archives: black pepper

A guide to the best barbecue sauce (and beer) for every meat

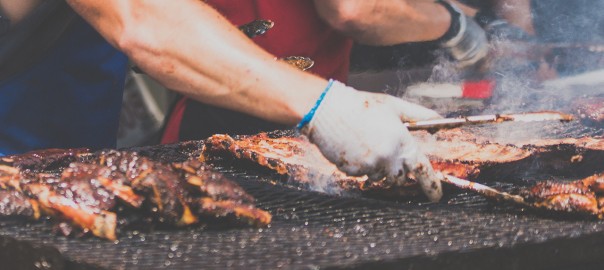
Ahhh! Barbecue sauce. A hot button culinary topic if there ever was one. 

Fortunately, I’m a meat guy from the home of lobster and clam chowdah, so my loyalties with BBQ sauce aren’t regional and tend to be with whatever will make what I’m cooking taste amazing! 

Here’s a breakdown of some of the fantastic barbecue sauces you can find throughout America. These are best when done following a homemade bbq sauce recipe, hundreds of which are online and you can experiment with. The best bbq sauces avoid high-fructose corn syrup-heavy ingredients for cayenne peppers, apple cider vinegar, Worcestershire sauce, and brown sugar. However, sometimes a little ketchup can be all you need to make the perfect sauce for any meat.

Alabama White Barbecue Sauce

The white barbecue sauce made famous at Big Bob Gibson’s Bar-B-Q in Northern Alabama is by far one for the more unique of the American BBQ sauces, but only because our national perception of the perfect sauce for BBQ chicken is shaped by the rows of dark brown Sweet Baby Ray’s bottles lining our grocery stores and the more midwestern and coastal influences of Kansas City, Memphis, and Carolina.

Honestly, mixing mayo and horseradish is phenomenal; Robert Gibson knew what he was doing 96 years ago when he invented the sauce.

Alabama White sauce is best for… 

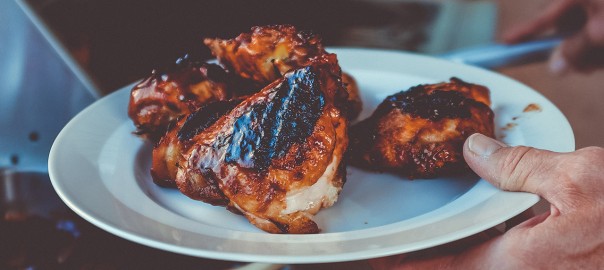
Grilled chicken or pork chops. Lightly flavored meat, some char from the grill, a creamy tangy sauce to dip into. 

 It is amazing paired with a summer ale, something with a creamy finish and citrus notes.

Memphis BBQ Sauce 

Next, we go to the signature barbecue flavor of Memphis, Tennessee. Traditionally Memphis BBQ is dry rub only and often served with sauce on the side. Memphis sauce features lots of molasses and vinegar, and tomato-based, often by using tomato paste. This is all to say it’s certainly a familiar barbecue flavor but is often much thinner than your average BBQ sauce.


Try Memphis BBQ sauce on… 

Definitely smoked baby back ribs. Memphis BBQ is a great way to serve ribs if you want to avoid the mess of traditionally-sauced ribs. Memphis ribs are dry, the sauce is wet, and your fingers stay clean! Mostly…

The perfect beer for Memphis BBQ is definitely an IPA. With a light and refreshing taste but some bitter hoppy undertones, and IPA can bang heads with the smokey spicy bark on great ribs.

Texas Barbecue Sauce

Now to Texas. The Lone Star State is big, bold, spicy, and tangy; they also have great BBQ sauce. Featuring a tomato sauce base and a combination of garlic, Worcestershire sauce, brown sugar, and lemon juice, Texas sauce using has some extra heat from cayenne peppers, chipotle peppers, or some other chili pepper.

Seriously, Texas sauce has immense flavor and purposefully so, Texas barbecue is magnificent. 

Texas Barbecue sauce was made for…

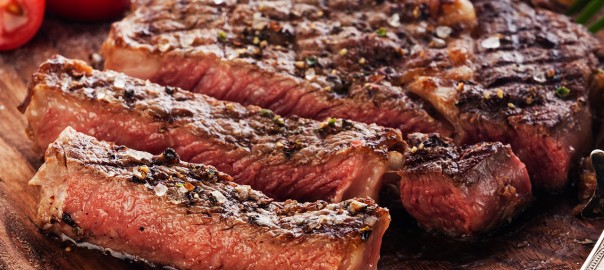
Beef brisket. There is no choice but brisket. Beefy, bold, and fatty, the most flavorful of all meats is magical with the richest of all BBQ sauces.

As for a libation to go with the BBQ brisket, I’d go light here, mostly because I want room for more brisket. All the ranchers I’ve met drink Michelob Ultra like water. So judge if need be, but don’t knock it till you try it. 

St. Louis Barbecue Sauce

Rolling into Missouri we have the home of the great St Louis ribs. Good pork tends to be sweet, and the classic St. Louis sauce is sweet to match. Sticky. Sweet. Tomato-based. Unlike most other American barbecue sauces, St. Louis prefers to hold the liquid smoke from their namesake sauce. If you’re gonna sauce your ribs, this is the way to do it. 

Best use for St. Louis sauce…

St Louis ribs of course. But the flavors work great on really any fatty cut of BBQ pork.

And as for beer, the only choice is the St. Louis original, Budweiser, right?

Kansas City BBQ Sauce

Staying in Missouri, we next have the ubiquitous Kansas City style of sauce. This is closest to the universal BBQ sauce experience. Thick, sweet, smokey, and tomato-based, with ketchup as a key ingredient, Kansas City BBQ sauce is pretty much delicious on anything. 

Smother Kansas City sauce on…

The most beefy-tasty meats like sirloin steaks, chuck steaks, the cowboy cuts, or brisket burnt ends. All these cuts have to have enough beefy flavor to marry well with such a rich sauce.

I’d lean towards hops again for a beer to go with St. Louis barbecue ribs. You want something to cut the richness, definitely a hoppy lager. Sam Adams is a personal fave, but maybe I’m biased, having grown up not far from their headquarters in Boston.

South Carolina Barbecue Sauce

Moving into the Carolinas is where flavor and consistency get really interesting. In South Carolina, we leave the tomato-based sauces behind for mustard, vinegar, as well as ground black pepper, garlic, and other spices. This sauce is spicy, super tangy, and has a dash of sweetness. It is amazing on smoked pork matching well with the rich meat with incredible brightness. 

South Carolina sauce should drench…

Pulled pork. It’s how I was taught by a Deep South chef, and goshdarnit, if it ain’t still the best choice on tender, smoked pork.

Beer? Again, let’s match with a craft IPA. I’m looking for citrus, maybe even some tropical notes. Something fruity to add sweetness as a counterpoint the tanginess of the sauce, so a cloudy New England-Style IPA is perfect. I like local favorite Night Shift based in Everett, MA, which has an amazing choice of varieties. 

Eastern North Carolina BBQ Sauce

Into eastern North Carolina we go, where we encounter perhaps the simplest of all BBQ sauces. Basically, this style is just vinegar and spices like cayenne pepper or crushed red pepper flakes. It’s a sauce that works well with anything grilled or smoked and really lets the meat speak for itself.

Use Eastern NC sauce with…

Pork chops, grilled chicken, dressing for a chicken salad, and any lighter meats that can use a tangy boost. 

Best with a lighter beer, I’d go with a pale lager or pilsner. Make sure it is full-bodied enough to add some richness but light enough not to overwhelm.

Western North Carolina BBQ Sauce

They take BBQ sauce very seriously in the Carolinas. It is, after all, thought to be the birthplace of American BBQ. And so, in western North Carolina we find a second variety. This one is similar to its eastern cousin, but with the addition of some tomato for flavor. 

Good luck arguing which sauce is better with anyone from the Tarheel State. Fortunately for me, I get to pick and choose my loyalties…

I can’t get enough Western Carolina sauce on…

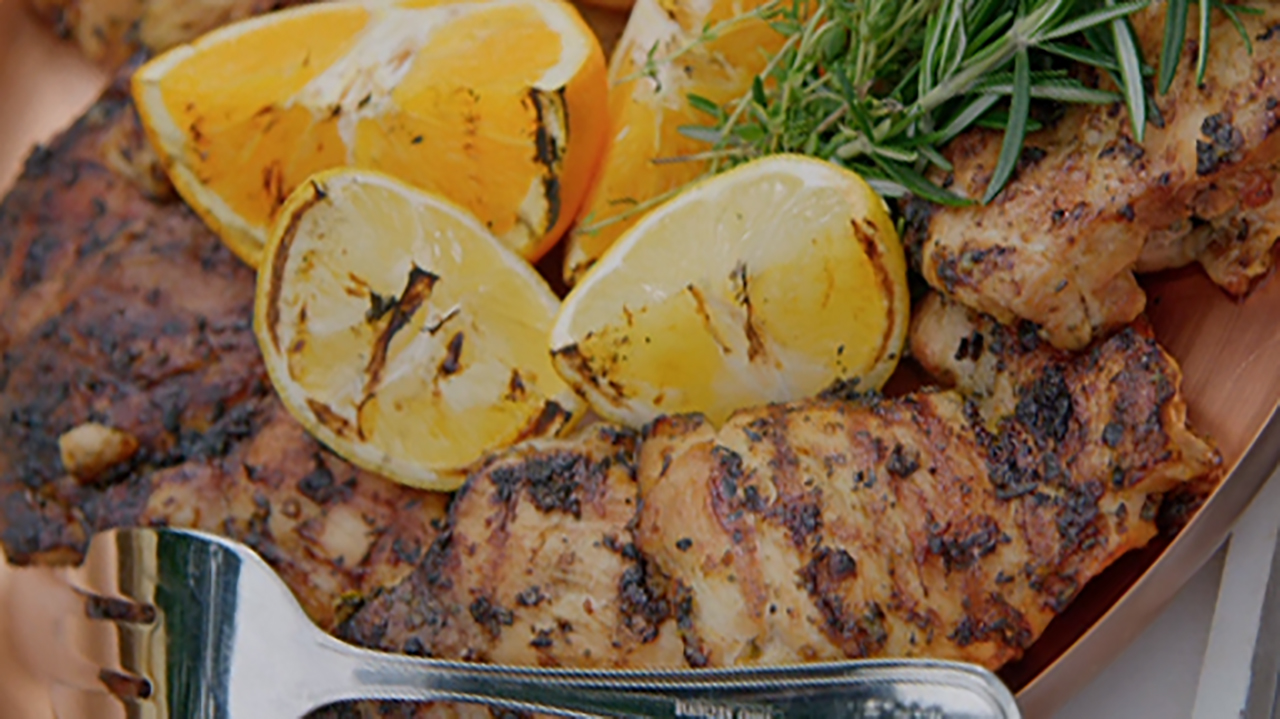
Some of the richer cuts of light meat like chicken thighs, pork sirloin, and country-style ribs The tomato adds a bit of sweet acidity to this sauce that helps those more flavorful cuts.

Pair with a wheat beer — like an Allagash — that adds a bit of muted sweetness with a barely there tanginess. A real compliment to the Lexington Piedmont style sauce.


pantry essentials

10 Pantry Essentials Every Cook Should Have

You may have taken the first key step towards a month of great eating and ordered a ButcherBox, complete with high-quality grass-fed beef, heritage pork, and free-range, organic chicken.

But do you know what else completes a kitchen? Pantry staples, like high-quality oils, a few kinds of vinegar, dried herbs, and more.

This guide details the pantry essentials that make all the difference when preparing the delicious meals at home. The essentials that all cooks have a hands-length from their stoves include condiments like assorted vinegars, Dijon mustard, and soy sauce or their gluten-free variants. With a few of these, you can make everything from vinaigrettes and dressings to sauces, rubs, and much more.

Other necessary kitchen staples include canned tomatoes, which add richness to stews and soups, and dried herbs like oregano, rosemary, and thyme.

The best part? None of these staples are prohibitively expensive, and your individual purchase will probably last you quite a while.

1. High-Quality Oils

You can’t cook many meals without a cooking fat, and while grass-fed butter, ghee, or tallow might be an option, you should always keep a solid selection of healthy, high-quality cooking oils at hand.

These oils might include high heat friendly options filled with healthy fats, like avocado oil or coconut oil. For lower heat preparations, a solid bottle of olive oil should always be handy. You can even use good olive oil as a finishing touch, like a drizzle over salad or hummus.

Neutral oils like avocado oil or olive oil are also excellent bases for homemade salad dressings, and, if you’re really looking to up your pantry game, keep finishing oils like sesame oil or walnut oil on hand.

2. An Assortment of Vinegar

A good vinegar will take a good dish to great, and thankfully there are many options to choose from.

If you need to add acidic sweetness, reach for balsamic vinegar. In fact, dousing some caramelized red onions with balsamic vinegar and sugar is a sure-fire way to make a quick and delicious topping for burgers and steaks, while aged balsamic vinegar makes the perfect coating for grilled veggies.

Don’t stop at balsamic vinegar. Champagne vinegar adds a sweet note to homemade vinaigrettes, while apple cider vinegar boasts so many purported health benefits it’s hard to keep count. You can even throw it into homemade barbeque sauce for a unique bite.

Even plain old white vinegar has its place in a pantry. It’s as useful for making crispy pickles as making homemade kitchen cleanser.

3. Dijon Mustard

Yellow mustard has its place, but nothing heightens a dish more than a dollop of Dijon mustard. The traditional French mustard is made with brown mustard seeds, white wine, and a verjus made from unripe grapes. This verjus is what gives Dijon mustard its distinct, tart flavor.

Use Dijon mustard in a homemade vinaigrette for a crisp salad, or as part of a rub for various cuts of meat. These rosemary brined pork chops are a perfect example.

The best part about Dijon mustard? While it sounds fancy, it’s a pretty affordable condiment, with the store brand bottles rarely costing more than $3 and the fancy stuff only clocking in at $5 or less.

4. Soy Sauce/Tamari/Coconut Aminos

What’s the best way to build umami into your dishes? Soy sauce, a sauce made from fermented soybeans, roasted wheat, and cultures, is the ultimate, inexpensive umami condiment.

Of course, many people question the nutritional impact of soy sauce. If you’re gluten-free, a specific type of soy sauce, tamari, can be made without gluten.

If you avoid soy and grains entirely, coconut aminos, a sauce made from coconut tree sap and salt, is a great alternative. While a bit less pungent and a tad sweeter than traditional soy sauce, it still packs umami flavor into dishes.

Use soy sauce or any of its alternatives in Asian-inspired fare, like this ginger pork noodle soup.

5. A Solid Hot Sauce

While the hot sauce category is vast, your favorite hot sauce is a kitchen essential. Why? Because it can be doused on most anything and elevates the flavor of whatever you’re noshing on.

Do you prefer Asian flavor profiles? Reach for the less hot, slightly sweet Sriracha, or pack in the chili garlic flavor with sambal.

Mexican and Latin America hot sauces are another great category: The options are many, but most sauces feature some kind of vinegary heat and potentially a kick of citrus like lime.

Channel pure Americana with Tabasco or Louisiana hot sauce. There are, literally, thousands of hot sauces to choose from.

Use your favorite hot sauce to jazz up a simple breakfast of eggs and bacon, or incorporate it into vinaigrettes and sauces for a little kick.

6. Dried Herbs

Like hot sauce, the selection for dried herbs is vast. And while it’s great to build out your spice cabinet and experiment with various herbs, there are a few essentials we’d recommend always having on hand.

Dried oregano, basil, rosemary, and thyme — commonly sold together as an Italian seasoning blend — lend bright flavors to any dish you whip up and are much more convenient in a pinch than fresh herbs.

Other dried herbs we’d consider staples include dill, which is perfect in anything from pickles to salads, and dried bay leaves, which lend depth to soups and stews.

If you’d really like to pad out your spice cabinet, add dried marjoram, ground coriander, dried mint, dried sage, and dried tarragon.

7. Coconut Milk

Canned coconut milk is a treasure, and not just because it’s suitable for most diets. The silky, fatty substance lends richness to any dish it touches, and won’t spoil as quickly as refrigerated alternatives like heavy cream or milk.

Despite it including coconut meat, coconut milk is a fairly neutral, non-dairy way to add creaminess and heft. Use coconut milk to add creaminess to soup, braise meats, or add silky texture and flavor to rice.

Pro tip: Stock up on cans of coconut milk. Whichever ones you don’t use for savory dishes, use them to make dairy-free sweets like no-churn ice cream.

8. Nut and Seed Butters

What’s your favorite? Peanut butter, almond butter, cashew butter, tahini? Whichever nut or seed butter you prefer, it’s bound to serve many uses in your kitchen.

You can, of course, use nut butters to spread on toast, add protein to smoothies, and bake up some delicious cookies. But nut butters have serious culinary uses, too.

Peanut butter or almond butter both make excellent Asian-inspired sauces, like in this Thai almond soba noodle salad. Tahini tastes delicious in Mediterranean fare. Try it drizzled over these Mediterranean meatballs.

9. Canned Tomatoes

Whether you’re whipping up a sauce for pasta, throwing some chili in the crockpot, or cooking up beef stew or pot roast low and slow, canned tomatoes are so useful.

You can find canned tomatoes in many forms, from canned tomato paste to whole, peeled tomatoes in a can. It’s good to have a variety of these options on hand for whatever you may need. They’re inexpensive and can add flavor to nearly any dish, like this fennel and tomato Italian pork shoulder.

10. Good Salt and Black Pepper

It’s a bit of a given that you should have salt and pepper on hand. It’s rare to not add it to a dish in the kitchen. But not just any salt or pepper will do.

Iodized table salt is the most common option, but it’s not exactly the healthiest one. It’s bleached, devoid of trace elements, and often contains additives. Also, it just doesn’t taste as good as sea salt crystals.

Sea salt comes from the ocean, and is evaporated to separate the salt crystals from the water.

(Another option: ButcherBox Chef Yankel always recommends having Kosher salt on hand for seasoning steaks.)

For pepper, whole peppercorns that can be cracked in a pepper mill lend the best flavor.

An easy Bulgogi Beef Skillet recipe from Paleohacks

If you’re craving takeout, try this easy, one skillet beef bulgogi recipe from our friends at Paleohacks for sweet and spicy flavor with zero soy, MSG, or preservatives!

Bulgogi is a popular Korean recipe that translates literally to “fire meat.” Super thin slices of strip steaks, sirloin steak, or ribeye are marinated in spices until tender, then grilled or pan-fried. The result is a sticky, crispy, and slightly spicy recipe that can be turned into a complete meal with a side of cauliflower rice or stir-fried veggie noodles.

The unique marinade includes ripe, grated Asian pear for sweetness, texture, and tang. The acidity in the pear also helps to tenderize the meat. If you can’t find Asian pears, a traditional pear will work just fine. To add a subtle spice to the marinade, use gochugaru, the bright red Korean red pepper. This powder is less spicy than cayenne and creates a balanced heat that lets the other flavors shine through.

bulgogi-beef

Coconut sugar stands in for brown sugar, adding sweetness and helping to crisp the steak for delicious texture. Finally, toasted sesame oil adds nutty aroma while ginger, garlic, and coconut aminos add even more flavor and dimension.

To make the bulgogi, mix all the ingredients for the marinade together, add to the sliced beef, and refrigerate for at least two hours. Then, grease a medium skillet with avocado oil—not olive oil. Avocado oil has a high smoke heat point that can withstand high cooking temperatures without burning. Cook the steak about two minutes per side, in two batches.

bulgogi-beef

To serve, top the hot steak slices with sesame seeds and scallions, and enjoy!

If you’re craving more takeout recipes but don’t feel like cooking, check out one of these 13 totally Paleo meal delivery options!

Paleohacks’ Korean-style BBQ Bulgogi Beef Skillet

bulgogi-beef


Prep time- 10 minutes

Cook time- 10 minutes

Chill time- 4 hours

Total time- 4 hours, 20 minutes

Serves- 4

Tools

Mixing bowl

Skillet

Tongs

Ingredients

bulgogi-beef

For the Marinade

1/3 cup grated Asian pear, peeled

1 T Korean red pepper (or chili powder)

1 T coconut sugar

1 T lime juice

2 T toasted sesame oil

2 T coconut aminos

1 clove garlic, minced

1/2 t ground ginger

1/4 t sea salt

For the Steak:

2 10-oz strip steaks, thinly sliced

1 t avocado oil

1/2 t sesame seeds, for serving

1/4 cup chopped green onion, for serving

Directions

1. Combine ingredients for marinade in a mixing bowl and stir well.

2. Add steak slices and stir to coat. Cover and refrigerate 2 to 4 hours.

3. Grease a skillet with avocado oil and heat over medium-high heat for a few minutes. When hot, use tongs to add half of the marinated steak strips and cook for 2 minutes. Flip and cook an additional 2 minutes.

4. Transfer steak to a bowl and repeat with remaining strips.

5. Serve the beef bulgogi hot garnished with sesame seeds and green onion.

ny-strip-steak

NY strip steak – An iconic steak in New York and beyond for good reason

You can find it featured on the menu of most reputable steakhouses, and although it goes by various names, when one thinks of a perfectly sized, tender, and flavorful cut of beef, likely, they are imagining a New York strip steak.

The strip steak comes from the topmost section of the sirloin, a little-used area of muscle, the longissimus, that is commonly referred to as the strip loin or top loin. The strip steak is sometimes prepared with a bone attached; quite often, you can find the strip is part of a T-bone steak or Porterhouse steak when part of a larger bone-in cut that also includes tenderloin steak — by itself, filet mignon. 

Delmonico steak, Kansas City strip steak, or NY strip steak?

As a standalone steak, it is most commonly referred to as the New York strip steak, but it can also be called the New York sirloin steak, the Kansas City steak (with bone-in) or Kansas City strip steak, contré filet, strip loin steak, hotel steak, ambassador steak, club sirloin steak, or in some parts of the world, simply sirloin steak. Also, the New York strip can be — or has been known — as the Delmonico steak.

The connection to Delmonico’s, the famous New York steakhouse and restaurant first opened in Lower Manhatten in the 1820’s, is likely how the cut earned its most famous moniker, the New York strip steak. However, it is unclear if a Delmonico steak, or the original Delmonico steak, is, or ever was a strip steak from the top loin or a ribeye steak. The reason for the confusion is likely due to steakhouses across the country seeking to mimic Delmonico’s famous steaks, but using an array of different — yet similarly tender and thick — cuts. Those who have investigated the Delmonico and New York strip steak connection, refer to the cut also being called a club steak, a reference to the restaurant’s early days as one of the first American dining clubs. 

However convoluted the naming history of the cut may be, one thing isn’t up for debate: New York strip steaks take relatively little preparation and can be cooked to a melt-in-your-mouth level of deliciously quite easily.

ny-strip-steak

The perfect NY strip steak

Whether pan seared — or reverse seared — grilling on a charcoal or gas grill, or cooking by some other method, all a New York strip steak really needs is a coating of crushed black pepper and kosher salt or sea salt and some compound butter. Just a few ingredients, a few minutes of cooking time, and you can get the perfect steak for any steak lover. The easy prep is one of the reasons it pops up on restaurant menus so often.

According to ButcherBox Head Chef Yankel Polak, the lack of too much visible fat also makes New York strip steak a steakhouse favorite.

“There is a breed of steak lover out there who likes things a bit leaner,” Chef Yankel explains. “I used to see them in restaurants all the time; they would order a big ol’ ribeye and leave all that amazing fat sitting on the plate. It inspired me to offer a NY strip steak as the lean alternative.”

“When butchered properly, it has only a thin strip of fat running down one side — and besides its natural marbling — the strip steak presents itself as the less fatty menu option,” continues Chef Yankel.

And, there is a business reason as well: According to Chef Yankel, a NY strip steak is a high-value item for a restaurant because there is nearly no waste. “It dry ages well, cooks quickly, and requires almost no skill to do it perfectly and deliciously.”

“Personally I like slow smoking them at 225°F until they are rare, resting them for a bit, and then finishing them over a raging fire for the ultimate crust,” he added.

The cut does also benefit from a bit of marinating if you want to marry a grass-fed, grass-finished New York strip steak to other flavors you may be preparing. Below are two of Chef Yankel’s favorite methods for marinating and cooking the perfect New York strip steak.

NY Strip Steak with Chef Yankel’s Zesty Marinade Recipe

Ingredients:

  • 2 ButcherBox NY Strip Steaks
  • 3 limes, zest and juice
  • 1 bunch fresh cilantro chopped
  • 1 head of garlic, peeled and minced
  • 1 Tbsp crushed black pepper
  • ¼ c olive oil

Directions:

1. Combine all ingredients for marinade in small bowl. Mix well and coat steaks thoroughly.

2. Allow steaks to marinate refrigerated at least one hour, then bring steaks to room temp before cooking.

3. Grill steaks over charcoal or open flame for 4 to 6 min per side, or until internal temperature reads 120°F. Rest steak 8 min before serving.

Chef Yankel’s  5-minute NY Strip Steak Marinade Recipe


Ingredients:

  • 2 ButcherBox NY Strip Steaks

Marinade/Dressing:

  • ¼ c balsamic vinegar (the higher-quality, the better!)
  • ½ c extra virgin olive oil
  • 2 Tbsp Italian seasoning
  • ½ tsp chili flakes
  • 1 Tbsp garlic, minced
  • 1 tsp lemon zest
  • 1 tsp kosher salt
  • 1 tsp black pepper

Directions

1. Preheat oven to 400°F.

2. Bring steaks to room temperature and season with salt and pepper.

3. Mix all marinade ingredients. Pour ¼ c over steaks and let them sit at room temp for 5 min.

4. Preheat cast-iron skillet. Once skillet is hot, sear steaks on both sides for 2-3 min per side or until a nice crust forms.

5. Place pan in oven for 5 more min, or until thermometer inserted in thickest part of steak reads 120°F.

6. Let steaks rest for at least 8 min before slicing. Serve alongside salad and enjoy!

smoking-meat

The ultimate guide to smoking meat at home

Smoking meat is a prehistoric culinary art. In the past, the technique was used to preserve protein-rich foods. Smoking dehydrates meat and imparts antibacterial properties that keep it from spoiling quickly. While our ancestors used the method to preserve red meat and fish, today smoking is used for all kinds of meat — not just as a preservation method — and the enhanced flavor makes it quite the delicacy.

We’re most familiar with smoked meats in the form of barbecue: When meat is treated to the low and slow treatment in a smoker, connective tissues and collagen within the meat break down,  resulting in ultra-flavorful, ultra-tender food. Top that off with the bevy of barbecue sauces we’ve invented — vinegar-based, sweet, thick and tangy, you name it — and you’re in heaven.

This guide delves into the ins and outs of smoking meat at home — from equipment to wood chips to the best cuts of meat to smoke.

Equipment

There are several fancy smoker options, from pellet smokers to vertical electric smokers to offset smokers for the true meat smoking aficionado. These smokers are specially designed for applying indirect heat at steady low temperatures, and most cost several hundreds of dollars.  While cooking with a Traeger wood pellet grill can be amazing, if you’re a novice who’s not ready to invest too heavily into smoking equipment, have no fear.

Everyday gas grills and charcoal grills can be manipulated to smoke meat with just a little effort.

Gas grills can be tricky to use as smokers, as they’re designed to cook meat over direct heat at high temperatures — the opposite of smoking, which is low, indirect heat over a long period of time.

With a little patience, however, a gas grill will smoke your meat. You’ll need to build an indirect heat zone and a direct heat zone within your grill, making sure to keep your meat in the indirect zone. Experiment with your burners until you’re able to bring the internal temperature to around 250°F which you can check with a meat thermometer (for most cuts of meat, anyway).

You’ll need a smoke box to hold your — soaked and drained — wood chips. Newer gas grills sometimes come with a built-in metal smoker box, but you can also purchase a heavy duty metal smoker box or make an inexpensive one at home by placing the wood chips in a foil pan, covering it with heavy-duty aluminum foil, and adding slits with a knife. 

It’s a good idea to set up a drip pan to collect the drippings of your meat. Also, be sure to add a small amount of liquid to the drip pan — like water, apple juice, or beer — to add moisture and keep the drippings from drying out. Don’t set the pan directly on top of the burners, but rather on a grate, with another grate above for the meat. 

As for a kettle or charcoal grill, like a traditional Weber, things are a little simpler. Remove the cooking grate from your grill and place the drip pan on one side. Remember to fill it with some liquid. Next, pile up your coals or lump charcoal on the opposite side of the grill. 

Once the coals are white hot, you can add your wood and then smoke your meat over the drip pan. While you’ll occasionally need to open the grill to add more coal or wood, try not to disturb the smoking process.

Cuts of Meat

In truth, you can smoke pretty much any kind of meat or seafood. Poultry, red meat, pork, fish are all fair game — game meat, like venison, is also great when smoked.

But, if you’re looking for meats that respond really well to the smoker, you’ll actually want to aim low, rather than high. Low-cost, tougher cuts of meat tenderize when smoked low and slow.

For example, try Boston butt — or simply pork butt as it’s also simply called — for sumptuous pulled pork. Be sure to rub your pork butt amply with your desired spices — we like this smoky coffee rub recipe. Other pork options include ribs, like this brown sugar rub and mustard barbeque sauce-laced recipe. You can also smoke sausages for a complex, savory flavor.

While you can smoke leaner cuts like pork loin, it’s not ideal, as it responds better to grilling or roasting than smoking. 

Beef brisket is the king of smoked meat, and the perfect cut when it comes to smoked beef. Give this smoked brisket with citrus marinade a whirl. But one thing to remember is not to smoke steaks—seriously, a simple grill or hot skillet is a better bet.

Poultry like whole chickens and turkeys turn out great in the smoker. You can also smoke chicken leg quarters if you’re not feeling up to the whole chicken yet. Here are some pecan smoked chicken wings for a super simple smoked recipe.

Wood Chips and Chunks

Not all wood is created equal when it comes to smoking meat. For one, you should never use any old wood you chopped down in your backyard — it’s potentially toxic. Never fear, though, there are plenty of other woods to experiment with as you smoke meat

While wood chips are sold more readily in most grocery stores and hardware stores, they tend to ignite quickly and burn out quite fast. This is not ideal for smoking low and slow. Wood chunks, on the other hand, burn for hours in a smoker. They do take a bit longer to ignite, but if you’re smoking meat, you’ve probably already committed the time.

If you use wood chips, be sure to soak them for at least 30 minutes before using. This will ensure they burn long enough to impart some flavor to the food.

What about the many varieties of wood? Getting the smoky flavor you want requires choosing the right wood.

Consider them on a scale of mild to intense. Fruity woods, like apple, peach, cherry, and pear, are light and sweet. They pair well with poultry, fish, and pork. Hickory, maple, pecan, and oak are stronger, but not overwhelming. Beef, game, and pork all go well with these woods. Mesquite is the most intense wood—it’s best used in moderation and with red meat.

Once you’ve mastered smoking with one wood, feel free to experiment with mixing woods for different flavors. 

Now, you’re equipped with everything you need to know to get started on smoking meat. Get cooking!

ribeye-steak

The ribeye steak – There is no better grilling steak

Ribeye steak is one of the most delicious of all the cuts of beef that we — as steak lovers — want to grill and eat every time we spark up the grill.

The reason for our ribeye obsession is that it is so tender and tasty; and, it is mouthwatering-good when grilled with just kosher salt or sea salt and fresh ground black pepper for seasoning. The reason ribeye steak is a true beef flavor bomb is that it has more marbling — the fatty connective tissue within the muscle — than most other cuts.

Even grass-fed and grass-finished ribeye steaks — which are usually less fatty than corn-fed and grain-fed factory farm beef — has just enough of that good fat marbling to make the steaks savory and full of that great grass-fed beef flavor we love.

And while ribeyes are perfect steaks to cook with an oven — they are great when lightly seasoned and seared on a hot skillet with a bit of olive oil or unsalted butter — we prefer the simple pleasure of a perfectly cooked ribeye from the grill.

“ribeye-steak”

Head ButcherBox Chef Yankel Polak is a huge fan of the ribeye steak. Chef Yankel says, “Cast iron or open fire. Finish it with butter and tons of salt. Even the best ribeye will taste underwhelming if not seasoned properly.”

What gives ribeye steaks such great marbling? They come from the rib primal of a cow, specifically, the longissimus dorsi, which gets very little use, hence the excess fat dispersed throughout the muscle. But in a grass-fed ribeye steak, that fat is a bit healthier than in a grain-fed or corn-fed ribeye.

The fattiness burns up when being cooked adding a juicy moisture to the meat, making it incredibly tender. Once you eat a grilled ribeye, you will definitely notice its smooth, rich texture and delicious beefy flavor. When cooked on an open flame, charred lightly and medium-rare in the middle 

According to Chef Yankel, “Ribeyes have a ton of fat so super high heat is the best way to get the most flavor.” When cooking on an open flame, char a ribeye lightly on each side — a few minutes on each side — and then let it sit for eight to ten minutes before cutting into.  Follow these instructions and you will get a perfect medium-rare steak every time. 

Here, for a little more detail, is Chef Yankel’s recipe for Garlic Crusted Ribeye Steak:

Garlic-Crusted Ribeye Steak

  1. Dry ribeye steaks and bring to room temperature.  

  2. Season steaks generously on both sides with salt and pepper.

  3. Preheat grill. If using an open flame, wait for flames to die down. Right before grilling, make sure grill surface is extremely hot, then rub it down with an oil-soaked rag – we advise using tongs to hold the rolled-up rag.

  4. Rub heads of garlic with olive oil, 1 tsp kosher salt, and 1 tsp fresh black pepper and wrap in aluminum foil.

  5. Bake garlic for about 30 minutes on the cooler side of grill – indirect heat.

  6. Once baked, peel the skin off garlic and place in food processor with ghee. Pulse to make a paste.

  7. For medium-rare, place ribeye steaks at 45° angle across hottest part of grill grates, then grill for 2 – 3 min per side, while rotating 90° every 1 ½ min.

  8. Place steaks on a baking sheet and smear 1 large Tbsp of garlic paste on top of each steak.

  9. Move steak to the cooler part of the grill, then grill for 4 min per side. Keep your meat moving to ensure that it cooks evenly. Remove from grill when a meat thermometer inserted into thickest part reads 120°F.

  10. Let the steaks rest for 8 min before slicing.

“hog-farmer”

grilled-chicken-breast

Grilled chicken breast and chicken thighs: The essential summer recipes

Grilled chicken breast and chicken thigh: The essential summer recipes

Grilled chicken is the ultimate summer dish. Why heat up the oven or slave over a pot indoors when you can soak up some sunshine while grilling up your dinner?

The key to juicy, tender grilled chicken is the technique. Harnessing the power of indirect heat on the grill is the way to go. Whether it’s a gas or charcoal grill, spend some time building heat in your grill, then grill your chicken over indirect heat. You can use the direct flames and high heat for crisping, browning, and those characteristic grill marks.

The flavor profile possibilities are endless, too. Try Greek-marinated grilled chicken or spicy Italian grilled chicken. Citrus is grilled chicken’s best friend, from smoky citrus grilled chicken to grilled chicken with lemon and thyme.

Whatever marinade or spice-blend you opt for, these chicken recipes will keep you grilling all summer long.

1.      Juicy Grilled Chicken Breast

This juicy grilled chicken breast is all about the technique. Keep it pure and simple (to start, at least) with just a few bone-in, skin-on chicken breast halves, some salt, some oil, and a grill. The trick is to harness the power of indirect heat, whether you’re using a gas or charcoal grill. If using a gas grill, turn on all the burners and close the lid. Once the temperature inside the grill reaches 400°F, turn off one of the burners. You’ll be grilling your chicken in the indirect heat left by the now-off burner. For a charcoal grill, light 50 or 60 briquettes for 20 to 30 minutes, until they’re covered with ash. Clear them to one side, and place chicken breast halves over the indirect heat. Your chicken will take a quick trip to the direct heat for crisping and browning. Once you’ve mastered this technique, you can get more creative with a marinade or rub. 

2.      Grilled Greek Marinated Chicken Breast with Peach and Endive Salad 

If you’re trying to capture the essence of summer in a meal, this grilled Greek marinated boneless chicken breast with peach and endive salad will do it. Freshness abounds with summer fruits and veggies like peaches, avocado, endive lettuce, and corn. Meanwhile, boneless skinless chicken breasts get marinated in a deliciously zesty Greek vinaigrette and grilled quickly for color, then finished off in the oven. While you’re grilling chicken, you can also grill corn to add a delicious smoky char flavor to the accompanying salad. Toss the salad in Primal Kitchen’s Green Goddess dressing and add some tangy feta, and you’re in heaven. 

3.      Spicy Grilled Italian Chicken 

Heat things up with this Italian flavored, red pepper flake, and chili powder-spiced grilled chicken breast. Barbeque sauce, white wine vinegar, and lemon juice add tang while Italian seasonings like dried basil, dried oregano, and dried parsley add an herbaceous touch. Marinating the chicken in the sauce ensures tender, juicy breasts while basting it while grilling maximizes the spicy Italian flavor. Bonus: It only takes an hour to marinate and 20 minutes to grill up, making for one effortless summer meal.

4.      Aromatic Grilled Chicken Thighs

The ultimate spice blend prevails in this aromatic grilled chicken thighs recipe. With seasonings like garlic powder, onion powder, dried oregano, turmeric, chili powder, paprika, and of course salt and black pepper, these skin-on, bone-in, grilled chicken thighs are packed with flavor. The unique custom spice blend is better than anything you can find in a bottle, plus your kitchen will smell as heavenly as a spice shop as you prepare it. The trick to perfectly grilled and crispy, aromatic chicken is to cook it over indirect heat, bone side down for the majority of the time. Only flip it to the spiced-skin side at the end to avoid burning the spices.

“grilled-chicken-breast”

5.      Smoky Citrus Grilled Chicken Thighs

These smoky citrus grilled chicken thighs are extra special because they require a charcoal grill and hickory wood chips to perfect that smoke flavor. This recipe works with any cut of chicken, but boneless skinless chicken thighs ensure ultra-juicy and flavorful dark meat. Herbs like rosemary and thyme and plenty of citrus—including lemon, orange, and lime—really pack in the flavor to complement the smokiness from the hickory wood chips. Once again, indirect heat helps create masterfully charred yet juicy grilled chicken.

6.      Grilled Citrus Chicken Breast with Summer Watermelon Salad

Summer strikes again with these grilled citrus chicken breasts with summer watermelon salad. Boneless skinless chicken breasts get marinated in a mélange of aromatics, including fresh crushed garlic cloves, shallots, fresh thyme, and rosemary, whole lemon and orange and a bit of olive oil, salt, and pepper. All of the aromatics get pulsed in the food processor to form the perfect marinade. Meanwhile, a refreshing summer salad of grilled corn, red and yellow watermelon, cilantro, feta, and onion accompany the chicken, making for an ideal summer meal.

7.      Grilled Chicken Breasts with Lemon and Thyme

Simple yet bold, these grilled chicken breasts with lemon and thyme are a delicious quick meal, clocking in at 20 minutes total on the grill. Lemon juice and thyme meld with red pepper flakes, garlic, olive oil, salt and pepper for an uncomplicated marinade. Bone-in chicken breasts stand up to the heat to ensure succulent flavor and tenderness. If you don’t have dried thyme on hand, don’t worry, any similar dried spice will work. Think marjoram, oregano, rosemary, or sage.

Extra Tips

ButcherBox Head Chef Yankel Polak suggests the best way to grill a juicy chicken breast comes down to two key steps. The first is to pound your boneless chicken breast thin before you grill chicken. You can use a meat mallet or just your rolling pin, but either way, a thinner chicken breast allows for more evenly cooked meat. Second, once you’ve achieved the ideal internal temperature, set aside at room temperature and let the juices distribute throughout the now flavorful grilled chicken breast. 

Do both and you will get the ultimate summer dish, perfectly grilled chicken, every time you use the outdoor grill.

“grilling-for-a-party”

grill tacos

Turn off your oven and grill tacos this summer

Tacos.

You can never go wrong with tacos. And while in a former life I wouldn’t blink at “Making a Run for the Border” for a few late night beef, cheese, and lettuce treats. These days, there are too many good things happening with tacos to out there to even think about heading to the Taco Bell.

Not only are there a lot of Mexican restaurants concocting tacos with fantastic flavor combinations or perfecting the classic Mexican street taco, but there are also a plethora of amazingly delicious taco recipes out there these days that are quick, easy, and affordable. 

For a truly splendid taco experience, you need to make them yourself. Skip the stovetop, skillet, and box of hard tortilla shells and seasoning mix, and throw lightly seasoned grass-fed flank steak on the grill, and thank us later.

There is no better time than summer to fire up the grill and make your carne asada tacos or grilled chicken tacos.

We even fully support cranking up the slow cooker for some al pastor or carnitas with a heritage breed pork butt. But, you don’t even need to do that. You can make both pork taco dishes on your grill as well. 

Before we get into some great tactics for making the best grill tacos this summer, let’s quickly dig into how the delicious food became so popular in the first place.

Silver mines to street tacos to Tex-Mex

According to Jeffrey M. Pilcher, professor of history at the University of Minnesota and the author of the book Planet Taco: A Global History of Mexican Foodtacos as we know them today can be traced to the snacking habits of Mexican silver miners.

Pilcher explains in his book that, “People have been eating corn tortillas with bits of meat or beans rolled up inside for more than a millennium.” These corn-dough snack foods were known as antojitos and would come in many shapes with a variety of fillings.

The Spanish word taco was used for a “small bite of food” well before it can be found used in Mexico, according to Taco Planet. The term was also used for firearm plugs, among other things. At one point, “taco” was slang for gunpowder wrapped in paper used by silver miners outside of the town of Pachuca. It happened that these Mexican miners also preferred rolled tacos — and used that same term for both explosives and their packable lunches. Once the silver mining operations died down, they brought their rolled version of the dish to the streets of Mexico City, and then later to the American Southwest.

Tacos emerged in the American Southwest in the mid-twentieth century due to cultural intermingling and one particular food entrepreneur. 

Mexican Americans living in the “borderlands” created various versions of tacos influenced by the mixing of cultures along the US-Mexico line. Tex-Mex, New Mexican, and Cal-Mex cuisines all had their own versions of the taco. Rolled tacos, for instance, are still popular at authentic Mexican restaurants in Southern California today.

While at a rolled taco shop in California in the 1960’s when hot dog vendor Glenn Bell realized he could quicken the pace of the methods used to make the long-cooking, fried rolled tacos. He realized he could do for the taco what McDonald’s did for the cheeseburger and opened his first taco shop in San Bernadino. Taking a relatively little-used preparation technique — the pre-fried, U-shaped, crispy corn tortilla shells — Bell’s restaurant, which eventually became Taco Bell,  turned a Mexican food tradition into an American staple.

But the best tacos are grill tacos

There’s a bit of a food culture backlash against Glenn Bell’s crispy creation among taco aficionados. The days, the standard Mexican street taco — or at least a version of it with soft corn tortillas, barbacoa or carnitas, and a garnish of onions and cilantro — has become more prevalent at authentic Mexican restaurants, hole-in-the-wall Mom-and-Pop joints, street vendors, food trucks, and the like. 

In his book on tacos, Jeffrey Pilcher even made a trek to Hermosillo, Mexico, to try the regions hard-to-find, traditional taco specialty, carne asada tacos. To make a point about “fast food,” he recounts the two minutes it took the husband and wife street cart vendors to grill their steak to perfection and fill it in warm tortillas with onions and cilantro. On his return to America, he compares his experience in Hermosillo with the two minutes it took the staff at a Los Angeles Taco Bell to nuke their take on the steak taco. 

The best part of the move away from pre-mixed taco seasoning and ground beef tacos is that people now realize, just as Pilcher did, that it is as easy to make grill tacos in the far more delicious and fresh manner by cooking a lightly-seasoned steak on a grill or slow-cooking pork tacos.

We love all kinds of tacos, and we don’t think anyone can beat tacos with grilled grass-fed steaks, like flank steak or skirt steak, as well as free-range organic chicken breasts and heritage breed pork butt. 

There is no comparison to marinating a steak overnight in some sweet and spicy marinade and throwing it on the grill, and then cutting it up, throwing it in some warm corn tortillas, and then adding some fresh radish or cabbage or cilantro. This dish is obviously best with some refried beans and an ice-cold Modelo. 

We even found a recipe created by our friends at Traeger Grills that allows you to make al pastor tacos right on the grill. 

But for all the recipes we love, few compare to Head ButcherBox Chef Yankel Polak’s delicious and easy NY strip steak tacos — grilled to perfection, sliced, and then mixed with a cabbage slaw. 

Check it out one of the best taco recipes we’ve tried below: 

Sweet and Sour NY Strip Tacos with Cabbage Slaw

Prep time: 15 minutes

Cook time: 15 minutes

Ingredients:

  • 2 ButcherBox NY Strip Steaks
  • Marinade and Slaw Dressing
  • ¼ c sesame oil
  • ¼ c honey
  • ¼ c coconut aminos
  • ¼ c rice vinegar
  • 4 Tbsp sesame seeds
  • Slaw
  • 2 c shredded napa cabbage
  • ½ c shredded carrots
  • ½ c shredded Gala apple (any apple works!)
  • salt and black pepper to taste
  • 2 Tbsp fresh chopped cilantro (optional, for garnish)

Directions

1. Mix all marinade ingredients. Use ½ to marinate the steaks overnight, and reserve other ½ for the slaw.

2. Mix cabbage, apples, and carrots. Dress with marinade and refrigerate overnight for best flavor.

3. Preheat grill. If using an open flame, wait for flames to die down. Right before grilling, make sure grill surface is extremely hot, then rub it down with an oil-soaked rag – we advise using tongs to hold the rolled-up rag. 

4. For medium-rare, place NY Strip Steak at 45° angle across hottest part of grill grates, then grill for 2 – 3 min per side, while rotating 90° every 1 ½ min. Move steak to the cooler part of the grill, then grill for 4 min per side. Keep your meat moving to ensure that it cooks evenly. Remove from grill when a meat thermometer inserted into thickest part reads 120°F.

5. Rest for at least 8 min. Slice thinly against the grain.

6. Serve steak topped with slaw in your favorite taco shell or sticky bun. Garnish with fresh cilantro and enjoy!

bacon-jam

Bacon is our jam – The history of the most delicious breakfast meat with a special bacon jam recipe

Check out an amazing bacon jam recipe at the bottom of this post from our Head ButcherBox Chef.

Bacon has been around for a long time. In fact, the earliest recorded examples of the cut date back to 1,500 B.C. The fatty back or belly of pork was popular with the Greeks and Roman, the latter who cooked it with figs and flavored with pepper. 

Breakfast meat history

What we know as bacon today is not precisely what has been traditionally known as bacon or bacoun. In much of Europe, the word bacon was used as a synonym for all pork. The word bacon and its earlier form bacoun were derived from French, German, and Teutonic versions for “back.”

The form of salt-cured and sliced bacon we know in America today is much different from its earlier forms and is known as “streaky” bacon in the United Kingdom. 

Bacon became a common dish in England starting in the 17th century. According to the Oxford Companion of Food, bacon, especially smoked bacon and extra-fatty bacon was a staple for almost everyone except the very poor across the British Isles. In fact, many families would keep their bacon in a prominent place in the home as a point of pride. For centuries, Bacon grease was a common cooking fat, which remained true until the mid-twentieth century when bacon fat was replaced by olive oil, vegetable oil, and other fats not derived from meat.

bacon-jam

Modern bacon

Today, Wiltshire in England remains one of the world’s bacon-producing centers; Wiltshire has been the center of the bacon universe since John Harris set up the first large-scale bacon curing business there in the 1770s.  

The modern, American version of bacon was an innovation of butcher and manufacturing. At the turn twentieth century, the meat industry moved away from salt-curing and smoking bacon, and found it more affordable to sugar-brine pork belly at a large scale. Before 1915, bacon was still sold as a solid hunk of meat — usually four pounds — and people cut bacon into smaller pieces in the home. 

Until the 1960s, bacon maintained its reputation as being a “country” cut of pork, a holdover from its English peasant popularity. As wet-cured, pre-sliced bacon became easier to package, it appeared more readily in stores and — due to its sweet and salty flavor — found its ways to the breakfast plates of many Americans as the perfect companion to fried eggs. 

You can even make homemade bacon jam these days

These days, you can find bacon beyond the morning breakfast table as the cut of pork has spiked in popularity over the past two decades. 

There is dark brown sugar candied bacon, maple bacon, applewood smoked bacon, turkey bacon, and even, shockingly, meatless veggie bacon. 

These days, you can find bacon cheeseburgers almost anywhere someone is making burgers, and it is especially useful — to add some fatty flavor — to lead cuts of beef like filet mignon. Bacon appears everywhere from donuts to ice cream to cocktails — in the form of sweet bacon candy — and can even be made into a form of bacon jam. 

Our Head ButcherBox Chef, Yankel Polak, has devised an ingenious bacon jam recipe that he thinks is best used when added to a cheeseburger. It could also be added to grilled cheese or mixed in with roasted and mashed potatoes, pasta, or scrambled eggs. 

Is your mouth watering yet?

Without further ado, here is Chef Yankel’s famous burger recipe featuring his own unique homemade bacon jam recipe featuring maple syrup, brown sugar, coffee, and Guinness.

Chef Yankel’s “Epic Burger With 15 Ingredient Homemade Bacon Jam”

Total time: 1 hour and 15 minutes 

Prep time: 60 minutes

Cook time: 15 minutes

Ingredients:

  • 4 ButcherBox Burgers or ButcherBox Ground Beef molded into 6oz burger patties

Bacon Jam

  • 1 pack (10 oz) ButcherBox Bacon, roughly chopped
  • ½ onion, diced
  • 3 Tbsp brown sugar
  • 3 garlic cloves, minced
  • ¼ tsp cayenne
  • 1 tsp cinnamon
  • ½ tsp nutmeg
  • ¼ c bourbon
  • 3 Tbsp cold brew coffee
  • 3 Tbsp Guinness
  • 3 Tbsp sherry vinegar
  • 3 Tbsp balsamic vinegar
  • ¼ c maple syrup
  • ¼ c ketchup 

Onion Rings

  • 1 red onion, sliced and separated
  • 1 c buttermilk
  • 1 Tbsp smoked paprika
  • 1 Tbsp garlic powder
  • 1 Tbsp chipotle powder
  • 1 tsp kosher salt
  • 1 c cornstarch
  • 2 c peanut oil 

Truffle Mayo

  • ½ c mayonnaise
  • 2 Tbsp truffle puree (or truffle oil)
  • salt and black pepper to taste

Fixins

  • salt and black pepper to taste
  • 2 Tbsp ghee
  • 4 thick slices sharp yellow cheddar
  • 4 leaves butter lettuce
  • 4 large tomato slices
  • 4 sesame hamburger buns


Directions:

1. Place bacon in a cold Dutch oven on medium heat (starting cold renders the fat better). Cook bacon until crispy, then drain half the bacon fat. Keep the other half in the pan.

2. Add onions to bacon and sauté. Once onions are translucent, add nutmeg, cinnamon, cayenne, garlic cloves, and brown sugar. Stir until sugar has melted.

3. Add bourbon, coffee, Guinness, sherry vinegar, balsamic vinegar, and maple syrup. Simmer on medium heat until liquid is reduced by half.

4. Remove from heat and let cool at room temperature for 5 min. Place mixture in food processor, add ketchup and pulse to a chunky jammy texture. Refrigerate for up to 30 days or freeze up to 6 months.

5. Soak red onion slices in buttermilk for 30 min.

6. Preheat peanut oil to 350°F.

7. Mix cornstarch, kosher salt, smoked paprika, chipotle powder and garlic powder.

8. Coat onion slices evenly with the spice mix and fry gently for 2 min or until golden brown. Let rest on a paper towel-lined plate to drain excess oil.

9. Mix mayo, truffle puree and salt and black pepper. Refrigerate until needed.

10. Bring burgers to room temperature and season both sides with salt and pepper.

11. Preheat a large skillet (preferably cast-iron skillet) and add 2 Tbsp ghee. Once the ghee is hot, sear burgers for 3 min on one side. Flip burgers, place cheddar on the burger and sear the other side for three more min or until desired doneness.

12. Spread truffle mayo liberally on both sides of the bun. Place lettuce leaf down first (to protect the bun from burger juices), followed by tomato.

13. Place burger on top of tomato followed by a healthy dollop of bacon jam. Top with onion rings and close that baby up! Be sure to let us know how it went! 

“how-to-cook-burgers”

steak marinade

Make a great chicken, pork, or grass-fed steak marinade for a mouthwatering meal

Quality chicken, pork, and beef can often be thrown directly on the grill without any seasoning — or with just a pinch of kosher salt and freshly-ground black pepper — and taste amazing. But, an excellent homemade steak marinade — for instance — can take your meat to the next level.

Many steaks can be immensely improved with a little kitchen creativity and some minced garlic or soy sauce. This is especially true of skirt steak, flank steak, and similar tougher cuts with lots of connective tissues.

But if you really want to pack flavor into a grass-fed, grass-finished steak or some pasture-raised, heritage-breed pork or free-range chicken, a little knowledge of how marinades work and which flavor combinations are best can make a standard weeknight meal into a savory, memorable culinary experience.

Is it necessary to marinate steak, pork, or chicken?

Why marinate, you ask? Marinating before grilling is an excellent way to add additional flavors and to get more tender meat.

Marinades work well because of the natural attributes of beef, chicken, and pork, according to Head ButcherBox Chef Yankel Polak. “The longer you leave a protein in a marinade the more flavor it should absorb,” he explains, “and, what’s more, marinating will tenderize a tougher cut of meat.”

The problem is that, in reality, most marinades only penetrate about 2 millimeters deep. “And, get this,” Chef Yankel says, “it all happens in the first few seconds.”

So, while many people think that marinating meat for extended periods of time, or even overnight, is the key to having meat with fantastic flavor, that’s not actually the case. “While there is nothing wrong with preparing your ingredients the day before, remember that a good marinade only needs minimal contact with your protein to do everything it’s supposed to do,” according to Chef Yankel.

A good marinade enhances flavors

While there are many options for chicken or steak marinades, you can pull right off the shelf of your grocery store to have a pretty good meal, making your own marinades is healthier and leads to more flavorful pork chops or a nice juicy steak.

If you can, try to keep the marinades as natural as possible. It would be foolish to take a nice cut of grass-fed steak or heritage-breed pork and then douse it with some combination of corn syrup and lab-made additives.

Keep in mind that different cuts and types of meat have different flavor profiles. Some flavors will work best with, say, a flank steak more so than a ribeye, and vice versa.

“Think about the item you are cooking, whether that’s chicken, beef, or pork, and use ingredients in your marinade that will complement the flavor,” Chef Yankel says.

Flavor profiles for each type of meat

According to our chef, the best complementary flavor profiles are citrus for chicken, sweet flavors for pork, and marinades that are rich and savory for beef, especially grilled steaks.

This is why lime and lemon juices go great with other spices in chicken marinades; pineapple, brown sugar, and maple are great to have in pork marinades; and balsamic vinegar, minced garlic, and mushroom flavors work well as steak marinades.

“While they don’t alter the internal structure of the meat,” Chef Yankel adds, “acidic elements in marinades will certainly give you that extra punch of flavor — the ‘wow’ factor that accompanies that first bite.”

Some flavors that can’t be made from scratch — unless you have time to ferment malt vinegar, molasses, anchovies, and tamarind extract for 18 months. So it is okay to mix some natural ingredients like rosemary or fresh lemon juice with a good soy sauce or Worcestershire sauce.

Using a homemade marinade on your grass-fed steak can change a mundane meal into something otherworldly. Experiment and you might discover unexpected flavor combinations that work wonders for your palate.

And, to save you some precious time, now you also know that you don’t even have to marinate for too long to get those flavorful benefits.

Watch Chef Yankel break down his favorite marinades for chicken, pork, and beef here. In the video below check out an easy steak marinade — that has very little prep time —featuring garlic, cilantro, lime zest and olive oil. According to Yankel, that’s all you need for a delicious steak every time.

Also, here is Chef Yankel’s favorite one-hour steak marinade recipe for grilling New York strip steaks:

  • 3 limes, both zest and juice
  • 1 bunch fresh cilantro, chopped
  • 1 head of minced garlic
  • 1 tablespoon black pepper
  • 1/4 cup olive oil
  • 1/4 cup parsley, chopped
  • 1/4 cup chives, chopped
  • 4 tablespoons tarragon, chopped
  • 4 tablespoons dill, chopped
  • 2 tablespoons whole grain mustard
  • 1 tablespoon dijon mustard
  • 1/4 cup white wine vinegar
  • 1/4 cup olive oil
  • 1 tablespoon coarse kosher salt
  • 1 tablespoon fresh ground black pepper
  1. Combine all marinade ingredients in small bowl. Mix well and coat steaks thoroughly.
  2. Allow steaks to marinate in a refrigerator at least one hour, then bring steaks to room temperature before cooking.
  3. Grill the strip steaks over charcoal or an open flame for 4 to 6 minutes per side, or until internal temperature reads 120°F. Rest steak 8 minutes before serving.

You can find more recipes here. Happy eating!