Tag Archives: balsamic vinegar

easy new york strip steak

Easy New York Strip Steak

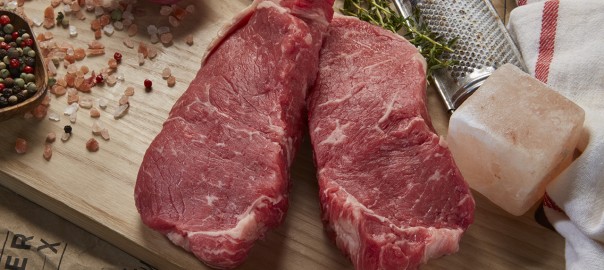
Chef Yankel and the ButcherBox Kitchen are excited to share not only the best, easiest way to quickly cook a New York strip steak, but a way to get a perfectly tender NY strip from frozen.


TRANSCRIPT:

Hey there, I’m Yankel. And today I’m going to show you how to make the absolute. Perfect, New York strip steak. Plus five ingredients and you’re going to get a beautiful pan sauce out of it. Now. We’re doing it from Frozen. So let’s check out our steak in the freezer.  Well, there is a beautiful New York strip rock-solid.

We’re going to head over to the sink. And what we’re going to do is just defrost the surface of it while we do some of our prep.

I’m going right into the sink in a bowl. I want it submerged in cool running water. So we’re going to fill it up.  Now, I know I said from frozen. You’re probably wondering what’s he doing? It? Looks like he’s defrosting it.  All I want is the surface defrosted enough for it to hold some salt and pepper.

That’ll take a few minutes while we let the water trickle. We’re going to head over to the counter and we’re going to slice up some of our ingredients we get everything ready in advance. I have to make more flavors maybe even complete dishes. So since we’re doing a New York strip steak in a cast-iron pan, I thought why not add a couple of other ingredients to make it extra delicious.

So we’re going to do some mushrooms. Just a nice little handful, and all I’m going to quarter them. And then we’re going to do a quickly sliced onion, and at the very end right before we go into the oven with our steak, we’re going to add a splash of balsamic vinegar and that’s going to give us a little bit of a pan sauce because we’re going to actually baste the steak with butter and garlic. All that’s going to come together plus the juices from the mushrooms, and that’s really what I want to capitalize on here.

They give off a nice amount of liquid, I want to turn that into something magical. So I got my onion, I’m just gonna take the ends off.  And I think we’re just going to go with half an onion for this recipe. I can use the other half for whatever my next project is. Quick tip about slicing onions,  onion has rings that go in a certain direction. I just want thin slices. So I’m going to let the onion and the shape of the onion do most of the work for me and just cut against those rings.

I’m going to use the garlic when I baste the steak, so I don’t want to mince it too much. I’m just going to go with semi-thin slices that way it won’t burn when it’s in that hot pan. Oh, goodness.  It’s either nostalgia. or onions and garlic. It’s generally my excuse. All right, I think our steak has enough surface texture to absorb some seasoning.

So I’m going to go grab it and then we’re gonna get started. But before I leave, I’m going to preheat my pan.  We’re going to go with medium-high heat because I want a good sear without burning. I’ve already got the oven preheated to 350°F. Now, before we get started one of the key points to getting a good sear on a steak is having a dry surface.

So what we’re going to do is open our package. I like to have a paring knife go right in on the edge.  Great. All right. We want to dry every bit of moisture on that surface because any moisture is going to steam and steam is going to slow down the searing process. So I’ve got some paper towels ready, and I’m just going to blot all that moisture out.

Dry surface. And you can see just enough give for it to hold salt and pepper. I’m going to set that down there, and we’re going to season it. Now when it comes to salt and pepper, not all salts are equal. I like to use coarse kosher salt that gives me a nice texture to work with and kosher salt really melts beautifully on the meat as it cooks. So it gives it really good seasoning.

Then, of course, fresh cracked black pepper has the best flavor. A good pepper mill will get you everywhere. We’re gonna flip that over. A nice coating. remember we’re only seasoning the outside of the meat so we want to make sure it has a nice even cover, that way every bite is flavorful.

Alright, our pan is hot. We’re going to go into the pan with some high-temperature oil. I’ve got avocado oil here, and it can cook at very high temperatures without smoking and it’s refined and what that means is that it has most of the impurities taken out of it.

If you’re using an extra virgin olive oil, you risk the impurity scorching and you get that burnt flavor. So a good high temp oil will go a long way. Lots of alternatives out there, coconut oil, peanut oil, some of the sunflower, safflower, and canola oils work well. It’s up to you.

As soon as we have a little smoke, which we should have it almost immediately because the pan has been preheating.

That’s ready to go. So we’re going to go with our steak right into the pan.

Now, the key here is good contact with the pan. We want every inch of that steak touching the pan because when we brown steak when we brown meat, that’s where the flavor happens. It’s called the Maillard reaction, and we are building flavor compounds. So don’t skip the browning step. Good surface contact. I press down a little bit.

Resist the temptation to move that steak around. The first two minutes are crucial for a good sear. Once we move it, we’re going to lose that contact. So we’re just going to let it sit there for two minutes and build up that crust.

We’re about ready to flip it over and you know the New York strip has that very distinctive line of fat along one side. So what I like to do is before I flip it. I’m actually going to turn it on its side and make sure that that fat has good contact with the pan. It’s absolutely delicious. But it needs a sear.

So we’re just going to press it in there.  Every inch of it, make sure it has a nice brown crust building and then we will flip the steak over and do the other side. That’s kind of what we’re looking for crispy fat. All right, we’re going to flip it over. There you go.

We’re gonna cook it for about a minute on this side and then we’re going to add butter and garlic and we’re going to baste it. Butter and garlic together is a magical combination, but butter has this characteristic of transferring flavor. So we’re really going to let the steak absorb that garlic flavor and basting it when you’re about three minutes into cooking is a perfect time for it to absorb all that garlicky goodness. 

Now what I’m going to do is move the steak to the top of the pan and get my butter foaming. And as soon as I see big bubbles from the butter, it’s time to start giving that’s steak a bath.

Always give your steak a nice bath.

I’m a butter and garlic lover.  And so I bathe my steaks in it. Perfect.

All right, we’re going to pull the steak out for just a minute and we’re going to saute our onions and mushrooms before putting our steak back in and putting everything into the oven.

Set that down right there onions go in, mushrooms go in.

Don’t need to cook it for long on the stovetop. We’re just going to stir it up and make sure it has every bit of coating that we for need maximum flavor. Now, we’re going to add a splash of balsamic.

We’re going to put our steak right back on top. We’re going to go into our preheated oven for about ten minutes; but we’re going to check it in three minutes, so we know exactly what temperature it is so we can track it better. Remember grass-fed beef can cook a little bit faster than normal. So pay attention.

A few minutes into cooking. I want to temp the steak. I like to gauge where it’s at and that will help me decide how much longer it’s going to need exactly. So we’re looking at okay 90 degrees to me that means five or six more minutes. The temperature tends to rise much more quickly. Once it passes a 100°F.

I think we’re just about there. So we’re going to give it one more temp.

That’s perfect. We’re looking for 115°F and rising, under 120°F, and I’ll tell you why.

Meat does this thing where it continues to cook even after you’ve taken it off the heat.  It will rise at least 5°F and maybe even 10°F depending on how hot it is and how much time we let it rest. So, it’s going to finish cooking and I’m going to move it to the cutting board, so it doesn’t have any more heat hitting it.

We’re going to leave it there eight minutes in that time. It will rise to at least 5°F. It’s, in fact, getting hot or not colder. If we want to keep the surface hot as well, we’ll loosely tent it with foil, just so it can breathe a little bit. In the meantime, we can reduce a little bit of that liquid for our sauce.

It’s going to cook down real fast. It’s going to be absolutely delicious all those flavors come together. The mushrooms just give off all the liquid we needed for a sauce. The butter, the balsamic, the onions also give off a lot of moisture. So all together, we’re just taking all that liquid and turn it into something absolutely magical.

And of course, I never miss an opportunity to add a little bit more seasoning. So I’m just going to get a little bit salt and one quick grind of fresh ground black pepper.  As the moisture burns off you’re going to see the bubbles in the pan begin to get larger. As they get larger, the sauce is actually going to come together.

And that’s when we’ll know it’s done. So right now, we have little bubbles. Bigger bubbles mean we’re exactly where we want it to be.

Smells so good.

Beautiful. Well, we’re going to let that steak rest for a few minutes. We’re gonna let the pan simmer. Let’s just give it low flame. All right our steak has rested long enough. We’re gonna slice into it.

Now when it comes to New York strip, there are two things to take into consideration. One is that beautiful strip of fat, which I love to eat, but I’m going to take off in order to slice. So we’re just going to slice that strip of fat right off and set it aside. Gorgeous. You can already see that steak is perfectly cooked.

Now, we’re going to slice it right down the middle. Like so. And then we’re going to slice it against the grain because it’s going to be crazy tender when we do that. It’s already a super tender steak. Slicing against the grain makes it even more tender.

Yeah, it doesn’t get any better than that. From frozen. Perfect. Medium-rare. Super juicy. That’s good stuff. Well, it looks like it rested the perfect amount of time. You can always tell from how much moisture is left on the board. Not much in this case, which means every bite we get is going to be crazy juicy.

So I’m going to put that right onto my plate, and then we’re going to top it off with our mushrooms, onions, and balsamic.

And now we have these beautiful roasted mushrooms and onions, packed with flavor.  Absolutely gorgeous. We’re going to go right on top. It doesn’t take time, generally uses ingredients you have sitting around the house.  Put it all into a pan together.  Sear it. Baste it. Throw it in the oven. Rest it. Eat it.

That’s the whole process. It’s so easy. I ‘m Yankel, go cook something from frozen.
pantry essentials

10 Pantry Essentials Every Cook Should Have

You may have taken the first key step towards a month of great eating and ordered a ButcherBox, complete with high-quality grass-fed beef, heritage pork, and free-range, organic chicken.

But do you know what else completes a kitchen? Pantry staples, like high-quality oils, a few kinds of vinegar, dried herbs, and more.

This guide details the pantry essentials that make all the difference when preparing the delicious meals at home. The essentials that all cooks have a hands-length from their stoves include condiments like assorted vinegars, Dijon mustard, and soy sauce or their gluten-free variants. With a few of these, you can make everything from vinaigrettes and dressings to sauces, rubs, and much more.

Other necessary kitchen staples include canned tomatoes, which add richness to stews and soups, and dried herbs like oregano, rosemary, and thyme.

The best part? None of these staples are prohibitively expensive, and your individual purchase will probably last you quite a while.

1. High-Quality Oils

You can’t cook many meals without a cooking fat, and while grass-fed butter, ghee, or tallow might be an option, you should always keep a solid selection of healthy, high-quality cooking oils at hand.

These oils might include high heat friendly options filled with healthy fats, like avocado oil or coconut oil. For lower heat preparations, a solid bottle of olive oil should always be handy. You can even use good olive oil as a finishing touch, like a drizzle over salad or hummus.

Neutral oils like avocado oil or olive oil are also excellent bases for homemade salad dressings, and, if you’re really looking to up your pantry game, keep finishing oils like sesame oil or walnut oil on hand.

2. An Assortment of Vinegar

A good vinegar will take a good dish to great, and thankfully there are many options to choose from.

If you need to add acidic sweetness, reach for balsamic vinegar. In fact, dousing some caramelized red onions with balsamic vinegar and sugar is a sure-fire way to make a quick and delicious topping for burgers and steaks, while aged balsamic vinegar makes the perfect coating for grilled veggies.

Don’t stop at balsamic vinegar. Champagne vinegar adds a sweet note to homemade vinaigrettes, while apple cider vinegar boasts so many purported health benefits it’s hard to keep count. You can even throw it into homemade barbeque sauce for a unique bite.

Even plain old white vinegar has its place in a pantry. It’s as useful for making crispy pickles as making homemade kitchen cleanser.

3. Dijon Mustard

Yellow mustard has its place, but nothing heightens a dish more than a dollop of Dijon mustard. The traditional French mustard is made with brown mustard seeds, white wine, and a verjus made from unripe grapes. This verjus is what gives Dijon mustard its distinct, tart flavor.

Use Dijon mustard in a homemade vinaigrette for a crisp salad, or as part of a rub for various cuts of meat. These rosemary brined pork chops are a perfect example.

The best part about Dijon mustard? While it sounds fancy, it’s a pretty affordable condiment, with the store brand bottles rarely costing more than $3 and the fancy stuff only clocking in at $5 or less.

4. Soy Sauce/Tamari/Coconut Aminos

What’s the best way to build umami into your dishes? Soy sauce, a sauce made from fermented soybeans, roasted wheat, and cultures, is the ultimate, inexpensive umami condiment.

Of course, many people question the nutritional impact of soy sauce. If you’re gluten-free, a specific type of soy sauce, tamari, can be made without gluten.

If you avoid soy and grains entirely, coconut aminos, a sauce made from coconut tree sap and salt, is a great alternative. While a bit less pungent and a tad sweeter than traditional soy sauce, it still packs umami flavor into dishes.

Use soy sauce or any of its alternatives in Asian-inspired fare, like this ginger pork noodle soup.

5. A Solid Hot Sauce

While the hot sauce category is vast, your favorite hot sauce is a kitchen essential. Why? Because it can be doused on most anything and elevates the flavor of whatever you’re noshing on.

Do you prefer Asian flavor profiles? Reach for the less hot, slightly sweet Sriracha, or pack in the chili garlic flavor with sambal.

Mexican and Latin America hot sauces are another great category: The options are many, but most sauces feature some kind of vinegary heat and potentially a kick of citrus like lime.

Channel pure Americana with Tabasco or Louisiana hot sauce. There are, literally, thousands of hot sauces to choose from.

Use your favorite hot sauce to jazz up a simple breakfast of eggs and bacon, or incorporate it into vinaigrettes and sauces for a little kick.

6. Dried Herbs

Like hot sauce, the selection for dried herbs is vast. And while it’s great to build out your spice cabinet and experiment with various herbs, there are a few essentials we’d recommend always having on hand.

Dried oregano, basil, rosemary, and thyme — commonly sold together as an Italian seasoning blend — lend bright flavors to any dish you whip up and are much more convenient in a pinch than fresh herbs.

Other dried herbs we’d consider staples include dill, which is perfect in anything from pickles to salads, and dried bay leaves, which lend depth to soups and stews.

If you’d really like to pad out your spice cabinet, add dried marjoram, ground coriander, dried mint, dried sage, and dried tarragon.

7. Coconut Milk

Canned coconut milk is a treasure, and not just because it’s suitable for most diets. The silky, fatty substance lends richness to any dish it touches, and won’t spoil as quickly as refrigerated alternatives like heavy cream or milk.

Despite it including coconut meat, coconut milk is a fairly neutral, non-dairy way to add creaminess and heft. Use coconut milk to add creaminess to soup, braise meats, or add silky texture and flavor to rice.

Pro tip: Stock up on cans of coconut milk. Whichever ones you don’t use for savory dishes, use them to make dairy-free sweets like no-churn ice cream.

8. Nut and Seed Butters

What’s your favorite? Peanut butter, almond butter, cashew butter, tahini? Whichever nut or seed butter you prefer, it’s bound to serve many uses in your kitchen.

You can, of course, use nut butters to spread on toast, add protein to smoothies, and bake up some delicious cookies. But nut butters have serious culinary uses, too.

Peanut butter or almond butter both make excellent Asian-inspired sauces, like in this Thai almond soba noodle salad. Tahini tastes delicious in Mediterranean fare. Try it drizzled over these Mediterranean meatballs.

9. Canned Tomatoes

Whether you’re whipping up a sauce for pasta, throwing some chili in the crockpot, or cooking up beef stew or pot roast low and slow, canned tomatoes are so useful.

You can find canned tomatoes in many forms, from canned tomato paste to whole, peeled tomatoes in a can. It’s good to have a variety of these options on hand for whatever you may need. They’re inexpensive and can add flavor to nearly any dish, like this fennel and tomato Italian pork shoulder.

10. Good Salt and Black Pepper

It’s a bit of a given that you should have salt and pepper on hand. It’s rare to not add it to a dish in the kitchen. But not just any salt or pepper will do.

Iodized table salt is the most common option, but it’s not exactly the healthiest one. It’s bleached, devoid of trace elements, and often contains additives. Also, it just doesn’t taste as good as sea salt crystals.

Sea salt comes from the ocean, and is evaporated to separate the salt crystals from the water.

(Another option: ButcherBox Chef Yankel always recommends having Kosher salt on hand for seasoning steaks.)

For pepper, whole peppercorns that can be cracked in a pepper mill lend the best flavor.

bacon-jam

Bacon is our jam – The history of the most delicious breakfast meat with a special bacon jam recipe

Check out an amazing bacon jam recipe at the bottom of this post from our Head ButcherBox Chef.

Bacon has been around for a long time. In fact, the earliest recorded examples of the cut date back to 1,500 B.C. The fatty back or belly of pork was popular with the Greeks and Roman, the latter who cooked it with figs and flavored with pepper. 

Breakfast meat history

What we know as bacon today is not precisely what has been traditionally known as bacon or bacoun. In much of Europe, the word bacon was used as a synonym for all pork. The word bacon and its earlier form bacoun were derived from French, German, and Teutonic versions for “back.”

The form of salt-cured and sliced bacon we know in America today is much different from its earlier forms and is known as “streaky” bacon in the United Kingdom. 

Bacon became a common dish in England starting in the 17th century. According to the Oxford Companion of Food, bacon, especially smoked bacon and extra-fatty bacon was a staple for almost everyone except the very poor across the British Isles. In fact, many families would keep their bacon in a prominent place in the home as a point of pride. For centuries, Bacon grease was a common cooking fat, which remained true until the mid-twentieth century when bacon fat was replaced by olive oil, vegetable oil, and other fats not derived from meat.

bacon-jam

Modern bacon

Today, Wiltshire in England remains one of the world’s bacon-producing centers; Wiltshire has been the center of the bacon universe since John Harris set up the first large-scale bacon curing business there in the 1770s.  

The modern, American version of bacon was an innovation of butcher and manufacturing. At the turn twentieth century, the meat industry moved away from salt-curing and smoking bacon, and found it more affordable to sugar-brine pork belly at a large scale. Before 1915, bacon was still sold as a solid hunk of meat — usually four pounds — and people cut bacon into smaller pieces in the home. 

Until the 1960s, bacon maintained its reputation as being a “country” cut of pork, a holdover from its English peasant popularity. As wet-cured, pre-sliced bacon became easier to package, it appeared more readily in stores and — due to its sweet and salty flavor — found its ways to the breakfast plates of many Americans as the perfect companion to fried eggs. 

You can even make homemade bacon jam these days

These days, you can find bacon beyond the morning breakfast table as the cut of pork has spiked in popularity over the past two decades. 

There is dark brown sugar candied bacon, maple bacon, applewood smoked bacon, turkey bacon, and even, shockingly, meatless veggie bacon. 

These days, you can find bacon cheeseburgers almost anywhere someone is making burgers, and it is especially useful — to add some fatty flavor — to lead cuts of beef like filet mignon. Bacon appears everywhere from donuts to ice cream to cocktails — in the form of sweet bacon candy — and can even be made into a form of bacon jam. 

Our Head ButcherBox Chef, Yankel Polak, has devised an ingenious bacon jam recipe that he thinks is best used when added to a cheeseburger. It could also be added to grilled cheese or mixed in with roasted and mashed potatoes, pasta, or scrambled eggs. 

Is your mouth watering yet?

Without further ado, here is Chef Yankel’s famous burger recipe featuring his own unique homemade bacon jam recipe featuring maple syrup, brown sugar, coffee, and Guinness.

Chef Yankel’s “Epic Burger With 15 Ingredient Homemade Bacon Jam”

Total time: 1 hour and 15 minutes 

Prep time: 60 minutes

Cook time: 15 minutes

Ingredients:

  • 4 ButcherBox Burgers or ButcherBox Ground Beef molded into 6oz burger patties

Bacon Jam

  • 1 pack (10 oz) ButcherBox Bacon, roughly chopped
  • ½ onion, diced
  • 3 Tbsp brown sugar
  • 3 garlic cloves, minced
  • ¼ tsp cayenne
  • 1 tsp cinnamon
  • ½ tsp nutmeg
  • ¼ c bourbon
  • 3 Tbsp cold brew coffee
  • 3 Tbsp Guinness
  • 3 Tbsp sherry vinegar
  • 3 Tbsp balsamic vinegar
  • ¼ c maple syrup
  • ¼ c ketchup 

Onion Rings

  • 1 red onion, sliced and separated
  • 1 c buttermilk
  • 1 Tbsp smoked paprika
  • 1 Tbsp garlic powder
  • 1 Tbsp chipotle powder
  • 1 tsp kosher salt
  • 1 c cornstarch
  • 2 c peanut oil 

Truffle Mayo

  • ½ c mayonnaise
  • 2 Tbsp truffle puree (or truffle oil)
  • salt and black pepper to taste

Fixins

  • salt and black pepper to taste
  • 2 Tbsp ghee
  • 4 thick slices sharp yellow cheddar
  • 4 leaves butter lettuce
  • 4 large tomato slices
  • 4 sesame hamburger buns


Directions:

1. Place bacon in a cold Dutch oven on medium heat (starting cold renders the fat better). Cook bacon until crispy, then drain half the bacon fat. Keep the other half in the pan.

2. Add onions to bacon and sauté. Once onions are translucent, add nutmeg, cinnamon, cayenne, garlic cloves, and brown sugar. Stir until sugar has melted.

3. Add bourbon, coffee, Guinness, sherry vinegar, balsamic vinegar, and maple syrup. Simmer on medium heat until liquid is reduced by half.

4. Remove from heat and let cool at room temperature for 5 min. Place mixture in food processor, add ketchup and pulse to a chunky jammy texture. Refrigerate for up to 30 days or freeze up to 6 months.

5. Soak red onion slices in buttermilk for 30 min.

6. Preheat peanut oil to 350°F.

7. Mix cornstarch, kosher salt, smoked paprika, chipotle powder and garlic powder.

8. Coat onion slices evenly with the spice mix and fry gently for 2 min or until golden brown. Let rest on a paper towel-lined plate to drain excess oil.

9. Mix mayo, truffle puree and salt and black pepper. Refrigerate until needed.

10. Bring burgers to room temperature and season both sides with salt and pepper.

11. Preheat a large skillet (preferably cast-iron skillet) and add 2 Tbsp ghee. Once the ghee is hot, sear burgers for 3 min on one side. Flip burgers, place cheddar on the burger and sear the other side for three more min or until desired doneness.

12. Spread truffle mayo liberally on both sides of the bun. Place lettuce leaf down first (to protect the bun from burger juices), followed by tomato.

13. Place burger on top of tomato followed by a healthy dollop of bacon jam. Top with onion rings and close that baby up! Be sure to let us know how it went! 

“how-to-cook-burgers”

steak marinade

Make a great chicken, pork, or grass-fed steak marinade for a mouthwatering meal

Quality chicken, pork, and beef can often be thrown directly on the grill without any seasoning — or with just a pinch of kosher salt and freshly-ground black pepper — and taste amazing. But, an excellent homemade steak marinade — for instance — can take your meat to the next level.

Many steaks can be immensely improved with a little kitchen creativity and some minced garlic or soy sauce. This is especially true of skirt steak, flank steak, and similar tougher cuts with lots of connective tissues.

But if you really want to pack flavor into a grass-fed, grass-finished steak or some pasture-raised, heritage-breed pork or free-range chicken, a little knowledge of how marinades work and which flavor combinations are best can make a standard weeknight meal into a savory, memorable culinary experience.

Is it necessary to marinate steak, pork, or chicken?

Why marinate, you ask? Marinating before grilling is an excellent way to add additional flavors and to get more tender meat.

Marinades work well because of the natural attributes of beef, chicken, and pork, according to Head ButcherBox Chef Yankel Polak. “The longer you leave a protein in a marinade the more flavor it should absorb,” he explains, “and, what’s more, marinating will tenderize a tougher cut of meat.”

The problem is that, in reality, most marinades only penetrate about 2 millimeters deep. “And, get this,” Chef Yankel says, “it all happens in the first few seconds.”

So, while many people think that marinating meat for extended periods of time, or even overnight, is the key to having meat with fantastic flavor, that’s not actually the case. “While there is nothing wrong with preparing your ingredients the day before, remember that a good marinade only needs minimal contact with your protein to do everything it’s supposed to do,” according to Chef Yankel.

A good marinade enhances flavors

While there are many options for chicken or steak marinades, you can pull right off the shelf of your grocery store to have a pretty good meal, making your own marinades is healthier and leads to more flavorful pork chops or a nice juicy steak.

If you can, try to keep the marinades as natural as possible. It would be foolish to take a nice cut of grass-fed steak or heritage-breed pork and then douse it with some combination of corn syrup and lab-made additives.

Keep in mind that different cuts and types of meat have different flavor profiles. Some flavors will work best with, say, a flank steak more so than a ribeye, and vice versa.

“Think about the item you are cooking, whether that’s chicken, beef, or pork, and use ingredients in your marinade that will complement the flavor,” Chef Yankel says.

Flavor profiles for each type of meat

According to our chef, the best complementary flavor profiles are citrus for chicken, sweet flavors for pork, and marinades that are rich and savory for beef, especially grilled steaks.

This is why lime and lemon juices go great with other spices in chicken marinades; pineapple, brown sugar, and maple are great to have in pork marinades; and balsamic vinegar, minced garlic, and mushroom flavors work well as steak marinades.

“While they don’t alter the internal structure of the meat,” Chef Yankel adds, “acidic elements in marinades will certainly give you that extra punch of flavor — the ‘wow’ factor that accompanies that first bite.”

Some flavors that can’t be made from scratch — unless you have time to ferment malt vinegar, molasses, anchovies, and tamarind extract for 18 months. So it is okay to mix some natural ingredients like rosemary or fresh lemon juice with a good soy sauce or Worcestershire sauce.

Using a homemade marinade on your grass-fed steak can change a mundane meal into something otherworldly. Experiment and you might discover unexpected flavor combinations that work wonders for your palate.

And, to save you some precious time, now you also know that you don’t even have to marinate for too long to get those flavorful benefits.

Watch Chef Yankel break down his favorite marinades for chicken, pork, and beef here. In the video below check out an easy steak marinade — that has very little prep time —featuring garlic, cilantro, lime zest and olive oil. According to Yankel, that’s all you need for a delicious steak every time.

Also, here is Chef Yankel’s favorite one-hour steak marinade recipe for grilling New York strip steaks:

  • 3 limes, both zest and juice
  • 1 bunch fresh cilantro, chopped
  • 1 head of minced garlic
  • 1 tablespoon black pepper
  • 1/4 cup olive oil
  • 1/4 cup parsley, chopped
  • 1/4 cup chives, chopped
  • 4 tablespoons tarragon, chopped
  • 4 tablespoons dill, chopped
  • 2 tablespoons whole grain mustard
  • 1 tablespoon dijon mustard
  • 1/4 cup white wine vinegar
  • 1/4 cup olive oil
  • 1 tablespoon coarse kosher salt
  • 1 tablespoon fresh ground black pepper
  1. Combine all marinade ingredients in small bowl. Mix well and coat steaks thoroughly.
  2. Allow steaks to marinate in a refrigerator at least one hour, then bring steaks to room temperature before cooking.
  3. Grill the strip steaks over charcoal or an open flame for 4 to 6 minutes per side, or until internal temperature reads 120°F. Rest steak 8 minutes before serving.

You can find more recipes here. Happy eating!


london broil

London Broil: A dish that is most often grilled and has nothing to do with England

Beef dish names can be so odd.

London broil is just another example of the beef industry’s propensity for attaching names to cuts of meat that are confusing, don’t quite fit, or, sometimes, are quite unappetizing.

The Delmonico steak, for instance, was supposedly “invented” at Delmonico’s in New York; but the exact cut of beef that was used is often debated. Steak lovers aren’t sure whether a Delmonico is boneless ribeye steak, a bone-in top loin steak, or a boneless top loin strip steak. The Denver steak was “discovered” in the last decade, and its name comes more from the work of a marketing team than to any direct connection to the Mile-High City. And don’t get me started on the contrast between the tender and tasty flat iron steak and the old, hunk of metal used for straightening clothes from which its name is derived.

But London broil might be in a class of its own when it comes to its unique (and misleading) name. The cut — or cooking method to be more precise — has no connection to the capital of England, and, these days, it is rarely broiled.

A North-American treat

The most mind-blowing part about London broil is that it is completely unheard of in, of all places, London. The name may be a bit of the same trickery used with the Denver steak.

As far as most people can gather, London broil was first cooked in Philadelphia. The history behind the name is lost to time, but the best theory for its relation to the city of London is that the name was meant to add status — and an association to a British sensibility and European economic prestige.

London broil can be both a cut of beef and a way to prepare and cook a steak.

In the late twentieth century, it would be commonplace to go to the grocery store butcher and get a “London broil,” which would be one of the more inexpensive cuts. Likely, the steak consumers of that era were getting a flank steak — which didn’t have the same popularity as it does these days as a favorite for fajitas, steak sandwiches, and other such dishes.  The proper, regal sounding name may have been meant to appeal to consumers who might have perceived the affordable steak as a way to rise above their means.

The steak was likely brought home and cooked directly under the broiler in the oven until a crispy crust formed. Maybe some salt and pepper was a part of the cooking process. It was then sliced and served.

Many remember the dish as tough or flavorless. Those unfortunate food memories are likely due to the cooking practice of broiling on high heat as well as the lack of a critical step that is used to make London broil today: The marinade.

Many reflect fondly — and still enjoy to this day — a good London broil, we’ll share some best practices below to ensure you can delight in this delicious steak as well.

You just won’t ever find the steak in the city of London because it simply does not exist there; it is purely the product of the United States.

ClickHereForMore1

What exactly is London broil?

According to most accounts, those who remember getting London broil from the supermarket butcher recall it being a flank steak, or, sometimes, a thick piece of flank steak. (While it would make sense for skirt steak to be used as London broil due to its similarity to flank steak, there don’t seem to be many instances of that occurring.)

ButcherBox grass-fed “London broil” comes from one of the best cuts from the round primal of a cow; it is a great steak found in the rear leg section that doesn’t produce many good cuts of beef. According to ButcherBox Head Chef Yankel Polak, the 6-ounce cut that can be found in a monthly ButcherBox is “the most flavor of all the round steaks.”  

You may also discover that various beef cuts such as the top round, the bottom round, sirloin steak tip, chuck shoulder, or chuck steak is also labeled as “London broil.”

The main reason for this is that London broil is most often a cooking method that involves marinating a less tender cut, pan-broiling or grilling the steak and then slicing it — across the grain — into thin slices.

What many people love about London broil is its flavor. And while previous generations may have skipped a key step, it is the marinating of the beef that explains its popularity.

Whether a flank steak or round steak, when marinated right, it is a great dish. There is no best way to marinate a London broil, but combinations of soy sauce, garlic, olive oil, balsamic vinegar, mushroom sauce, red wine, rosemary, and other spices work best for the marinade.

The marinade can also be poured over the steak after cooking for added flavor. Chef Yankel thinks London broil is best served with a thick steak sauce or and easy-to-make au jus.

Don’t forget to CUT AGAINST THE GRAIN. If you don’t follow this essential step, you can quickly turn what would have been a tender steak into a tough cut — because you didn’t break the steak’s connective tissue — that is not easy to eat.

How to cook a London broil

As the name implies, a London broil is supposed to be oven-broiled in a shallow pan. Broiling has long been the traditional method of preparation.

However, these days, London broil is more likely to be grilled on an open flame over high heat than thrown into the oven. The reason? It may be that people feel they have more control over the doneness of their steaks when cooking on a grill.

The current popularity of grilling over an open flame rather than under a broiler may have to do with remembrances of eating a dried out, flavorless steak in the past. When cooked right, you can get a melt-in-your-mouth London broil cooked in the oven. It requires a diligent eye on cooking time and a great marinade.

If cooking on a grill, Chef Yankel suggests preheating until the surface of the grill is extremely hot. Right before putting the steak that has already gone through the marinating process on the open flame, he suggests quickly rubbing an olive oil-soaked cloth over it.

For a medium-rare London broil, Chef Yankel says to cook the room temperature steak on the hottest part of the grill for 3 minutes per side, rotating the steak on the grates 90 degrees each minute and a half. This process will give the steak a nice sear.  (You can also get a great sear by using Chef Yankel’s pan-frying method as well.)

Then put the steak on the cooler section of the grill and let it cook for four more minutes on each side. Use a meat thermometer to make sure that the thickest part of the steak reaches 120° F. Another key step is to make sure the steak rests for between six to ten minutes so that it cooks evenly and the flavorful juices are distributed throughout.

Again, make sure to cut against the grain when slicing. And enjoy!

If you are a ButcherBox member, Chef Yankel will be sharing one of his favorite London broil recipes in future boxes and on the member recipe page. If you aren’t already getting healthy grass-fed beef and other delicious thoughtfully-sourced meats delivered to your door each month, sign up here.


Mike and Fam

Building a company and being a Dad

When I was running my first company, I believed that I knew what it meant to be a great business leader.

I thought it showed good leadership to “set the pace” by being the first one in the office and the last to leave. I also felt it was noble to make some very important things — my friends, my finances, my family — secondary to the business as a way to show employees and investors that I was all in for the company. And although my health deteriorated and my relationships suffered, I was content because I told myself that I could help change the world in some way through my efforts.

And then, my daughter Marley was born. Immediately, I had a realization that creating a more well-balanced life was a necessity. Focusing on the time spent at your desk is a fool’s errand and a poor way to spend the precious little amount of time we have in this world.

Marley

In the almost three years since Marley was born, I moved on from CustomMade and founded a new company, ButcherBox.

As we’ve built ButcherBox, we’ve tried to create a better working environment for everyone by taking the lessons learned from prior experiences in tension-filled startups (I say “we” because the entire ButcherBox team has been in similar situations and wants to do better in our approach with ButcherBox). Quite often, the intense pressure found within early-stage companies is borne out of the nothing more than the management missives passed down from one generation of MBA-trained leaders to another.

So we are doing something different with ButcherBox, and it allows me to put in more quality time with my family than I ever could have if I blindly continued to lead by the “rules” that were instilled in me in the early days of CustomMade.

And so, I have never worked a Friday and yet have been able to scale up a profitable e-commerce company with a team of more than 25 like-minded employees.

Which is also quite good since my wife and I recently added a pair of identical twin girls to the fold.

How am I doing it?

Here are a few things that I have learned while running a company and being a dad to young kids. They may not all work for you, but they’ve been helpful for me to achieve the quality of life that is rewarding both personally and in business.

Follow your passion — being away is hard enough, make it count.

The businesses I like to start are about more than making a living; they are mission-driven. For me, trying to make a small positive change to some entrenched global system makes the time I spend on work as valuable as time on the other important things in my life.

First I did this by creating a marketplace to connect craftspeople without any idea about how to find work in the Internet age with their ideal consumers. Now, I am trying to provide the healthiest, highest quality meat to the world — ranging from 100% grass-fed beef to organic free-range chicken and heritage breed pork.

Find a day a week not to work and spend it at home 

4-day workweeks force your team to step it up while forcing you to work on what matters.

This has been the hardest but most rewarding. I don’t work ButcherBox on Fridays, I hang out with my kids. If I need to, I will still occasionally do a lunch or a mentoring meeting for a window, but the main focus of the day is on my children, not work.

Find ME time (Which, for me, is from 4:30 AM to 6:00 AM).

With work, kids, relationships, and more, I think it’s important to still carve out some much needed time for myself. To do that, I wake up before the craziness of the day begins! I do my Headspace meditation, have a stretch, drink some great coffee, review my goals, and prepare for what the day holds.

Kids spell love T.I.M.E.

I learned this one from the great Jim Walsh when I asked him for the one piece of advice he would give about raising kids. It is super helpful to remind myself of this one time and time again.

Focus on the most important projects and be OK that the job is never done.

You will never find enough hours to do everything, so learn to give yourself a break every now and then. Utilize a task manager, make sure you are hitting the highest priority items, and don’t beat yourself up when you can’t finish everything you need to in a day.

Limit your downside.

In other words, don’t bet the farm. For us, before we dove in blind, we used a platform like Kickstarter to prove the model. And when we started ButcherBox, it was with an all-in investment of $10,000. Don’t feel like you need to spend a lot to get your idea off the ground. Spend as little as possible to get the information you need. Adapt. Then, repeat.

Get your kids involved in the business.

And I don’t mean by teaching them how to code or putting them on fulfillment. Even doing the littlest things with the kids can go a long way. It also helps if you are able to laugh at yourselves a little.

This little video below has been viewed by more than 220,000 people and helped us sell a LOT of bacon!

Finally, take it easy and try to enjoy.

I’ve been told again and again that the time you get to spend with small children is so fleeting. Try to not “crank through tasks,” but to enjoy all the little small moments within your business and your personal life.

“working-dad-ceo"